Permission Management Module
This module implements the IPermissionStore to store and manage permissions values in a database.
This document covers only the permission management module which persists permission values to a database. See the Authorization document to understand the authorization and permission systems.
How to Install
This module comes as pre-installed (as NuGet/NPM packages) when you create a new solution with the ABP Framework. You can continue to use it as package and get updates easily, or you can include its source code into your solution (see get-source CLI command) to develop your custom module.
The Source Code
The source code of this module can be accessed here. The source code is licensed with MIT, so you can freely use and customize it.
User Interface
Permission Management Dialog
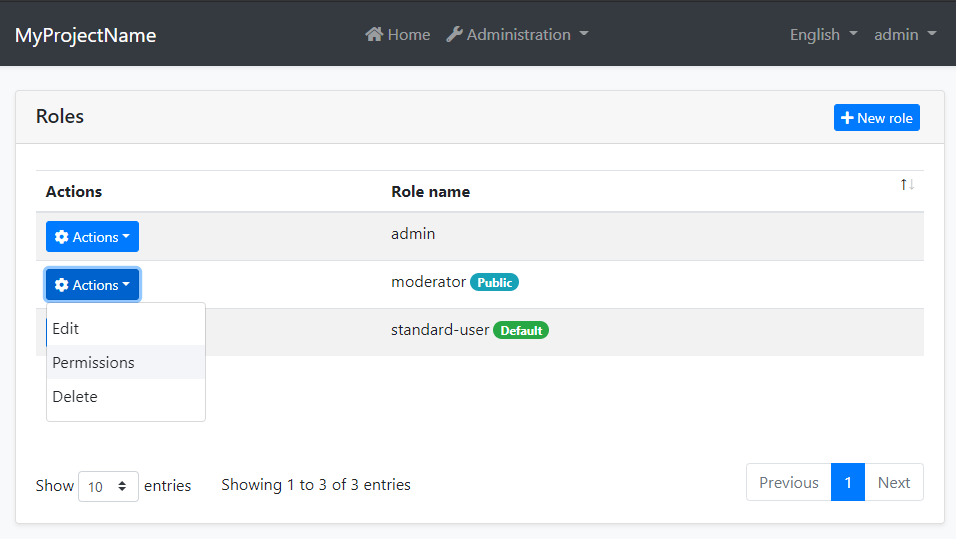
Permission management module provides a reusable dialog to manage permissions related to an object. For example, the Identity Module uses it to manage permissions of users and roles. The following image shows Identity Module's Role Management page:

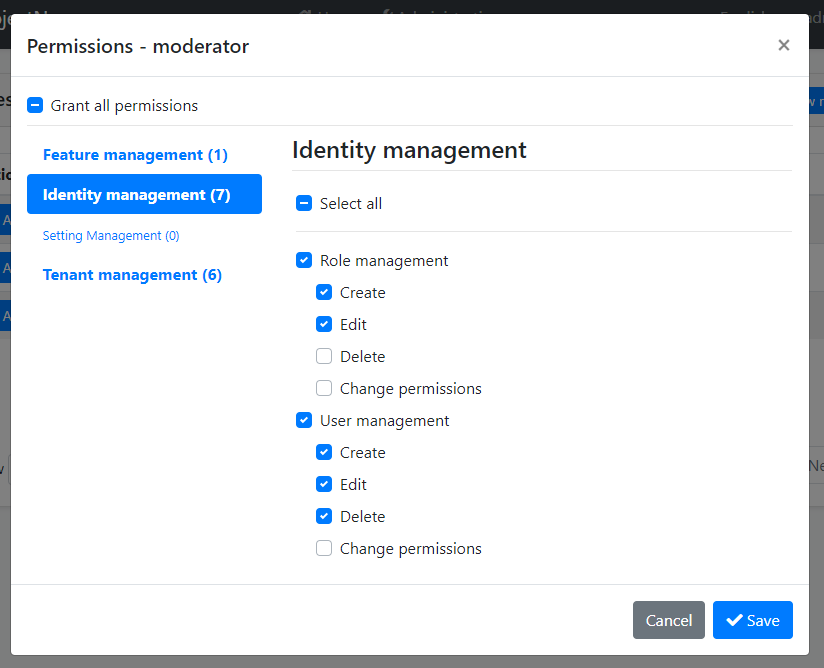
When you click Actions -> Permissions for a role, the permission management dialog is opened. An example screenshot from this dialog:

In this dialog, you can grant permissions for the selected role. The tabs in the left side represents main permission groups and the right side contains the permissions defined in the selected group.
IPermissionManager
IPermissionManager is the main service provided by this module. It is used to read and change the permission values. IPermissionManager is typically used by the Feature Management Dialog. However, you can inject it if you need to set a permission value.
If you just want to read/check permission values for the current user, use the
IAuthorizationServiceor the[Authorize]attribute as explained in the Authorization document.
Example: Grant permissions to roles and users using the IPermissionManager service
public class MyService : ITransientDependency
{
    private readonly IPermissionManager _permissionManager;

    public MyService(IPermissionManager permissionManager)
    {
        _permissionManager = permissionManager;
    }

    public async Task GrantRolePermissionDemoAsync(
        string roleName, string permission)
    {
        await _permissionManager
            .SetForRoleAsync(roleName, permission, true);
    }

    public async Task GrantUserPermissionDemoAsync(
        Guid userId, string roleName, string permission)
    {
        await _permissionManager
            .SetForUserAsync(userId, permission, true);
    }
}
Permission Management Providers
Permission Management Module is extensible, just like the permission system. You can extend it by defining permission management providers.
Identity Module defines the following permission management providers:
UserPermissionManagementProvider: Manages user-based permissions.RolePermissionManagementProvider: Manages role-based permissions.
IPermissionManager uses these providers when you get/set permissions. You can define your own provider by implementing the IPermissionManagementProvider or inheriting from the PermissionManagementProvider base class.
Example:
public class CustomPermissionManagementProvider : PermissionManagementProvider
{
    public override string Name => "Custom";

    public CustomPermissionManagementProvider(
        IPermissionGrantRepository permissionGrantRepository,
        IGuidGenerator guidGenerator,
        ICurrentTenant currentTenant)
        : base(
            permissionGrantRepository,
            guidGenerator,
            currentTenant)
    {
    }
}
PermissionManagementProvider base class makes the default implementation (using the IPermissionGrantRepository) for you. You can override base methods as you need. Every provider must have a unique name, which is Custom in this example (keep it short since it is saved to database for each feature value record).
Once you create your provider class, you should register it using the FeatureManagementOptions options class:
Configure<PermissionManagementOptions>(options =>
{
    options.ManagementProviders.Add<CustomPermissionManagementProvider>();
});
The order of the providers are important. Providers are executed in the reverse order. That means the CustomPermissionManagementProvider is executed first for this example. You can insert your provider in any order in the Providers list.


