Flutter Web Authentication From ABP
In this article, we are going to see, How to use ABP authentication in Flutter Web.
Before further progress, I assume that you have ABP project running and flutter application running on a web version in a specific port. In my example I use 4200 as port.
To run flutter web application in a specific port.
flutter run -d chrome --web-port=4200
Configurations in ABP Framework
Step 1
Open appsettings.json DbMigrator project. And In the IdentityServer Section. Please add the Scope.
"FlutterApp": {
     "ClientId": "FlutterApp",
     "ClientSecret": "1q2w3E",
     "RootUrl": "https://localhost:4200"
   }
Step 2
Open IdentityServerDataSeedContributor inside Domain\IdentityServer. Under CreateClientsAsync function. Paste the below configuration at the end of the function.
var appClientId = configurationSection["FlutterApp:ClientId"];
            if (!appClientId.IsNullOrWhiteSpace())
            {
                var appRootUrl = configurationSection["FlutterApp:RootUrl"].TrimEnd('/');

                await CreateClientAsync(
                  name: appClientId,
                  scopes: commonScopes,
                  grantTypes: new[] { "authorization_code", "client_credentials" },
                  secret: configurationSection["FlutterApp:ClientSecret"]?.Sha256(),
                  requireClientSecret: false,
                  redirectUri: "http://localhost:4200/static.html",
                  corsOrigins: new[] { appRootUrl.RemovePostFix("/") }
                );
            }
Step 3
Now run the DbMigrator project. The above configuration will be updated in the database.
Thats all from the ABP framework side.
Configurations in Flutter Web
Step 1
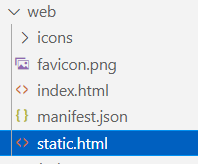
Inside the web folder create a static html file, In this case I name it as static.html.
<!doctype html>
<html lang="en">

<head>
    <meta charset="utf-8">
    <title>Connection Succeeded</title>
    <meta name="viewport" content="width=device-width, initial-scale=1">
</head>

<body>
</body>
<script>
    // Line to be noted
    window.opener.postMessage(window.location.href, '*');
</script>

</html>
Step 2
In your login file, Place a button, In the onclick trigger a function.
  @override
  Widget build(BuildContext context) {
    return Scaffold(
      body: Center(
          child: MaterialButton(
        child: Text("login"),
        onPressed: () {
          oAuthInit();
        },
      )),
    );
  }
Step 3
Install OAuth Dependency from pub. and import it in your login.dart file.
import 'package:oauth2_client/access_token_response.dart';
import 'package:oauth2_client/oauth2_client.dart';
import 'package:oauth2_client/oauth2_helper.dart';
Step 4
Now paste the below code in the Login button's onclick function. And it should be an async function.
oAuthInit() async {

    final currentUri = Uri.base;

    final redirectUri = Uri(
      host: currentUri.host,
      scheme: currentUri.scheme,
      port: currentUri.port,
      path: '/static.html',
    );

    OAuth2Client client = OAuth2Client(
        authorizeUrl: 'https://localhost:44310/connect/authorize',
        tokenUrl: 'https://localhost:44310/connect/token',
        customUriScheme: currentUri.scheme,
        redirectUri: redirectUri.toString(),
        credentialsLocation: CredentialsLocation.HEADER,
        scopeSeparator: '+');

    OAuth2Helper oauth2Helper = OAuth2Helper(
      client,
      grantType: OAuth2Helper.AUTHORIZATION_CODE,
      clientId: 'FlutterApp',
      clientSecret: '1q2w3E',
      scopes: [
        "email",
        "openid",
        "profile",
        "role",
        "phone",
        "address",
        "abp_angular"
      ],
    );

    var tokenResponse = await oauth2Helper.getToken();

    AccessTokenResponse response = (tokenResponse as AccessTokenResponse);

    if (response.accessToken != null) {
      SharedPreferences prefs = await SharedPreferences.getInstance();

      prefs.setString(Constants.TOKEN, response.accessToken!);
    }
  }
Now run the application.

Click the login button.

you can findout that our abp authentication service will poped up.
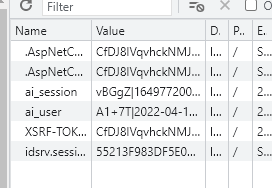
When you login with your correct credentials, it will saved in your cookies and also you can check the token is stored in the localstorage as we used shared preference.


Hurrah, Now the Authentication will work perfectly.


Comments
No one has commented yet, be the first to comment!