How to Use OpenAI API with ABP Framework
In this article, I will show you how to integrate and use the OpenAI API with the ABP Framework. We will explore step-by-step how these technologies can work together to enhance your application with powerful AI capabilities, such as natural language processing, image generation, and more.
Creating an ABP Project
To begin integrating OpenAI API with ABP Framework, you first need to create an ABP project. Follow these steps to create and set up your ABP project:
Step 1: Install ABP CLI
The ABP CLI is a command-line interface tool that helps you create and manage ABP projects easily. To install the ABP CLI, run the following command in your terminal:
dotnet tool install -g Volo.Abp.Studio.Cli
Step 2: Create a New ABP Project
Once you have installed the ABP CLI, you can create a new ABP project using the following command:
abp new Acme.OpenAIIntegration -t app --ui-framework mvc --database-provider ef -dbms PostgreSQL --csf
This command will generate a complete ABP project with an MVC UI. The examples provided in this article make use of UI controllers for demonstration purposes. However, the same approach can easily be applied to other UI types supported by ABP, such as Blazor or Angular. You can find other options here.
OpenAI Integration Setup
To begin integrating OpenAI API with ABP Framework, follow these steps:
Step 1: Create an API Key
To use the OpenAI services, you first need an API key. To obtain one, first create a new OpenAI account or log in. Next, navigate to the API key page and select "Create new secret key", optionally naming the key. Make sure to save your API key somewhere safe and do not share it with anyone.
This key will be used to authenticate your application when making requests to the OpenAI endpoints.
Step 2: Adding Microsoft.Extensions.AI Package
To integrate OpenAI API with ABP, we use Microsoft.Extensions.AI. This package offers a unified API for integrating AI services, making it easy for developers to work with different AI providers. You can find more details in this blog post.
To begin integrating OpenAI API with ABP Framework, follow these steps:
- Add the Microsoft.Extensions.AI and Microsoft.Extensions.AI.OpenAI (used to interact specifically with OpenAI services. Additionally, this package has alternatives like Azure OpenAI, Azure AI Inference, and Ollama, offering flexibility for developers to choose the AI provider that best fits their needs) packages:
dotnet add package Microsoft.Extensions.AI --prerelease
dotnet add package Microsoft.Extensions.AI.OpenAI --prerelease
- Add the required configuration to the
appsettings.jsonfile located inside theAcme.OpenAIIntegration.Webproject and dependencies to yourConfigureServicesmethod:
"AI": {
    "OpenAI": {
        "Key": "YOUR-API-KEY",
        "Chat": {
            "ModelId": "gpt-4o-mini"
        }
    }
}
Replace the value of the
Keywith your OpenAI API key.
Important Security Note: Storing sensitive information like API keys in
appsettings.jsonis not recommended due to security concerns. Please refer to the official Microsoft documentation for secure secret management best practices.
Next, add the following code to the ConfigureServices method in OpenAIIntegrationBlazorModule:
context.Services.AddSingleton(new OpenAIClient(configuration["AI:OpenAI:Key"]));

context.Services.AddChatClient(services =>
    services.GetRequiredService<OpenAIClient>().AsChatClient(configuration["AI:OpenAI:Chat:ModelId"] ?? "gpt-4o-mini"));
Creating a Sample Page
To demonstrate the use of OpenAI API, let's create a page named Sample in the Acme.OpenAIIntegration.Web project:
Create a Sample folder under the Pages folder of the Acme.OpenAIIntegration.Web project. Add a new Razor Page by right-clicking the Sample folder then selecting Add > Razor Page. Name it Index.
Open the Index.cshtml and change the whole content as shown below:
Note: This example demonstrates a simple implementation of a sample page that interacts with the OpenAI API, covering chat, retrieval-augmented generation (RAG), and image generation features. Each example is explained in detail in the next section, so feel free to continue for a better understanding of the steps and logic involved.
@page
@model Acme.OpenAIIntegration.Web.Pages.Sample
@{
    ViewData["Title"] = "OpenAI API Demonstration";
}

<h1>@ViewData["Title"]</h1>

<br/><br/>

<div class="row">
    <div class="col-md-4">
        <h2>Chat Example</h2>
        <form method="post" asp-page-handler="Chat">
            <div class="form-group">
                <label asp-for="ChatInput">Enter your message:</label>
                <textarea asp-for="ChatInput" class="form-control" rows="4"></textarea>
            </div>
            <button type="submit" class="btn btn-primary mt-2">Send</button>
        </form>
        @if (!string.IsNullOrEmpty(Model.ChatResponse))
        {
            <h3 class="mt-3">Response:</h3>
            <p>@Model.ChatResponse</p>
        }
    </div>

    <div class="col-md-4">
        <h2>RAG Example</h2>
        <form method="post" asp-page-handler="RAG">
            <div class="form-group mt-2">
                <label asp-for="RAGQuery">Query:</label>
                <input asp-for="RAGQuery" class="form-control" />
            </div>
            <button type="submit" class="btn btn-primary mt-2">Ask</button>
        </form>
        @if (!string.IsNullOrEmpty(Model.RAGResponse))
        {
            <h3 class="mt-3">Result:</h3>
            <p>@Model.RAGResponse</p>
        }
    </div>

    <div class="col-md-4">
        <h2>Image Generation Example</h2>
        <form method="post" asp-page-handler="ImageGeneration">
            <div class="form-group">
                <label asp-for="ImagePrompt">Image Description:</label>
                <input asp-for="ImagePrompt" class="form-control" />
            </div>
            <button type="submit" class="btn btn-primary mt-2">Generate Image</button>
        </form>
        @if (Model.GeneratedImageBytes != null)
        {
            <h3 class="mt-3">Generated Image:</h3>
            <img src="https://raw.githubusercontent.com/abpframework/abp/dev/docs/en/Community-Articles/2024-12-01-OpenAI-Integration/data:image/png;base64,@Convert.ToBase64String(Model.GeneratedImageBytes)" alt="Generated image" class="img-fluid mt-2" />
        }
    </div>
</div>
Index.cshtml.cs content should be like that:
using System;
using System.ClientModel;
using System.IO;
using System.Text;
using System.Threading;
using System.Threading.Tasks;
using Microsoft.AspNetCore.Mvc;
using Microsoft.AspNetCore.Mvc.RazorPages;
using Microsoft.Extensions.AI;
using OpenAI;
using OpenAI.Assistants;
using OpenAI.Files;
using OpenAI.Images;

namespace Acme.OpenAIIntegration.Web.Pages;

public class Sample : PageModel
{
    [BindProperty]
    public string ChatInput { get; set; }
    public string ChatResponse { get; set; }

    [BindProperty]
    public string RAGQuery { get; set; }
    public string RAGResponse { get; set; }

    [BindProperty]
    public string ImagePrompt { get; set; }
    public byte[] GeneratedImageBytes { get; set; }

    private readonly IChatClient _chatClient;
    private readonly OpenAIClient _openAiClient;

    public Sample(
        IChatClient chatClient,
        OpenAIClient openAiClient)
    {
        _chatClient = chatClient;
        _openAiClient = openAiClient;
    }

    public async Task<IActionResult> OnPostChatAsync()
    {
        ChatResponse = $"Chat response: {(await _chatClient.CompleteAsync(ChatInput)).Message}";
        return Page();
    }

    public async Task<IActionResult> OnPostRAGAsync()
    {
#pragma warning disable OPENAI001
        var fileClient = _openAiClient.GetOpenAIFileClient();
        var assistantClient = _openAiClient.GetAssistantClient();

        using var document = BinaryData.FromBytes(GetExceptionHandlingDocumentContent().ToArray()).ToStream();
        var exceptionHandlingDoc = await fileClient.UploadFileAsync(
            document,
            "ExceptionHandling.md",
            FileUploadPurpose.Assistants);

        AssistantCreationOptions assistantOptions = new()
        {
            Name = "Exception Handling Assistant",
            Instructions =
                """
                This assistant helps you with exception handling in ABP Framework. You can ask questions about exception handling and get answers.

                - Do not make any assumptions when asked for information that is not in the document
                - Give the most accurate information possible
                - Give short(max 1-2 sentence) and concise answers
                - Do not provide file citations
                """,

            Tools =
            {
                new FileSearchToolDefinition(),
            },
            ToolResources = new()
            {
                FileSearch = new()
                {
                    NewVectorStores =
                    {
                        new VectorStoreCreationHelper([exceptionHandlingDoc.Value.Id]),
                    }
                }
            },
        };

        var assistant = await assistantClient.CreateAssistantAsync("gpt-4o", assistantOptions);

        ThreadCreationOptions threadOptions = new()
        {
            InitialMessages = { RAGQuery }
        };

        ThreadRun threadRun = assistantClient.CreateThreadAndRun(assistant.Value.Id, threadOptions);

        do
        {
            Thread.Sleep(TimeSpan.FromSeconds(1));
            threadRun = assistantClient.GetRun(threadRun.ThreadId, threadRun.Id);
        } while (!threadRun.Status.IsTerminal);

        CollectionResult<ThreadMessage> messages
            = assistantClient.GetMessages(threadRun.ThreadId,
                new MessageCollectionOptions() { Order = MessageCollectionOrder.Ascending });

        var response = new StringBuilder();

        foreach (var message in messages)
        {
            response.AppendLine($"[{message.Role.ToString().ToUpper()}]: ");
            foreach (var contentItem in message.Content)
            {
                if (!string.IsNullOrEmpty(contentItem.Text))
                {
                    response.AppendLine(contentItem.Text);

                    if (contentItem.TextAnnotations.Count > 0)
                    {
                        response.AppendLine("");
                    }
                }
            }

            response.AppendLine("");
#pragma warning restore OPENAI001
        }

        RAGResponse = response.ToString();

        return Page();
    }

    public async Task<IActionResult> OnPostImageGenerationAsync()
    {
        var client = _openAiClient.GetImageClient("dall-e-3");

        var image = await client.GenerateImageAsync(ImagePrompt, new ImageGenerationOptions
        {
            ResponseFormat = GeneratedImageFormat.Bytes
        });

        var imageBytes = image.Value.ImageBytes;

        using var memoryStream = new MemoryStream();
        await imageBytes.ToStream().CopyToAsync(memoryStream);
        GeneratedImageBytes = memoryStream.ToArray();

        return Page();
    }

    public ReadOnlySpan<byte> GetExceptionHandlingDocumentContent()
    {
        return """
               # Exception Handling

               ABP provides a built-in infrastructure and offers a standard model for handling exceptions.

               * Automatically **handles all exceptions** and sends a standard **formatted error message** to the client for an API/AJAX request.
               * Automatically hides **internal infrastructure errors** and returns a standard error message.
               * Provides an easy and configurable way to **localize** exception messages.
               * Automatically maps standard exceptions to **HTTP status codes** and provides a configurable option to map custom exceptions.

               ## Automatic Exception Handling

               `AbpExceptionFilter` handles an exception if **any of the following conditions** are met:

               * Exception is thrown by a **controller action** which returns an **object result** (not a view result).
               * The request is an AJAX request (`X-Requested-With` HTTP header value is `XMLHttpRequest`).
               * Client explicitly accepts the `application/json` content type (via `accept` HTTP header).

               If the exception is handled it's automatically **logged** and a formatted **JSON message** is returned to the client.

               ## Business Exceptions

               Most of your own exceptions will be business exceptions. The `IBusinessException` interface is used to mark an exception as a business exception.

               `BusinessException` implements the `IBusinessException` interface in addition to the `IHasErrorCode`, `IHasErrorDetails` and `IHasLogLevel` interfaces. The default log level is `Warning`.

               Usually you have an error code related to a particular business exception. For example:

               ````C#
               throw new BusinessException(QaErrorCodes.CanNotVoteYourOwnAnswer);
               ````

               ### User Friendly Exception

               If an exception implements the `IUserFriendlyException` interface, then ABP does not change it's `Message` and `Details` properties and directly send it to the client.

               `UserFriendlyException` class is the built-in implementation of the `IUserFriendlyException` interface. Example usage:

               ````C#
               throw new UserFriendlyException(
                   "Username should be unique!"
               );
               ````
               * The `IUserFriendlyException` interface is derived from the `IBusinessException` and the `UserFriendlyException` class is derived from the `BusinessException` class.

               """u8;
    }
}
Running the Application
After completing the setup, you can run the application using the following command:
dotnet run --project ./src/Acme.OpenAIIntegration.Web
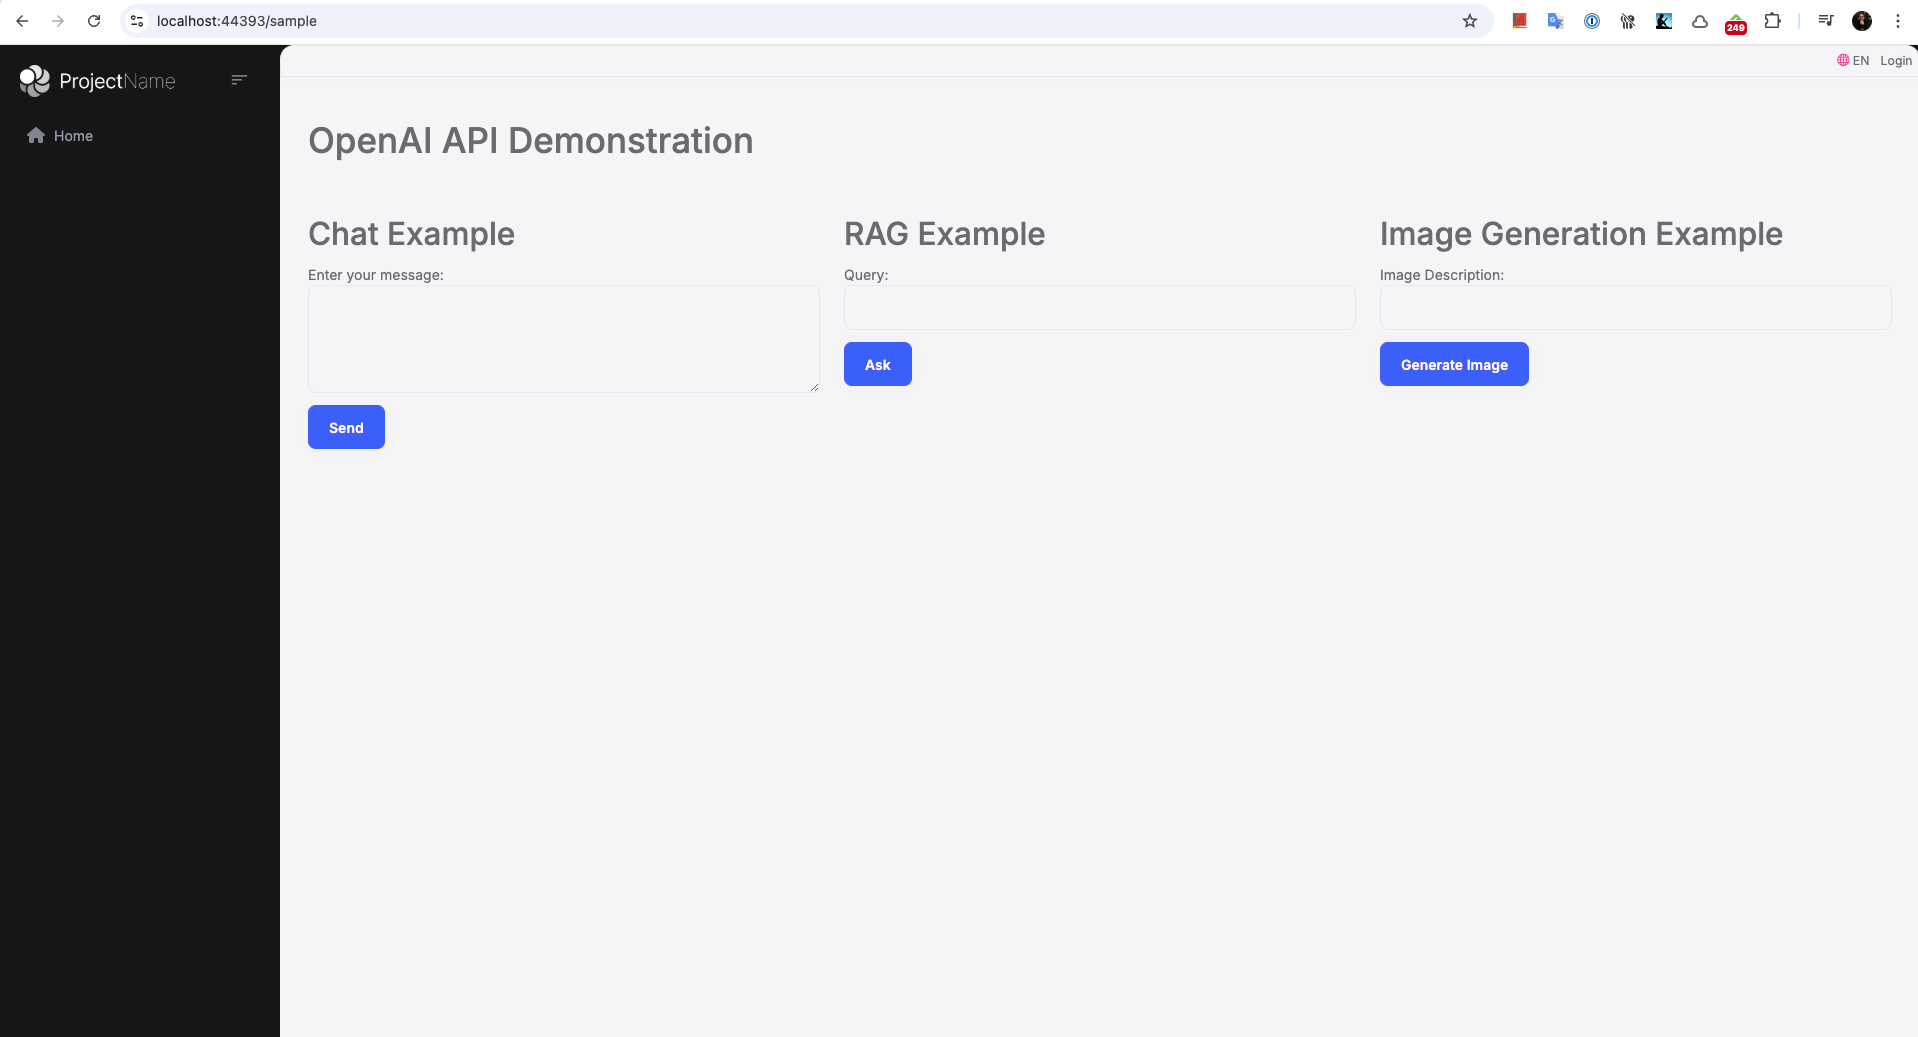
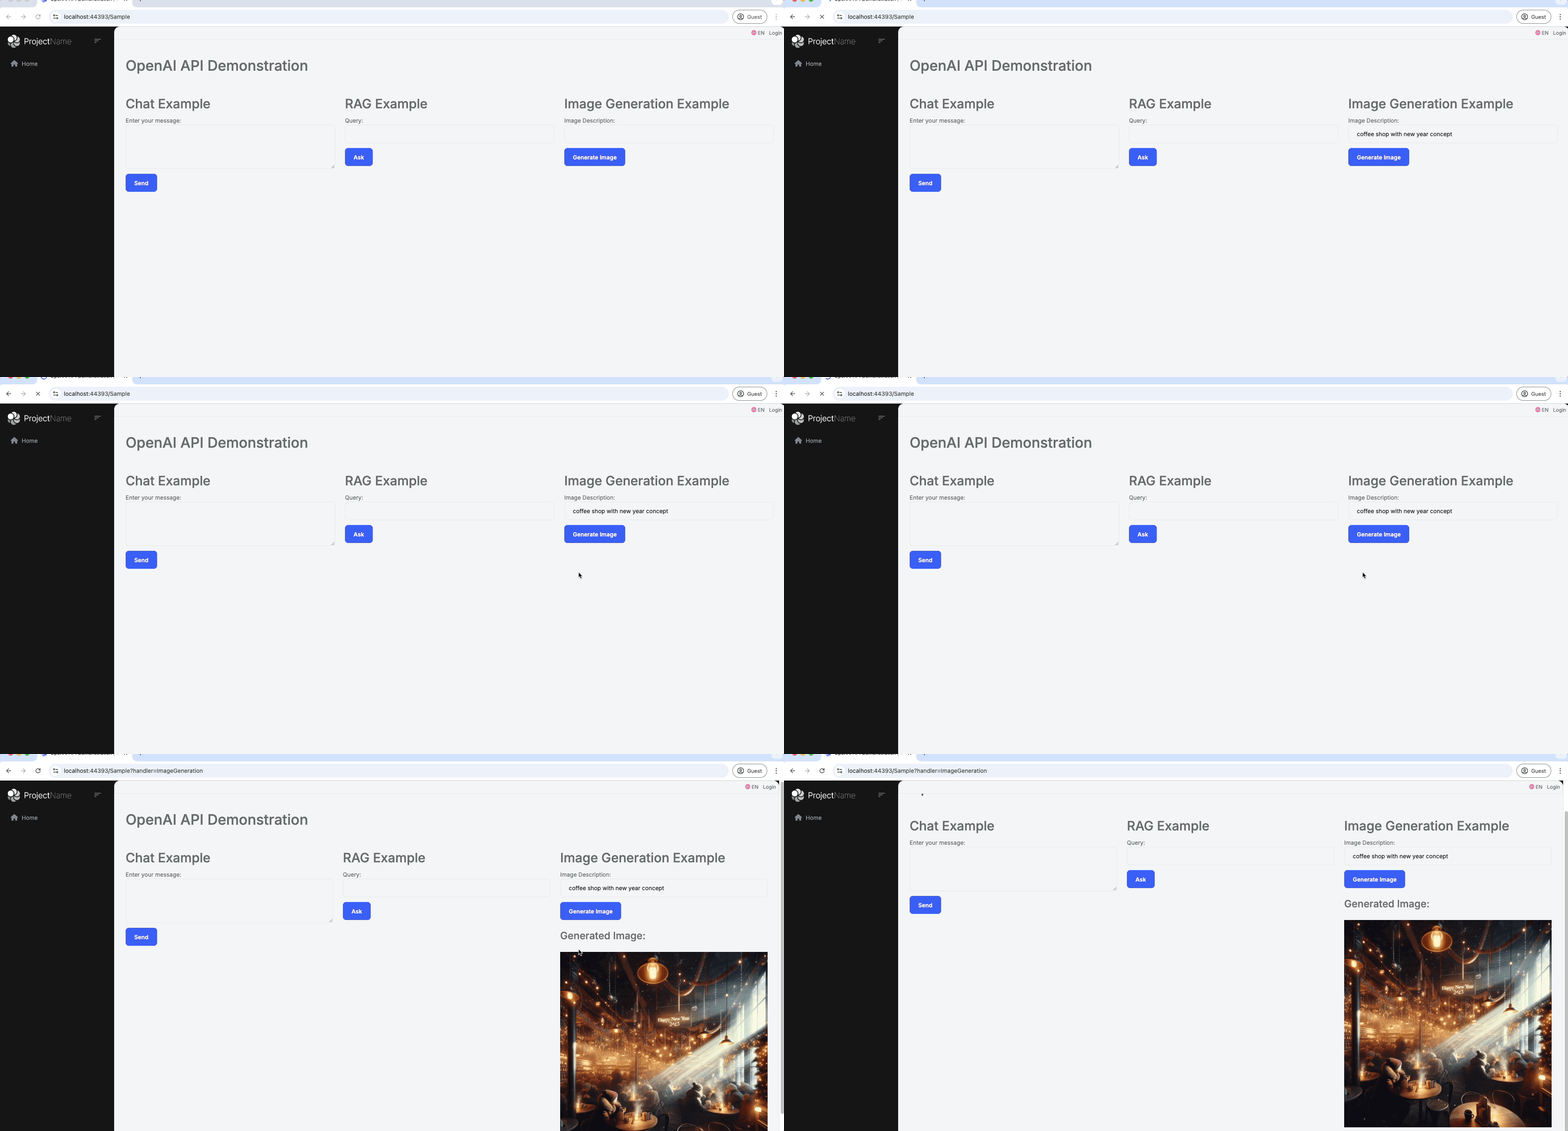
Once the application is running, open your browser and navigate to /Sample. You should see the Sample page we created, which contains sections for Chat, RAG (Retrieval-Augmented Generation), and Image Generation. You can find the screenshot of the page below:
Examples Overview
To showcase the integration of the OpenAI API with the ABP Framework, we implemented three different examples:
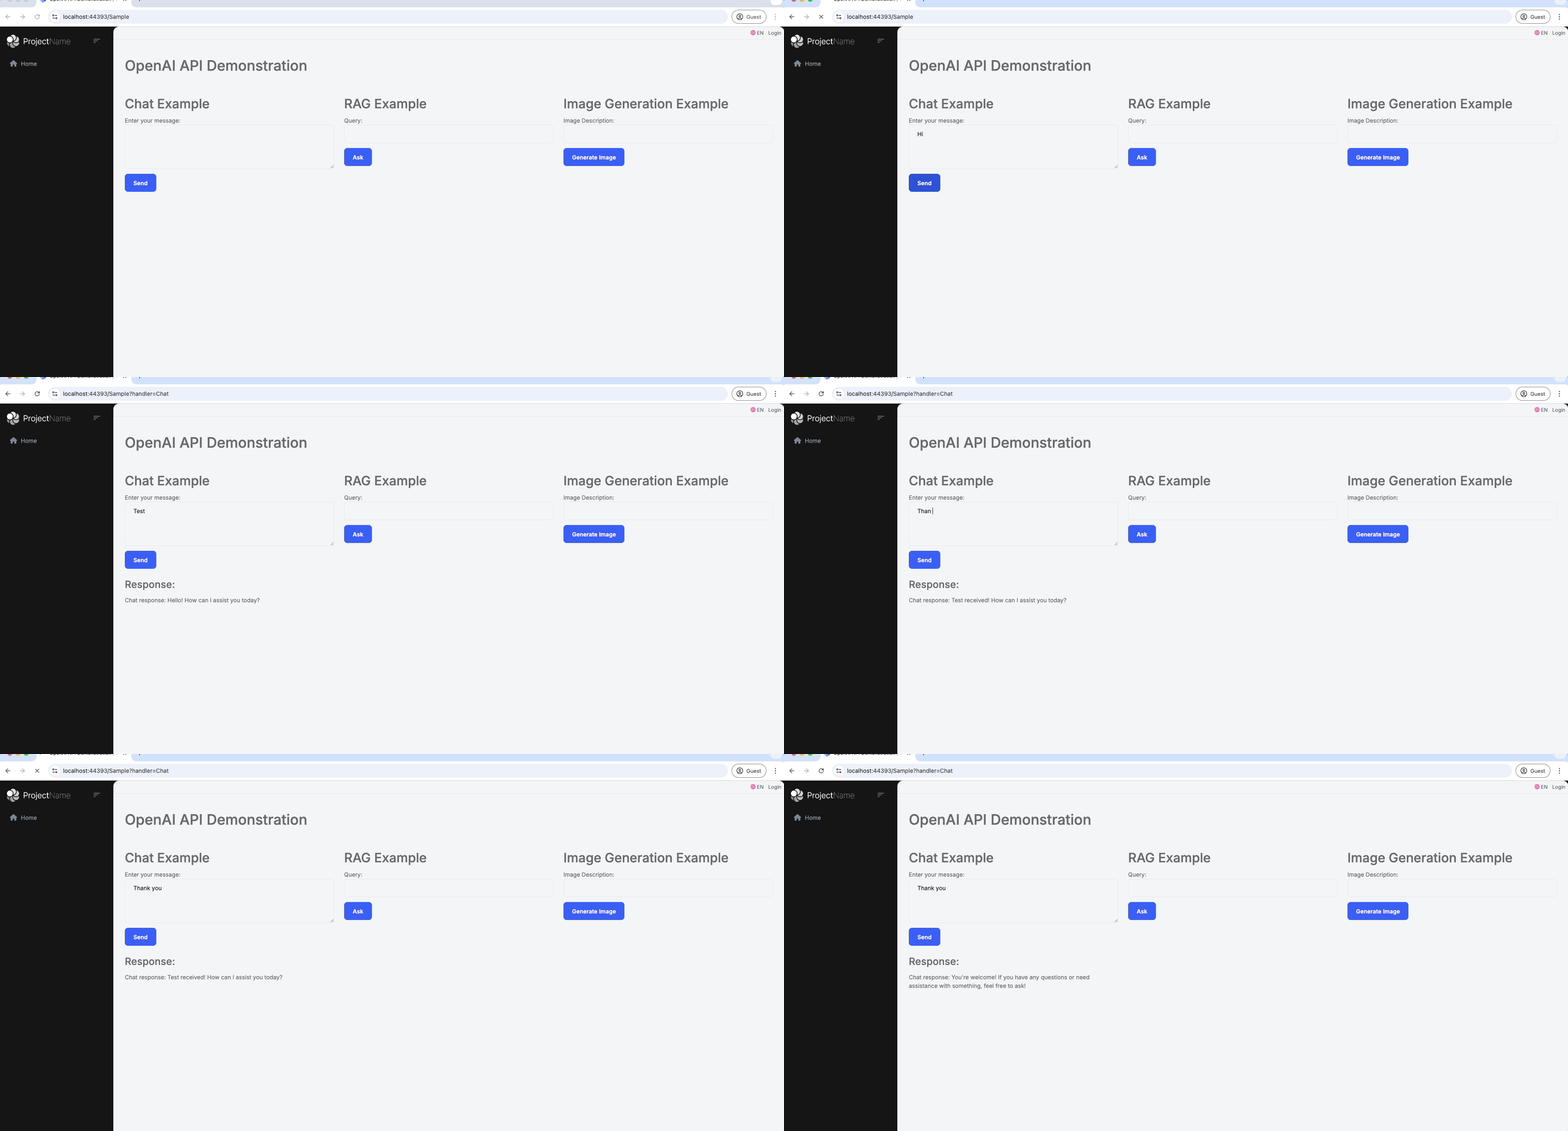
- Chat Example: This example demonstrates how to use OpenAI's chat capabilities by allowing users to enter a message and receive an AI-generated response. The implementation involves setting up a simple form on the
Samplepage where users can input their message. The form submission triggers theOnPostChatAsyncmethod, which uses theIChatClientto generate a response.
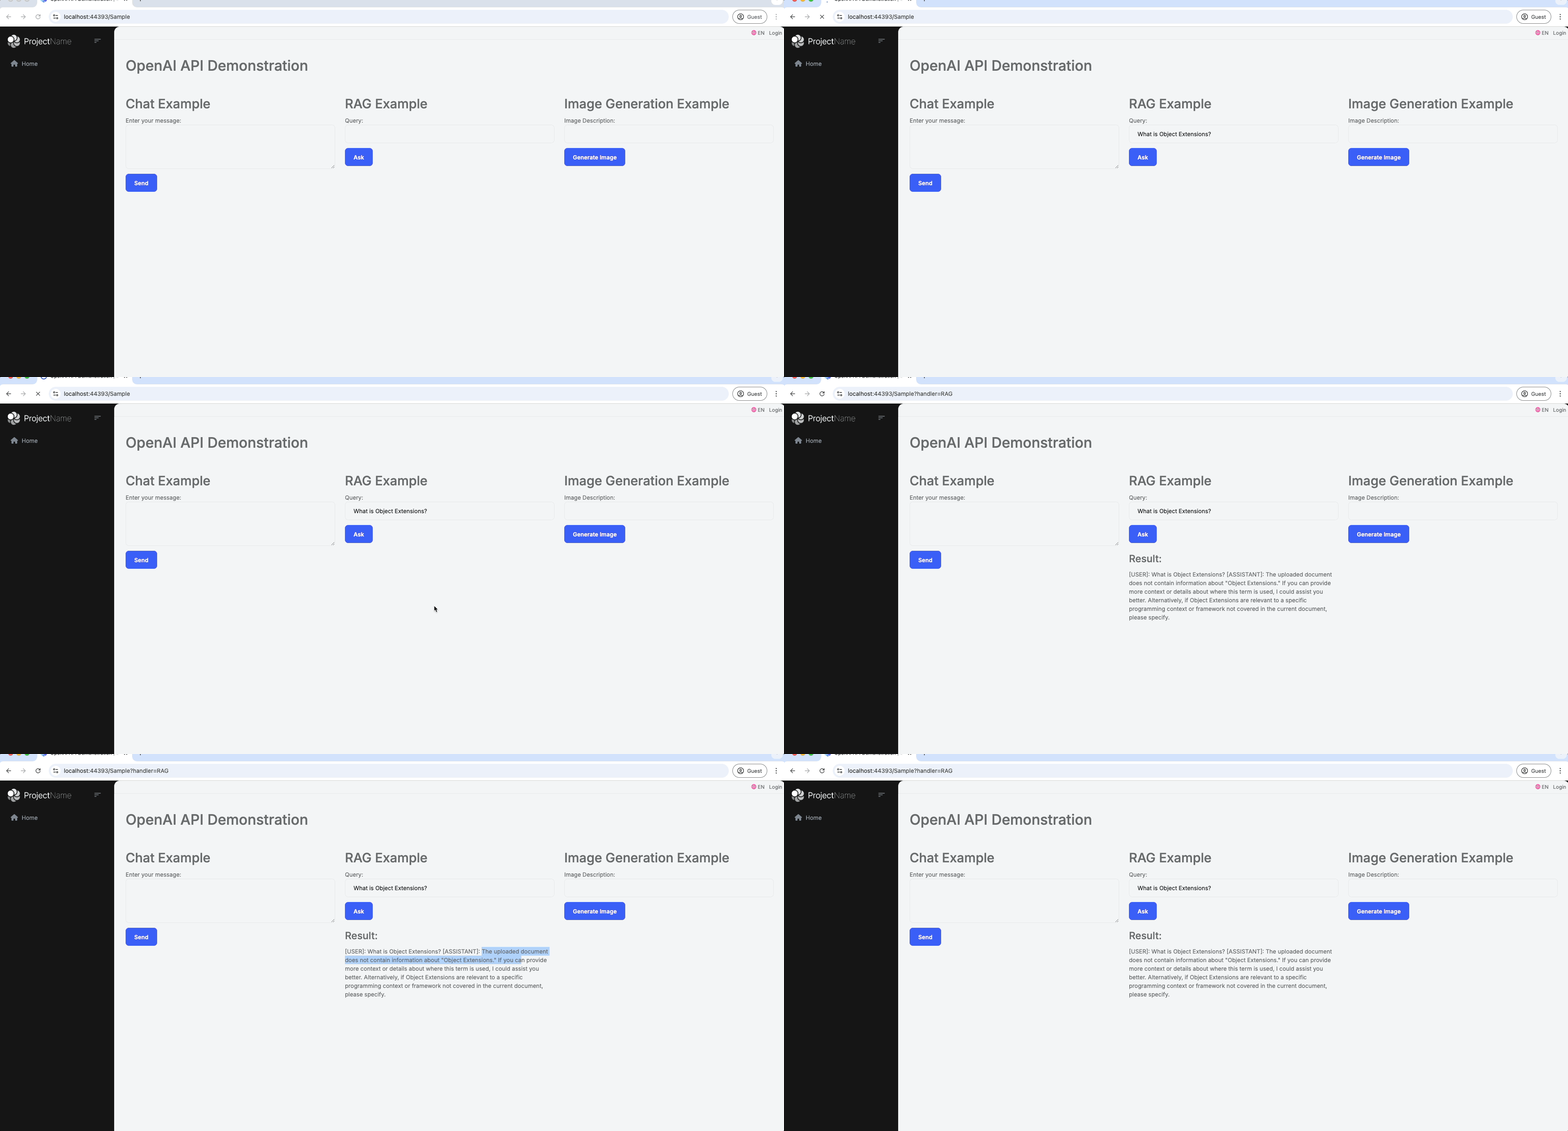
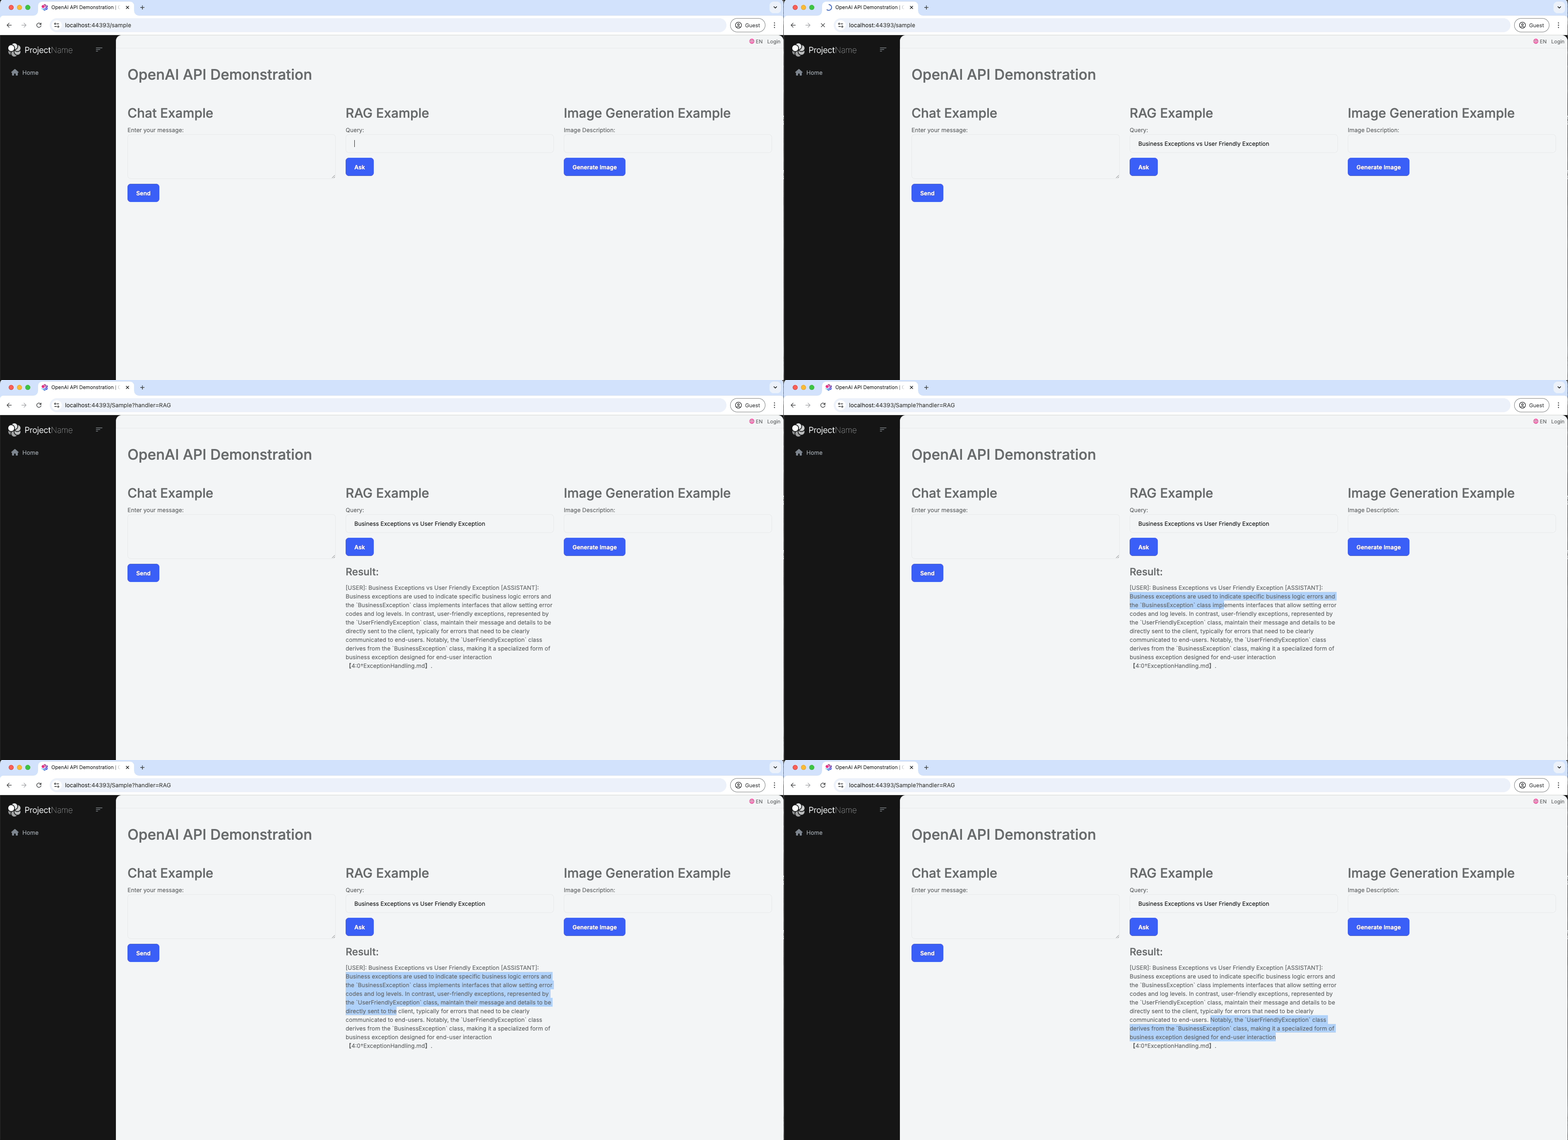
- Retrieval-Augmented Generation (RAG) Example: In this example, we use OpenAI to answer user queries by referencing custom documents uploaded to the OpenAI API. The implementation involves uploading a document using the
OpenAIFileClientand creating an assistant with specific instructions to handle the uploaded content. In this case, the document is a section from ABP's Exception Handling documentation, which includes examples on how ABP handles exceptions, user-friendly error messages, and business exceptions. Users can input their query on theSamplepage, and theOnPostRAGAsyncmethod processes the query to generate precise answers based on the document content. If users ask questions that are not covered in the document, the assistant clearly indicates that the information is not available, as per the instructions provided. For example, when asked aboutObject Extensions, the response begins with: "The uploaded document does not contain information aboutObject Extensions...". This demonstrates how the assistant adheres to the provided instructions. You can also find this example illustrated in the GIF below.
- Image Generation Example: This example leverages the DALL-E model to generate images based on user-provided prompts. On the
Samplepage, users can provide a description of the image they want to generate, and theOnPostImageGenerationAsyncmethod uses theOpenAIClientto generate the image.
Conclusion
In this article, we covered how to integrate the OpenAI API with the ABP Framework by creating a sample project, setting up the OpenAI services, and implementing examples for conversational AI, knowledge-based assistance, and image generation. By following these steps, you can add powerful AI-driven capabilities to your application, making it more interactive, intelligent, and capable of meeting user needs effectively.


Comments
Serdar Genc 62 weeks ago
superb
Berkan Şaşmaz 62 weeks ago
Thank you :)
start 61 weeks ago
how to use blob files ; make queries against it?
Berkan Şaşmaz 61 weeks ago
This seems to be beyond the scope of this article. But you can look at this source if you like.
Sergei Gorlovetsky 59 weeks ago
Thank you for the guide! We used Azure AI Foundry for interactions with various LLMs including OpenAI ones. It's nice to have this example of using Open AI API directly.
Berkan Şaşmaz 58 weeks ago
Thank you :)
Patrik Johansson 55 weeks ago
Great article of an interesting topic. While really not related to the topic, I think you should perhaps add a comment about the risks of storing API keys in appsettings.json just to be on the safe side, as it is quite common for people to do it and then perhaps give their API keys away on GitHub etc. Thanks.
Berkan Şaşmaz 55 weeks ago
Thank you for your comment, I absolutely agree with you. I am attaching the relevant note.