IdentityUser Relationship and Extending It
In this article, I will talk about the relationships of IdentityUser in every web application that can be created with the ABP framework. When you read this article, you will learn how to extend the user entity in the applications you develop using the ABP framework with a primitive type, extending the user by associating the user with another entity (User-many-to-one-X).
Creating the Solution
For the source code of the application: https://github.com/onurpicakci/Abp-Identity-Relationship
In this article we will use EF Core as the database provider and MVC as the user interface framework. But Angular, Blazor Server and Blazor WebAssembly also work. ABP Framework offers starter templates to get started faster. We can create a new starter template using the ABP CLI:
abp new IdentityRelationship
After the project is created, you can run the IdentityRelationship.DbMigrator project to create the database and seed the initial data. You can then run the IdentityRelationship.Web project to see our application run.
The default admin username is admin and the password is 1q2w3E*
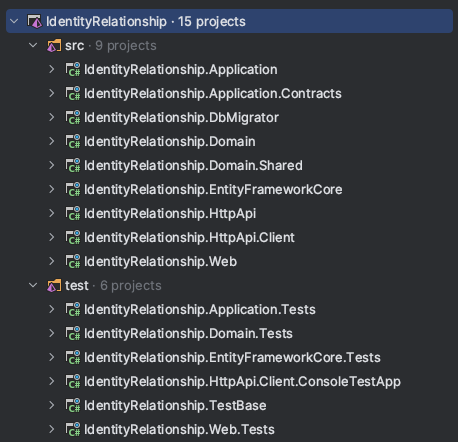
Module Entity Extensions
The module entity extension system is a high level extension system that allows you to define new properties for existing entities of the depended modules. It automatically adds properties to the entity, database, HTTP API and the user interface in a single point.
Extending the User Entity With a Primitive Type
Open the IdentityRelationshipModuleExtensionConfigurator class inside the Domain.Shared project of your solution and change the ConfigureExtraProperties method as shown below to add an IdentificationNumber property to the IdentityUser entity of the Identity Module.
public static void ConfigureExtraProperties()
{
    OneTimeRunner.Run(() =>
    {
        ObjectExtensionManager.Instance.Modules()
            .ConfigureIdentity(identity =>
            {
                identity.ConfigureUser(user =>
                {
                    user.AddOrUpdateProperty<string>( //property type: string
                        "IdentificationNumber", //property name
                        property =>
                        {
                            //validation rules
                            property.Attributes.Add(string.Empty);
                            property.Attributes.Add(
                                new StringLengthAttribute(64) {
                                    MinimumLength = 4
                                }
                            );

                            //...other configurations for this property
                        }
                    );
                });
            });
    });
}
This method is called inside the IdentityRelationshipDomainSharedModule at the beginning of the application. OneTimeRunner is a utility class that guarantees to execute this code only one time per application, since multiple calls are unnecessary.
If you want to localize, open the IdentityRelationship.Domain.Shared project and create a new localization in your /Localization/IdentityRelationship/en.json file.
"IdentificationNumber": "Identification Number"
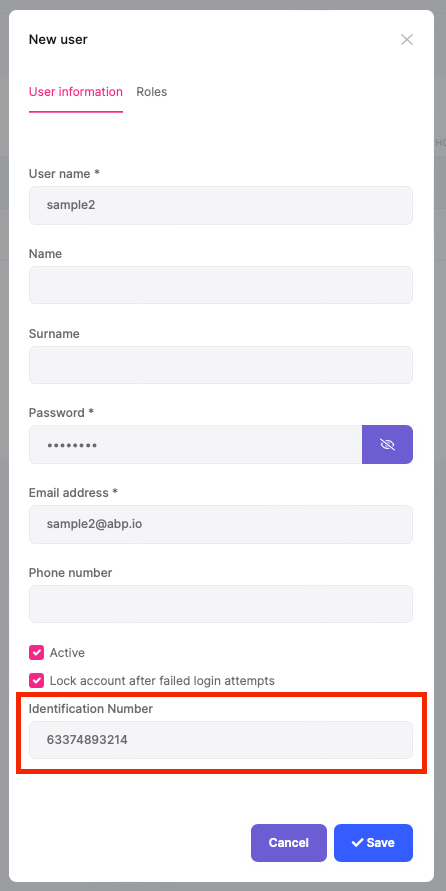
Once you define a property, it appears in the create and update forms of the related entity:
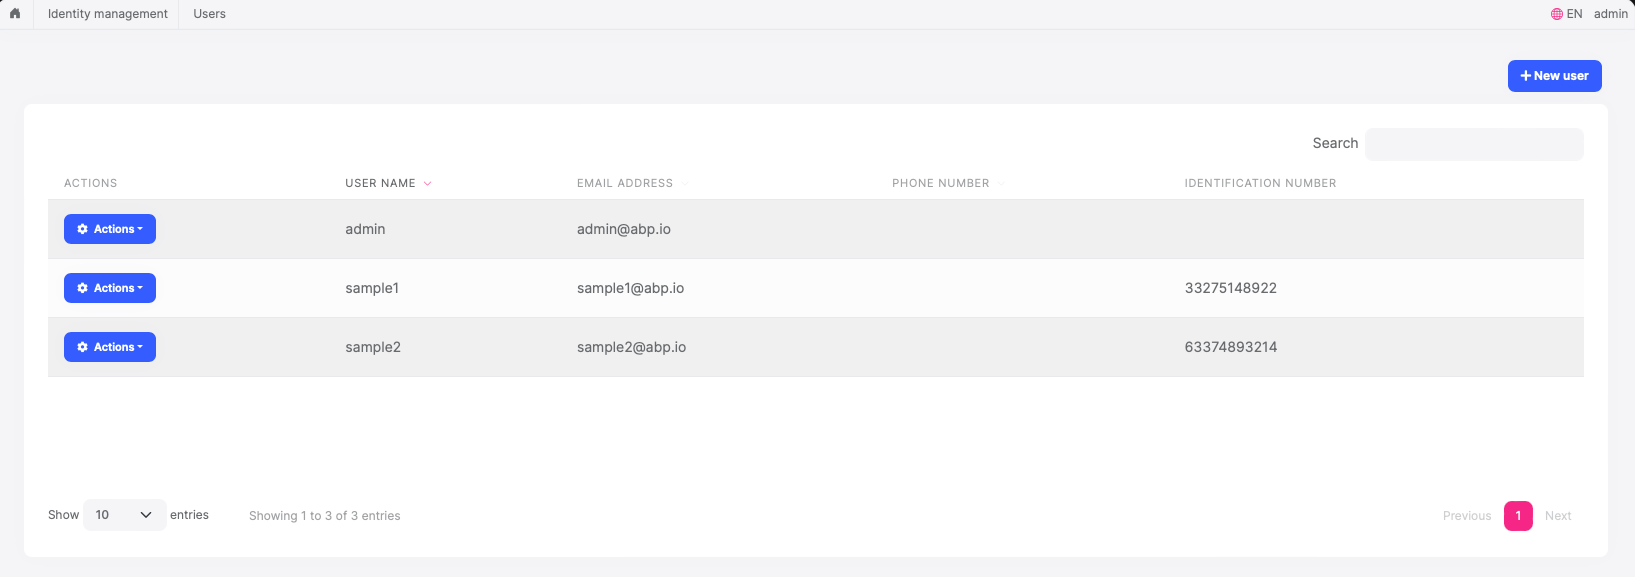
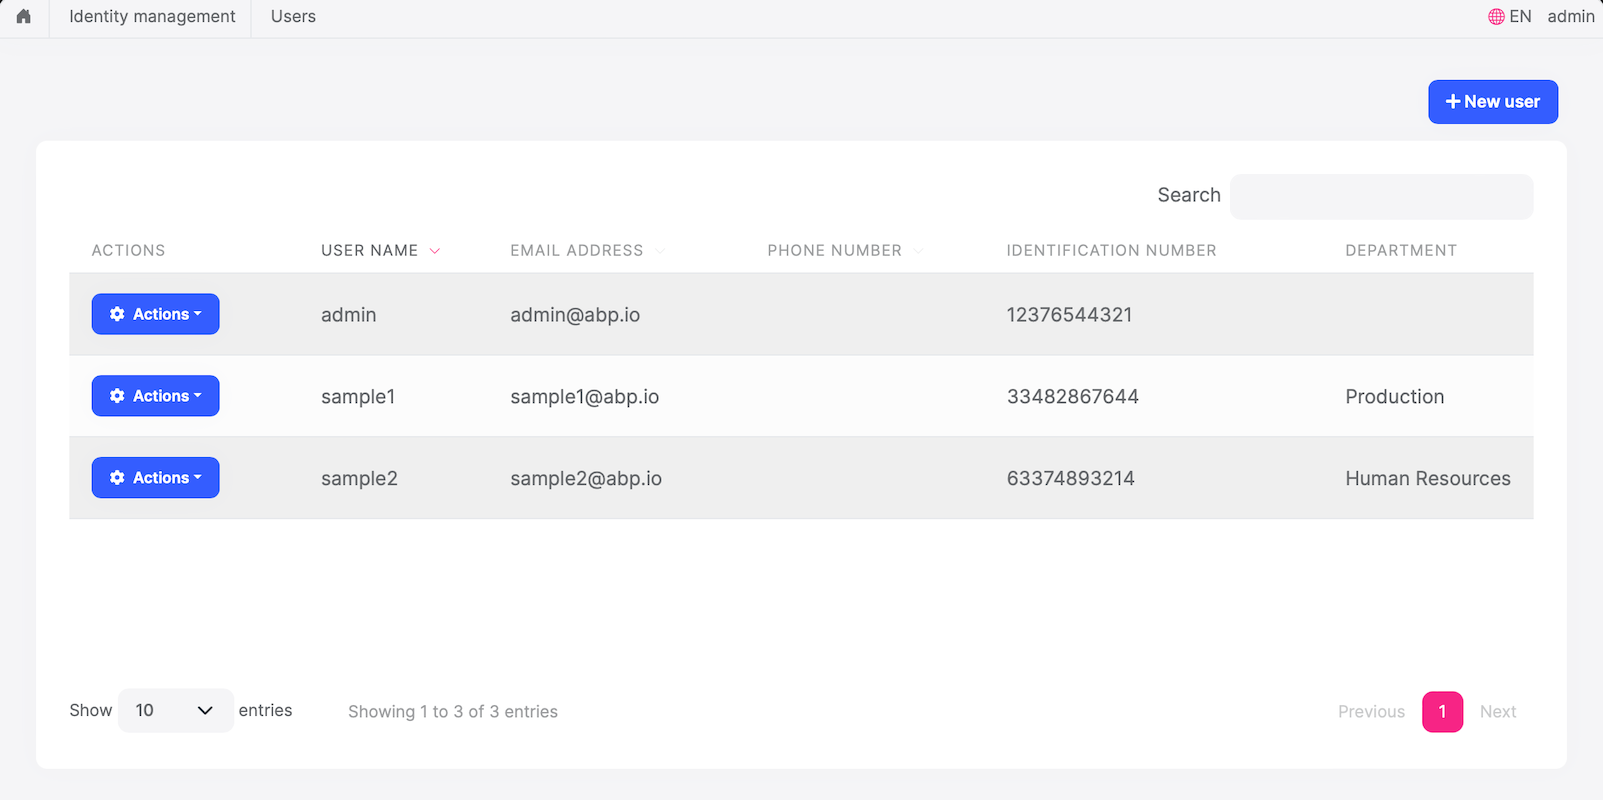
New properties also appear in the data table of the related page:
Navigation Properties / Foreign Keys
It is supported to add an extension property to an entity that is the Id of another entity (foreign key).
Example: Let's associate a department in the database with a user
First, create a Departments folder in the IdentityRelationship.Domain project and add the Department class inside:
using System;
using Volo.Abp.Domain.Entities;

namespace IdentityRelationship.Departments;

public class Department : AggregateRoot<Guid>
{
    public string Name { get; set; }
}
EF Core requires that you relate the entities with your DbContext. The easiest way to do so is adding a DbSet property to the IdentityRelationshipDbContext class in the IdentityRelationship.EntityFrameworkCore project, as shown below:
public DbSet<Department> Departments { get; set; }
Then in the IdentityRelationship.EntityFrameworkCore project of your solution, open the /EntityFrameworkCore/IdentityRelationshipEfCoreEntityExtensionMappings class and update your code:
public static class IdentityRelationshipEfCoreEntityExtensionMappings
{
    private static readonly OneTimeRunner OneTimeRunner = new OneTimeRunner();

    public static void Configure()
    {
        IdentityRelationshipGlobalFeatureConfigurator.Configure();
        IdentityRelationshipModuleExtensionConfigurator.Configure();

        OneTimeRunner.Run(() =>
        {
            ObjectExtensionManager.Instance
                .MapEfCoreProperty<IdentityUser, Guid>(
                    "DepartmentId",
                    (entityBuilder, propertyBuilder) => { propertyBuilder.HasMaxLength(128); }
                );

        });
    }
}
This class can be used to map these extra properties to table fields in the database. Please read this document to improve your understanding of what we are doing.
We need to create a new migration to see the changes in the database. Open your EntityFrameworkCore project in the terminal and run the following command (this depends on the IDE you are using).
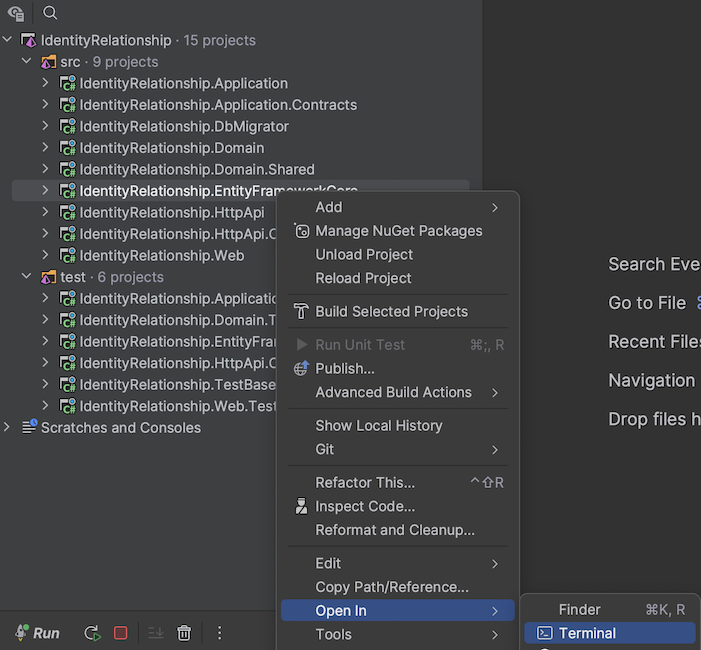
dotnet ef migrations add Create_Department_Entity
Finally, run the IdentityRelationship.DbMigrator project to update the database.
When you look at your database, you can see that the Department table has been added and DepartmentId has been added to your AbpUsers table.
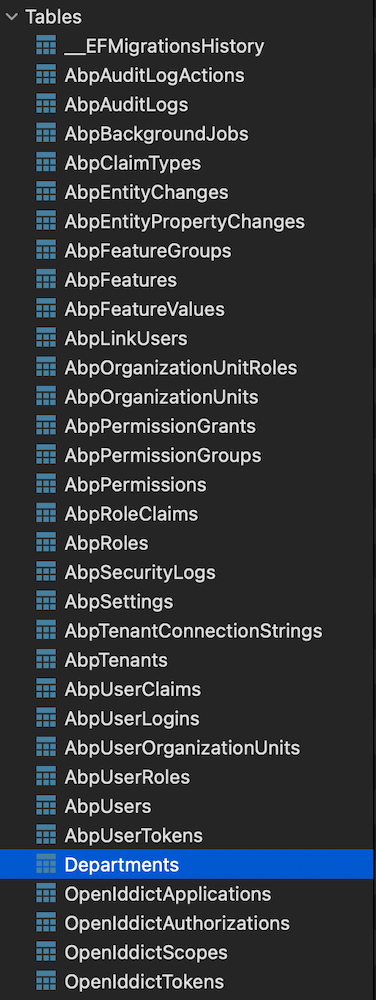
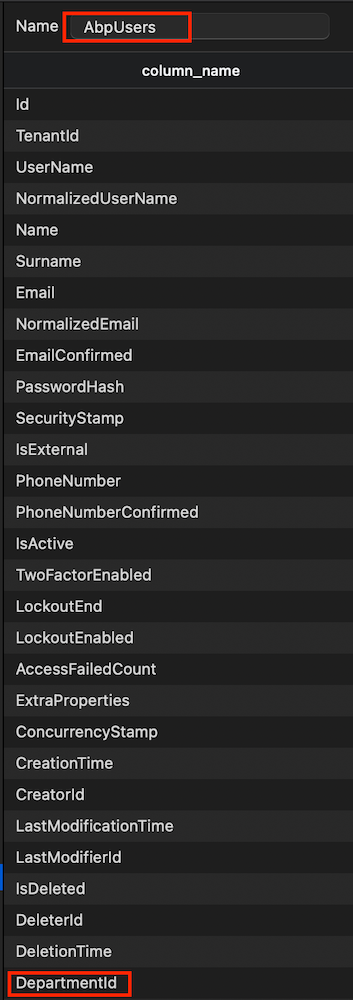
It's good to have some initial data in the database before running the application. This section introduces the Data Seeding system of the ABP framework. You can skip this section if you don't want to create the data seeding, but it is suggested to follow along and learn this useful ABP Framework feature.
Create a class deriving from the IDataSeedContributor in the IdentityRelationship.Domain project by copying the following code:
using System;
using System.Threading.Tasks;
using IdentityRelationship.Departments;
using Volo.Abp.Data;
using Volo.Abp.DependencyInjection;
using Volo.Abp.Domain.Repositories;

namespace IdentityRelationship;

public class IdentityRelationshipDataSeederContributor
    : IDataSeedContributor, ITransientDependency
{
    private readonly IRepository<Department, Guid> _departmentRepository;

    public IdentityRelationshipDataSeederContributor(IRepository<Department, Guid> departmentRepository)
    {
        _departmentRepository = departmentRepository;
    }

    public async Task SeedAsync(DataSeedContext context)
    {
        if (await _departmentRepository.GetCountAsync() <= 0)
        {
            await _departmentRepository.InsertAsync(
                new Department
                {
                    Name = "Human Resources"
                },
                autoSave: true
            );

            await _departmentRepository.InsertAsync(
                new Department
                {
                    Name = "Production"
                },
                autoSave: true
            );
        }
    }
}
- This code simply uses the
IRepository<Department, Guid>(the default repository) to insert two books to the database in case there weren't any books in it.
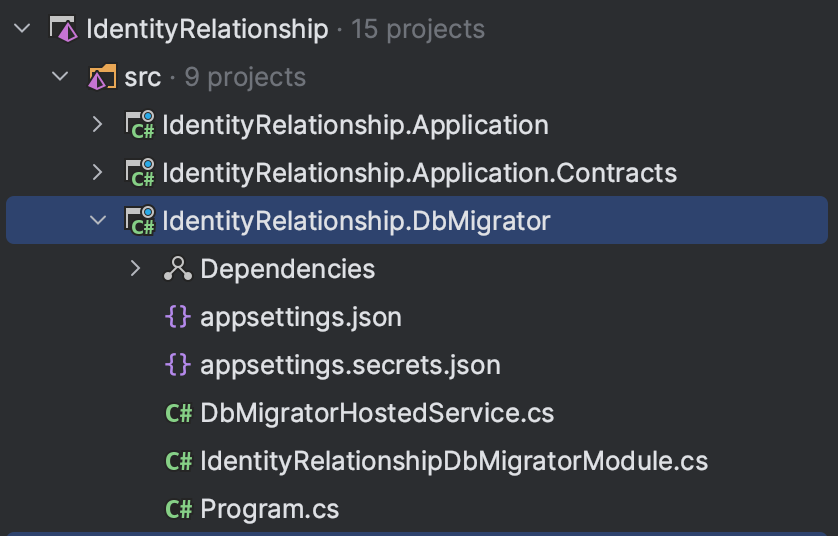
Run the IdentityRelationship.DbMigrator application to update the database:
Again, open the IdentityRelationshipModuleExtensionConfigurator class in the Domain.Shared project and add the following code:
user.AddOrUpdateProperty<Guid>(
    "DepartmentId",
    property =>
    {
        property.UI.Lookup.Url = "/api/app/department";
        property.UI.Lookup.DisplayPropertyName = "name";
    }
);
The UI.Lookup.Url option takes a URL to get the list of departments to select on the edit/create forms. This endpoint can be a typical controller, an auto API controller or any type of endpoint that returns a proper JSON response.
To localize, open the IdentityRelationship.Domain.Shared project and add it to your /Localization/IdentityRelationship/en.json file:
"DepartmentId": "Department"
Create a Departments folder in the IdentityRelationship.Application.Contracts project of your solution and add the DepartmentDto class in it
using System;
using Volo.Abp.Application.Dtos;
namespace IdentityRelationship.Departments;

public class DepartmentDto : EntityDto<Guid>

{
    public string Name { get; set; }
}
Now let's create an IDepartmentAppService interface in the Departments folder
using System.Threading.Tasks;
using Volo.Abp.Application.Dtos;
using Volo.Abp.Application.Services;

namespace IdentityRelationship.Departments;

public interface IDepartmentAppService : IApplicationService
{
    public Task<ListResultDto<DepartmentDto>> GetAsync();
}
Time to implement the IDepartmentAppService interface. Create a Departments folder in your IdentityRelationship.Application project and add the DepartmentAppService class inside.
using System;
using System.Collections.Generic;
using System.Threading.Tasks;
using IdentityRelationship.Departments;
using Volo.Abp.Application.Dtos;
using Volo.Abp.Domain.Repositories;

namespace IdentityRelationship.Department;

public class DepartmentAppService : IdentityRelationshipAppService, IDepartmentAppService
{
    private readonly IRepository<Departments.Department, Guid> _departmentRepository;

    public DepartmentAppService(IRepository<Departments.Department, Guid> departmentRepository)
    {
        _departmentRepository = departmentRepository;
    }

    public async Task<ListResultDto<DepartmentDto>> GetAsync()
    {
        var departments = await _departmentRepository.GetListAsync();
        return new ListResultDto<DepartmentDto>(
            ObjectMapper.Map<List<Departments.Department>, List<DepartmentDto>>(departments));
    }
}
DepartmentAppService is using the ObjectMapper to convert the Department objects to DepartmentDto objects. So, we need to define this mapping in the AutoMapper configuration.
Open the IdentityRelationshipApplicationAutoMapperProfile class inside the IdentityRelationship.Application project and add the following line to the constructor:
using AutoMapper;
using IdentityRelationship.Departments;

namespace IdentityRelationship;

public class IdentityRelationshipApplicationAutoMapperProfile : Profile
{
    public IdentityRelationshipApplicationAutoMapperProfile()
    {
        CreateMap<Departments.Department, DepartmentDto>();
    }
}
Run your IdentityRelationship.Web project and add a department to one of your users.
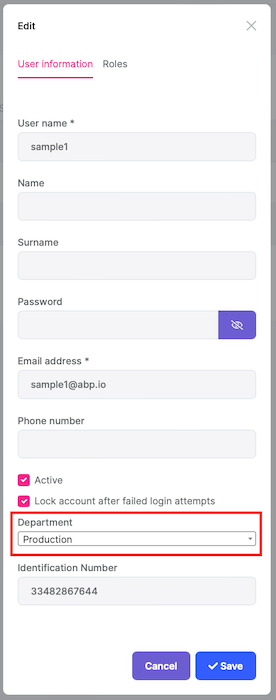
And it shows the department name on the data table:
Conclusion
In this article I talked about the use of the IdentityUser relationship and how to extend it. Thank you for reading the article, I hope it was useful. See you soon!


Comments
Salih 152 weeks ago
Great article!
Alper Ebiçoğlu 152 weeks ago
thank you for clarifying the
Userrelationship in ABPAtefeh Shahidifard 60 weeks ago
thank you. now how to get our added property in another module that have access to identityService.Entityframework? i use IOrganizationUnitRepository to get values. but the result does not contain extra properties. i have used in in auth server before and there i had extra properties!