Integrating the Syncfusion MVC Components to the ABP MVC UI
Introduction
In this article we will see how we can integrate the Syncfusion MVC Components into our ABP application.
🛠 Liked this post? I now share all my content on Substack — real-world .NET, AI, and scalable software design.
👉 Subscribe here → engincanveske.substack.com
🎥 Also, check out my YouTube channel for hands-on demos and deep dives: https://www.youtube.com/@engincanv
Source Code
You can find the source code of the application at https://github.com/EngincanV/ABP-Syncfusion-Components-Demo.
Prerequisites
-
- In this article, we will create a new startup template in v5.0.0-rc.2 and if you follow this article from top to bottom and create a new startup template with me, you need to install the .NET 6 SDK before starting.
NOTE: ABP v5.X stable version has been released. You can replace v5.0.0-rc.2 with the latest stable version in your steps.
Also, you need to update your ABP CLI to the v5.0.0-rc.2, you can use the command below to update your CLI version:
dotnet tool update Volo.Abp.Cli -g --version 5.0.0-rc.2
or install it if you haven't installed it before:
dotnet tool install Volo.Abp.Cli -g --version 5.0.0-rc.2
Creating the Solution
In this article, we will create a new startup template with EF Core as a database provider and MVC for the UI framework. But if you already have a project with MVC UI, you don't need to create a new startup template, you can directly implement the following steps to your existing project.
If you already have a project with MVC/Razor Pages UI, you can skip this section.
We can create a new startup template by using the ABP CLI:
abp new SyncfusionComponentsDemo -t app --preview
Our project boilerplate will be ready after the download is finished. Then, we can open the solution and start developing.
Starting the Development
Pre-requisite
If you've already had a license from Syncfusion, you can skip this section.
The first thing we need to do is create an account to be able to get a license from Syncfusion.
So, let's navigate to https://www.syncfusion.com/aspnet-core-ui-controls and click the "Download Free Trial" button.
Then fill the form and start your 30-day free trial.
After that, navigate to https://www.syncfusion.com/account/manage-trials/downloads to get our license key that will be used in our application.

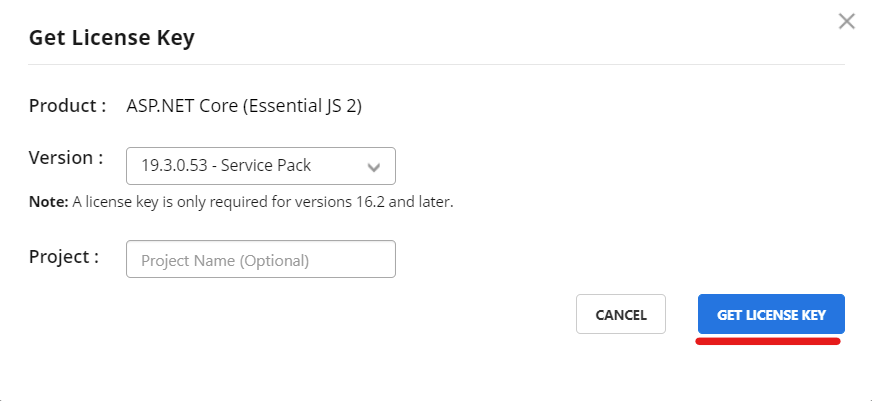
Click the "Get License Key" link for "ASP.NET Core (Essential JS 2)".

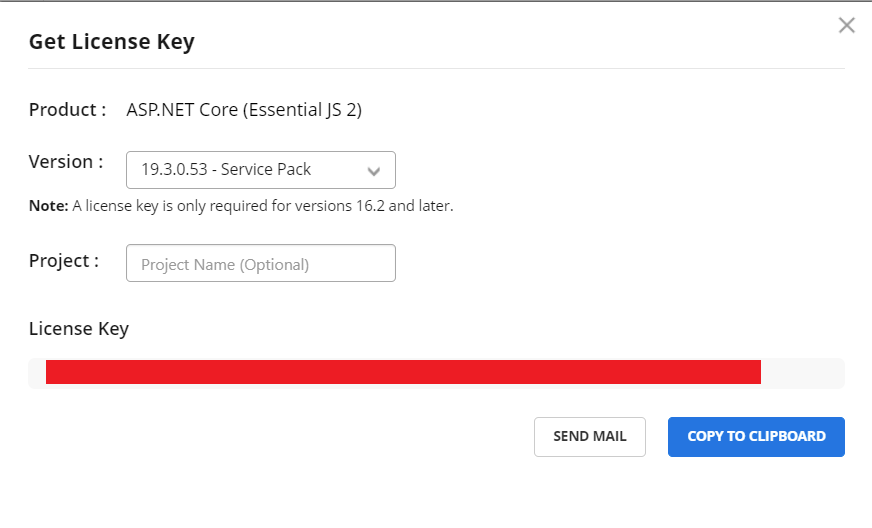
Then a modal will be opened like in the above image, select a version and click the "Get License Key" button.

Lastly, copy the generated license key value.
In order to use the relevant components, Syncfusion needs to check this license key to know that our license is valid.
Configurations
After providing a license key from Syncfusion, we can start with the configuration that needs to be done in our application.
1-) Install the Syncfusion.EJ2.AspNet.Core package
We need to install the Syncfusion.EJ2.AspNet.Core Nuget package to our Web project (*.Web).
We can install it via Visual Studio's Nuget Package Manager:

or via dotnet cli:
dotnet add package Syncfusion.EJ2.AspNet.Core --version 19.3.0.57
In this article, I've used the package in version 19.3.0.57.
2-) Register the License Key
After installing the package, we need to register our license key to be able to use the Syncfusion Components.
To register the license key, open your web module class and update the
ConfigureServicesmethod as follows:
public override void ConfigureServices(ServiceConfigurationContext context)
{
    var hostingEnvironment = context.Services.GetHostingEnvironment();
    var configuration = context.Services.GetConfiguration();

    //Register Syncfusion license
    Syncfusion.Licensing.SyncfusionLicenseProvider.RegisterLicense(licenseKey: configuration["Syncfusion:LicenseKey"].ToString());

    ConfigureUrls(configuration);
    ConfigureBundles();
    ConfigureAuthentication(context, configuration);
    ConfigureAutoMapper();
    ConfigureVirtualFileSystem(hostingEnvironment);
    ConfigureLocalizationServices();
    ConfigureNavigationServices();
    ConfigureAutoApiControllers();
    ConfigureSwaggerServices(context.Services);
}
Instead of writing the license key directly in here we can define it in the appsettings.json file and use it here by using the Configuration system of .NET.
- Open your appsettings.json file and add a new section named "Syncfusion" as below:
{
  //...

  "Syncfusion": {
    "LicenseKey": "<your-license-key>"
  }
}
Replace the
<your-license-key> part with your license key that we've obtained in the previous section.
To be able to use the Syncfusion Components we need to define them in our _ViewImports.cshtml file. By doing that we can use the Syncfusion components everywhere in our application.
Open your /Pages/_ViewImports.cshtml file and add a new tag helper:
@addTagHelper *, Microsoft.AspNetCore.Mvc.TagHelpers
@addTagHelper *, Volo.Abp.AspNetCore.Mvc.UI
@addTagHelper *, Volo.Abp.AspNetCore.Mvc.UI.Bootstrap
@addTagHelper *, Volo.Abp.AspNetCore.Mvc.UI.Bundling
@addTagHelper *, Syncfusion.EJ2 //use Syncfusion components
3-) Adding Syncfusion styles and scripts to our application
Firstly, let's install the @syncfusion/ej2 package from npm.
- Open your package.json file and add the
@syncfusion/ej2package with version 19.3.57:
{
  "version": "1.0.0",
  "name": "my-app",
  "private": true,
  "dependencies": {
    "@abp/aspnetcore.mvc.ui.theme.basic": "^5.0.0-rc.2",
    "@syncfusion/ej2": "^19.3.57"
  }
}
- Then, open the abp.resourcemapping.js file and update the mappings section:
module.exports = {
    aliases: {

    },
    mappings: {
        "@node_modules/@syncfusion/ej2/dist/ej2.min.js": "@libs/syncfusion/",
        "@node_modules/@syncfusion/ej2/material.css": "@libs/syncfusion/"
    }
};
ABP copies related packages from node_modules folder to the libs folder by examining this file. You can read this document for more info.
- Then run the
abp install-libsto install the dependencies and copy them into the libs folder by your mappings configuration. After running this command, in your libs folder it should be a folder named syncfusion folder.

The last thing we need to do is, add some style and script files provided by Syncfusion, between our head-body tags.
- We can do this by creating two view components (one for Styles and the other for Scripts). Let's do that.
First, create a folder structure as shown below under the Components folder.

Then open the related files and add the following codes to each of these files.
- Default.cshtml (/Components/Syncfusion/Script/Default.cshtml)
@addTagHelper *, Syncfusion.EJ2 //add this line

<!-- Syncfusion Essential JS 2 Scripts -->
<script src="/libs/syncfusion/ej2.min.js"></script>

<!-- Syncfusion Essential JS 2 ScriptManager -->
<ejs-scripts></ejs-scripts>
- SyncfusionScriptComponent.cs
using Microsoft.AspNetCore.Mvc;
using Volo.Abp.AspNetCore.Mvc;

namespace SyncfusionComponentsDemo.Web.Components.Syncfusion.Script
{
    public class SyncfusionScriptComponent : AbpViewComponent
    {
        public IViewComponentResult Invoke()
        {
            return View("~/Components/Syncfusion/Script/Default.cshtml");
        }
    }
}
- Default.cshtml (/Components/Syncfusion/Style/Default.cshtml)
<!-- Syncfusion Essential JS 2 Styles -->
<link rel="stylesheet" href="/libs/syncfusion/material.css">
- SyncfusionStyleComponent.cs
using Microsoft.AspNetCore.Mvc;
using Volo.Abp.AspNetCore.Mvc;

namespace SyncfusionComponentsDemo.Web.Components.Syncfusion.Style
{
    public class SyncfusionStyleComponent : AbpViewComponent
    {
        public IViewComponentResult Invoke()
        {
            return View("~/Components/Syncfusion/Style/Default.cshtml");
        }
    }
}
After creating these two components, we can use the Layout Hooks system of ABP to inject these two components between head and script tags.
To do this, open your web module class and update the ConfigureServices method as below:
public override void ConfigureServices(ServiceConfigurationContext context)
{
    var hostingEnvironment = context.Services.GetHostingEnvironment();
    var configuration = context.Services.GetConfiguration();

    //Register Syncfusion license
    var licenseKey = configuration["Syncfusion:LicenseKey"].ToString();
    Syncfusion.Licensing.SyncfusionLicenseProvider.RegisterLicense(licenseKey: licenseKey);

    Configure<AbpLayoutHookOptions>(options =>
    {
        //Now, the SyncfusionStyleComponent code will be inserted in the head of the page as the last item.
        options.Add(LayoutHooks.Head.Last, typeof(SyncfusionStyleComponent));

        //the SyncfusionScriptComponent will be inserted in the body of the page as the last item.
        options.Add(LayoutHooks.Body.Last, typeof(SyncfusionScriptComponent));
    });

    ConfigureUrls(configuration);
    ConfigureBundles();
    ConfigureAuthentication(context, configuration);
    ConfigureAutoMapper();
    ConfigureVirtualFileSystem(hostingEnvironment);
    ConfigureLocalizationServices();
    ConfigureNavigationServices();
    ConfigureAutoApiControllers();
    ConfigureSwaggerServices(context.Services);
}
After injecting the Syncfusion style and script into our application, our configurations have been completed. We can try with a simple component to see if it works as we expected.
- Let's try with the Calendar component. Open your Index.cshtml file and update with the below content:
@page
@using Microsoft.AspNetCore.Mvc.Localization
@using SyncfusionComponentsDemo.Localization
@using Volo.Abp.Users
@model SyncfusionComponentsDemo.Web.Pages.IndexModel

@section styles {
	<abp-style src="/Pages/Index.css" />
}

@section scripts {
	<abp-script src="/Pages/Index.js" />
}

<div class="container">
	<h2>Syncfusion - Calendar Component</h2>
	<ejs-calendar id="calendar"></ejs-calendar>
</div>
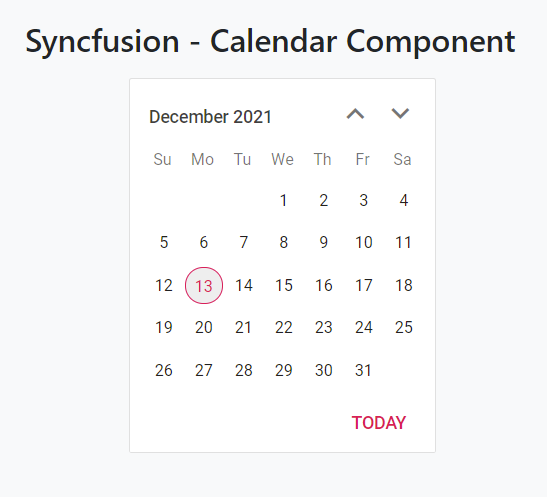
- Then when we run the application, we need to see the relevant calendar component as below.

🛠 Liked this post? I now share all my content on Substack — real-world .NET, AI, and scalable software design.
👉 Subscribe here → engincanveske.substack.com
🎥 Also, check out my YouTube channel for hands-on demos and deep dives: https://www.youtube.com/@engincanv
Conclusion
In this article, we've explained how to integrate the Syncfusion Components into our applications. After following this article, you can use the Syncfusion components in your application.
Thanks for reading the article, I hope you've found it useful :)


Comments
ercanozturk 216 weeks ago
Hi Engin. First of all, thank you for the article. It's a nice job. Does it also apply to the commercial version of ABP? I tried the same in commercial version. But it didn't work. It didn't give an error either. But I couldn't see the calendar either.
Engincan Veske 216 weeks ago
Hi @ercanozturk, I didn't try on the app-pro template but I will try and inform you asap.
Emanuel Pasat 215 weeks ago
I'm having exactly the same problem, on the Pro version. Do you have any update on that issue? Thank you
Hakan Külçür 210 weeks ago
Hi its not works on the Pro Version . But I solved it. The body tag in SyncfusionScriptComponent.cs is not working. "<!-- Syncfusion Essential JS 2 ScriptManager --> <ejs-scripts></ejs-scripts>" Adding tag, but not working. So I copy this section to Razor Page its works. this is not the right solution i think.
Don Boutwell 188 weeks ago
A few minor modifications to this to have it work on a pro template app:
I changed the ViewComponents to be Head and Body, since Syncfusion documentation says to put the script tag in the <head> area.
Components.Syncfusion.Head.Default.cshtml
Components.Syncfusion.Body.Default.cshtml
Additionally, I had to create a copy of the _ViewImports.cshtml in the root of my
Pages\{ProjectName}folder in order to get the Tag helpers to render properly. Not sure why that is, but at the end of the day the controls were working for me.Dicky.tech@gmail.com 163 weeks ago
@ Don Boutwell
Was trying to use your sample. Explain I changed the ViewComponents to be Head and Body