


Using Vue components in a Razor Pages ABP Application
In modern web development, integrating dynamic front-end frameworks with server-side technologies has become increasingly essential for creating responsive and interactive applications. This article explores how to effectively use Vue components within Razor Pages in an ABP Framework application. We will delve into the process of consuming endpoints through ABP Client Proxies, leveraging ABP's powerful localization features to enhance user experience, and implementing ABP permissions to ensure secure access control. By the end of this guide, you will have a comprehensive understanding of how to seamlessly blend Vue.js with Razor Pages, empowering you to build robust and user-friendly applications.
This article won't use any SPA approach. The goal of this article is to use Razor Pages with simple Vue components to eliminate jQuery while developing MVC application.
🎉 Also video version is available!
Creating the Solution
Let's create a simple TODO list application to demonstrate how to use Vue components in Razor Pages. I'll build a really simple backend without a connection to a database for demonstration purposes. We will focus on the frontend part.
- Creating a solution with ABP CLI:
abp new MyTodoApp -t app-nolayers -csf
Configure Vue
We need to add the @abp/vue package to the project to use Vue components.
npm install @abp/vue
- Install client libraries by using ABP CLI:
abp install-libs
As a last step, we need to configure our bundle in the ConfigureBundles method in the MyTodoAppModule.cs file:
private void ConfigureBundles()
{
    Configure<AbpBundlingOptions>(options =>
    {
        // ...

        options.ScriptBundles.Configure(
            // Or BasicThemeBundles.Scripts.Global
            // Or LeptonXLiteThemeBundles.Scripts.Global
            // 👇 Depends on the theme you are using
            LeptonXThemeBundles.Scripts.Global,
            bundle =>
            {
                bundle.AddFiles("/global-scripts.js");
                // 👇 Make sure to add this line
                bundle.AddContributors(typeof(VueScriptContributor));
            }
        );
    });
}
If your IDE doesn't recognize the namespace of the
VueScriptContributor, you can add it manually:using Volo.Abp.AspNetCore.Mvc.UI.Packages.Vue;
Now we're ready to use Vue components in our Razor Pages.
Creating a Vue Component
Let's create a simple Vue component to display the TODO list.
Passing a simple message to the component
- Remove existing HTML codes in
Index.cshtmland replace with the following code:
<div id="vue-app">
    <message-component :message="'Welcome, @CurrentUser.UserName !'"></message-component>
</div>
- Navigate to the
Index.cshtml.jsfile and add the following code:
Vue.component('message-component', {
    template: '<div>Hello, {{ message }}</div>',
    props: ['message']
});

new Vue({
    el: '#vue-app'
});
Run the application and you should see the following output:
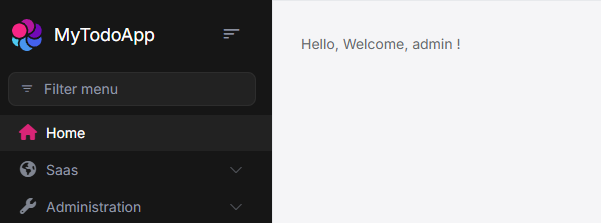
Hard refresh might be required to see the component since we added a new vue js file to the bundle.
If still you can't see the component, please check the browser console for any errors.
Interacting with the component
Let's add a button to the component to interact with the component.
- Add another component in the
Index.cshtmlfile:
<div id="vue-app">
    <message-component :message="'Welcome, @CurrentUser.UserName !'"></message-component>
    <counter-component></counter-component>
</div>
Vue.component('counter-component', {
    template:`
    <div class="card">
        <div class="card-body">
            <p>Count: {{ count }}</p>
            <button class="btn btn-primary" @click="increment">Increment</button>
        </div>
    </div>
    `,
    data: function () {
        return {
            count: 0
        };
    },
    methods: {
        increment: function () {
            this.count++;
        }
    }
});
Do not replicate
new Vue({})code block in the file. It's already in theIndex.cshtml.jsfile. Keep it at the bottom of the file as it is.
Run the application and you should see the following output:
Using ABP Client Proxy, Authorization and Localization
Building the backend
Before we go, let's build our backend to use in the component.
- Creating a simple Application Service:
public class TodoAppService : MyTodoAppAppService, ITodoAppService
{
    public static List<TodoItem> Items { get; } = new List<TodoItem>();

    [Authorize("Todo.Create")]
    public async Task<TodoItem> AddTodoItemAsync(TodoItem input)
    {
        Items.Add(input);
        return input;
    }

    [Authorize("Todo")]
    public async Task<List<TodoItem>> GetAllAsync()
    {
        await Task.Delay(1500);
        return Items;
    }
}
TodoItem.cs
public class TodoItem
{
    public string Description { get; set; }
    public bool IsDone { get; set; }
}
ITodoAppService.cs
public interface ITodoAppService
{
    Task<List<TodoItem>> GetAllAsync();
    Task<TodoItem> AddTodoItemAsync(TodoItem input);
}
Run the application and if you can see the following client proxy in the browser console, you're ready to go:
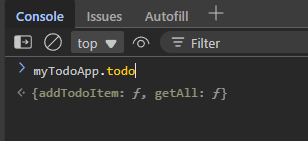
If you can't see the client proxy in the browser console, please check the Dynamic JavaScript Proxies to learn how to enable it.
- Add a new permission in the
MyTodoAppPermissionDefinitionProvider.csfile:
public override void Define(IPermissionDefinitionContext context)
{
    var myGroup = context.AddGroup(MyTodoAppPermissions.GroupName);

    var todo = myGroup.AddPermission("Todo");
    todo.AddChild("Todo.Create");
}
I go without localization or constants for simplicity.
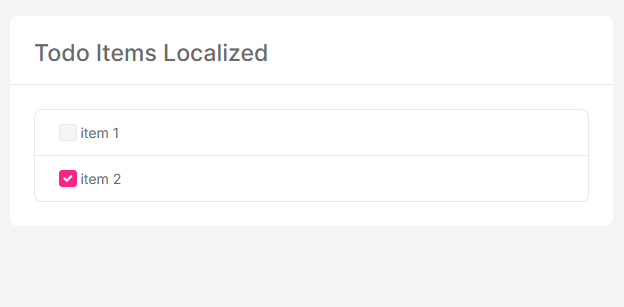
- Add a localization key in the
en.jsonfile:
{
    "TodoItems": "Todo Items Localized"
}
Building the Vue Component: Using ABP Localization, Authorization and Client Proxy
Since the component it directly loaded into the page, we can access the abp object on the page.
So we can use:
abp.localization.localize()to localize a string.abp.auth.isGranted()to check the authorization.myTodoApp.todo.getAll()andmyTodoApp.todo.addTodoItemto call the Application Service.
inside Vue Component code.
- Let's add another component named
todo-componentand usee all the ABP Features in it.
<div id="vue-app">
    <!-- ... -->
    <todo-component></todo-component>
</div>
- Implement the
todo-componentinIndex.cshtml.jsfile:
Vue.component('todo-component', {
    template: `
    <div class="card" v-if="abp.auth.isGranted('Todo')">
        <div class="card-header border-bottom">
            <h3>{{ abp.localization.localize('TodoItems') }}</h3>
        </div>
        <div class="card-body">
            <div v-if="isBusy" class="w-100 text-center">
                <div class="spinner-border" role="status">
                    <span class="visually-hidden">Loading...</span>
                </div>
            </div>
            <ul v-else-if="todos.length > 0" class="list-group">
                <li class="list-group-item" v-for="item in todos" :key="item.description">
                    <input class="form-check-input" type="checkbox" v-model="item.isDone">
                    <label class="form-check-label">{{ item.description }}</label>
                </li>
            </ul>
            <p v-else>No todos yet</p>
        </div>
        <div v-if="abp.auth.isGranted('Todo.Create')" class="card-footer d-flex flex-column gap-2 border-top pt-2">
            <input class="form-control" type="text" v-model="newTodo.description" placeholder="Add a new todo">
            <div class="form-check">
                <input class="form-check-input" type="checkbox" v-model="newTodo.isDone" id="isDone">
                <label class="form-check-label" for="isDone">Is Done</label>
            </div>

            <button class="btn btn-primary" @click="addTodo">Add</button>
        </div>
    </div>
    `,
    data: function () {
        return {
            newTodo: {
                description: '',
                isDone: false
            },
            isBusy: false,
            todos: []
        };
    },
    methods: {
        addTodo() {
            myTodoApp.todo.addTodoItem(this.newTodo);
            this.newTodo = { description: '', isDone: false };
            this.todos.push(this.newTodo);

            // Preferrable, you can load entire list of todos again.
            // this.loadTodos();
        },
        async loadTodos() {
             if (!abp.auth.isGranted('Todo')) {
                return;
            }
            this.isBusy = true;
            this.todos = await myTodoApp.todo.getAll();
            this.isBusy = false;
        }
    },
    mounted() {
        this.loadTodos();
    }
});
And see the result:
Since we use abp.auth.isGranted() to check the authorization, we can see the component only if we have the permission.
Whenever you remove Todo.Create permission, you can see the component is not rendered.
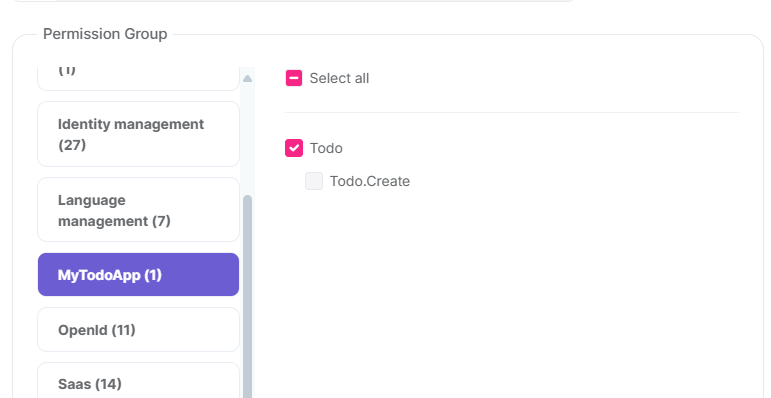
You won't see the card footer:


Comments
Berkan Şaşmaz 51 weeks ago
Great article!
Enis Necipoğlu 51 weeks ago
Also I dropped a video about this topic: https://www.youtube.com/watch?v=sZ8iSMovHZs
wilron79 50 weeks ago
Please fix: <message-component :message="'Welcome, @CurrentUser.UserName !'"></todo-component>[
the closing TAG should be </message-component>?
Enis Necipoğlu 50 weeks ago
thanks, you're right. I missed this one, I'm updating it
Duncan W 32 weeks ago
I watched the video and abp/vue appears to be built with Vue 2? There was a deprecated warning when the package was installed.
Are there plans to update this package to use Vue 3?