What's new in Angular 16? New Features and Updates
Hi everyone, in this article we'll talk about the new features and improvments of Angular v16 that published at May 3, 2023. There are many good features and improvements in this version. Let's get started!
First of all This version(v16) is stable but some API's still in the developer preview!
Syntax & features may change in future versions
ngcc is gone
TypeScript 5.0 support (Non-experimental decorators)
Create standalone app with CLI
Esbuild dev server (Dev. preview)
Signals (signal, computed, effect) (Dev. preview)
RxJS Interop (Dev. preview)
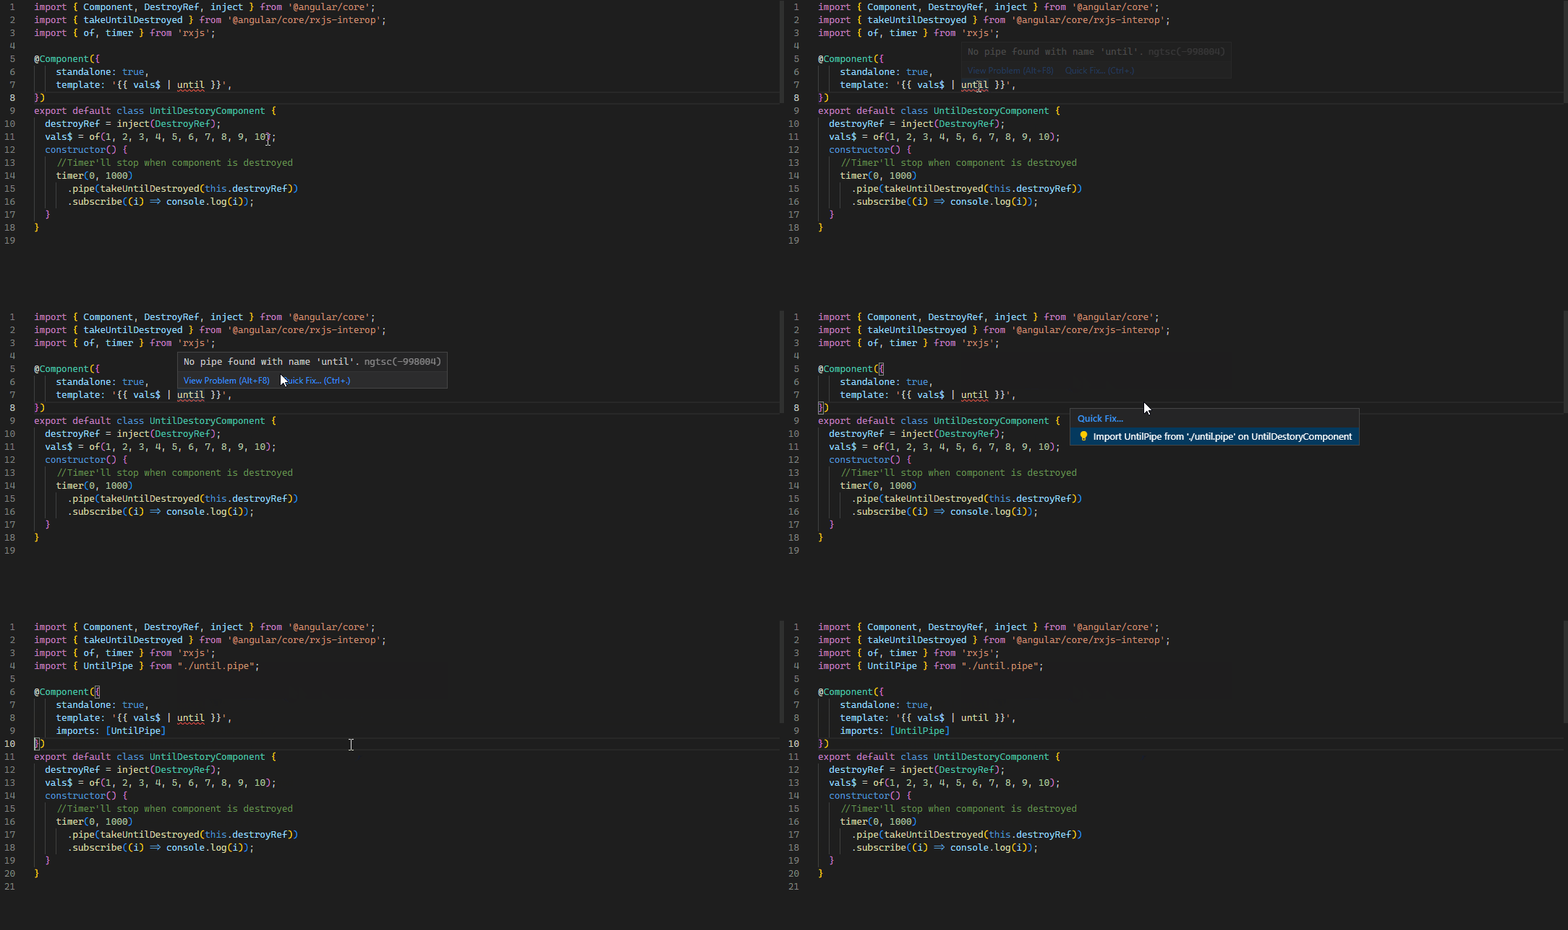
takeUntilDestroyoperator & Flexible ngOnDestroy (DestroyRef class)Autocomplete imports in templates
Required inputs
Input binding with router contexts
Server-side rendering and hydration enhanced
Angular published ngcc with the arrival of ivy in version 9 and it was a compatibility compiler for the old libraries. In angular 16 this support completely removed
PR Detail for removed Compatibility Compiler: https://github.com/angular/angular/pull/49101
In v16 enabling support for TypeScript 5.0 with support for ECMAScript decorators
We were already creating standalone Directive, Component and Pipe with the CLI but now we can also create standalone app with the command below
ng new my-app --standalone
OR
npx -p @angular/cli ng new my-app --standalone
Also with the schematics will convert your code, remove unnecessary NgModules classes and finally change the bootstrap of the project to use standalone APIs
ng generate @angular/core:standalone
Output

You’ll get a simpler project output without any NgModules. Additionally, all the generators in the project will produce standalone directives, components, and pipes
Early tests showed over 72% improvement in cold production builds 🚀
In ng serve now using Vite for the development server, and esbuild powers both your development and production builds
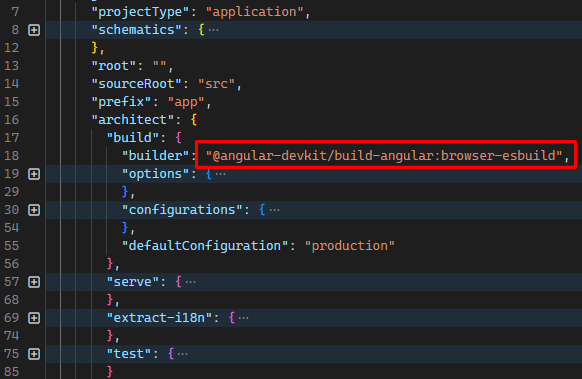
For the test it change
"browser"to"browser-esbuild"suffix inangular.jsonfile.
Last note by Angular team for esbuild
Next we’ll be tackling support for i18n before we graduate this project out of developer preview
Compare with browser and browser-esbuild
browser-esbuild

browser (Initial)

browser Cached (After first build)

First off all let me drop the Discussion
Also here's the documentation
Maybe it can be the game changer for Angular. Because we were using rxjs for reactivity and it was hard to learn
Let's take a look the defination of signals from documentation
- A signal is a wrapper around a value that can notify interested consumers when that value changes.
- Signals can contain any value, from simple primitives to complex data structures.
- A signal's value is always read through a getter function, which allows Angular to track where the signal is used.
Signals may be either writable or read-only
There are definations and examples of signals from documentation but I'll show you some examples from my side
Signal
import { Component, WritableSignal } from "@angular/core";

@Component({
  selector: "app-quantity",
  template: `<p>Quantity: {{ quantity() }}</p>`,
})
export class QuantityComponent {
  /**
   * We don't have to define the type of the signal
   * It'll automatically detect the type of the signal
   * In this case it's: WritableSignal<number>
   **/
  quantity = signal(0);

  setQuantity(amount: number) {
    //Set the quantity by the given amount
    this.quantity.set(amount);
  }

  updateQuantity(amount: number) {
    //Increment the quantity by the given amount
    this.quantity.update((curr) => curr + amount);
  }
}
const todos = signal([{ title: "Write an article about signals", done: false }]);

todos.mutate((value) => {
  // Change the first TODO in the array to 'done: true' without replacing it.
  value[0].done = true;
});
Computed signals
Computed signals are not writable signalsComputed signal dependencies are dynamicwhich means Only the signals actually read during the derivation are tracked. For example, in this computed the quantity signal is only read conditionally
const TAX_RATE = 0.18;

const price = signal(100);
const quantity = signal(1);
//computed function returns a read-only signal
const total: Signal<number> = computed(() => {
  if (price() > 0) {
    return price() * quantity() * (1 + TAX_RATE);
  }
  return 0;
});

console.log(total()); // 118
total.set(200); // Error: Cannot set a computed signal
Effects
Effects are using for creating side effects like console.log or alert etc.
const price = signal(1);
const quantity = signal(1);
const total = computed(() => {
  if (price() > 0) {
    return price() * quantity();
  }
  return 0;
});

effect(() => {
  console.log("Total:", total());
  /**
   * Output: Total: 0
   * effects will always get the latest value
   **/
});

price.update((curr) => curr + 1); //Total: 2
price.update((curr) => curr + 1); //Total: 3
price.update((curr) => curr + 1); //Total: 4
price.update((curr) => curr + 1); //Total: 5

price.set(0); //Total: 0
Reading without tracking dependencies
effect(() => {
  console.log("Total:", untracted(total));
  /**
   * Output: Total: 0
   * Normally it should be 0 and after 2 second 100, but we used untracked function
   * that's why it'll just get the last value and it'll not track the dependencies
   **/
});

price.update((curr) => curr + 1); //Total: 2
price.update((curr) => curr + 1); //Total: 3

price.set(0); //Total: 0

setTimeout(() => {
  price.set(100);
}, 2000);
Comparing signals with rxjs
Let's get the people and count them
//people.service.ts

//Signals
readonly people = signal(PEOPLE);
readonly count = computed(() => this.people().length);

//Rxjs
private readonly _peopleSubject = new BehaviorSubject<Person[]>(PEOPLE);

get people$(): Observable<Person[]> {
  return this._peopleSubject.asObservable();
}
get count$(): Observable<number> {
  return this.people$.pipe(map((people) => people.length));
}
Filter by department
//people.service.ts

filterByDepartmentSignal(name: string): void {
  name = name.toLowerCase();
  this.people.update(() =>
    !name
      ? PEOPLE
      : PEOPLE.filter(({ department }) => department.toLowerCase() === name)
  );
}

filterByDepartmentRxjs(name: string): void {
  name = name.toLowerCase();
  this._peopleSubject.next(
    !name
      ? PEOPLE
      : PEOPLE.filter(({ department }) => department.toLowerCase() === name)
  );
}
Add to list
addSignal(person: Person): void {
  this.people.update((people) => [...people, person]);
}

addRxjs(person: Person): void {
  const { value } = this._peopleSubject;
  this._peopleSubject.next([...value, person]);
}
Remove from list
//people.service.ts

removeSignal(id: number): void {
  this.people.update((people) => people.filter((p) => p.id !== id));
}

removeRxjs(id: number): void {
  const { value } = this._peopleSubject;
  this._peopleSubject.next(value.filter((person) => person.id !== id));
}
Like the async pipe, toSignal subscribes to the Observable immediately, which may trigger side effects. The subscription created by toSignal automatically unsubscribes from the given Observable upon destruction of the the component in which toSignal is called.
- In observable cases, the initial value is important because toSignals cannot know that its value will arrive immediately or with a delay.
toSignal
import { Component, inject } from "@angular/core";
import { HttpClient } from "@angular/common/http";
import { toSignal } from "@angular/core/rxjs-interop";
import { Member } from "../models";

const GITHUB_API = "https://api.github.com/orgs/volosoft/public_members";

@Component({
  standalone: true,
  selector: "app-member",
  template: `
    <div class="row">
      <div class="col-sm-12 col-md-6 col-lg-3 mb-2" *ngFor="let member of gitHubService.members()">
        <div class="card card-member">
          <div class="card-header text-center">
            <a class="text-primary text-decoration-none" [href]="member.html_url" target="_blank">{{ member.login }} </a>
          </div>
          <div class="card-body d-flex justify-content-center">
            <img width="250" height="250" style="border-radius: 10rem; border: 0.1rem solid #ccc" [src]="member.avatar_url" class="img-fluid" />
          </div>
        </div>
      </div>
    </div>
  `,
})
export class MemberComponent {
  private readonly http = inject(HttpClient);
  readonly members = toSignal(this.http.get<Member[]>(GITHUB_API), {
    initialValue: [],
  });
}
Output

toObservable
import { Component, signal } from '@angular/core';

@Component(...)
export class SearchResults {
  query: Signal<string> = inject(QueryService).query;
  query$ = toObservable(this.query);

  results$ = this.query$.pipe(
    switchMap(query => this.http.get('/search?q=' + query))
  );
}
Operator which completes the Observable when the calling context (component, directive, service, etc) is destroyed.
import { Component, DestroyRef, inject } from "@angular/core";
import { takeUntilDestroyed } from "@angular/core/rxjs-interop";
import { timer } from "rxjs";

@Component({
  standalone: true,
  template: "",
})
export default class UntilDestoryComponent {
  destroyRef = inject(DestroyRef);
  constructor() {
    this.destroyRef.onDestroy(console.clear);
    //Timer'll stop and clear the console when component is destroyed
    timer(0, 1000).pipe(takeUntilDestroyed(this.destroyRef)).subscribe(console.log);
  }
}

@Component({
  standalone: true,
  selector: "app-required-input",
  template: `{{ internalName }}`,
})
export class RequiredInputComponent {
  /**
   * What the hack is this? "internalName!"
   * We already mark as required but TS compiler still don't know that.
   * decarators not effects to the TS compiler. For type safety we need to use "!".
   * Angular team will bring a new function like input('name')...
   */
  @Input({ required: true, alias: "name" }) internalName!: string;
}
Usage
import { RequiredInputComponent } from "./path-to-component";

@Component({
  standalone: true,
  selector: "my-app",
  imports: [RequiredInputComponent],
  template: `<app-required-input [name]="myName" />`,
})
export default class AppComponent {
  myName = "Masum";
}
If we do not pass the name input, it will give an error as follows

import { Component, Input } from "@angular/core";

@Component({
  standalone: true,
  selector: "app-input-binding",
  template: `<h1>Input binding value: {{ title }}</h1>`,
})
export default class InputBindingComponent {
  @Input() title: string | undefined | null;
}

/**
  {
    path: 'req-inputs/:title',
    loadComponent: () => import('./components/required-inputs.component'),
    resolve: { title: () => 'Hello World!' },
  }

  Priority
  1: resolve: { title: () => 'masum' },
  2: route param: localhost/input-binding/masum
  3: query param: localhost/input-binding?title=masum
 */
Sooo What is hydration ?
Simply define: Hydration is the process that restores the server-side rendered application to the client
Why is hydration important?
Hydration improves application performance by avoiding extra work to re-create DOM nodes
It's really easy to apply hydration in Angular 16
import {
  bootstrapApplication,
  provideClientHydration,
} from '@angular/platform-browser';
...

bootstrapApplication(RootCmp, {
  providers: [provideClientHydration()]
});
That's all, your application is working with the hydration now!
What's next for hydration? Check out the roadmap
//app.config.server.ts

import { mergeApplicationConfig, ApplicationConfig } from "@angular/core";
import { provideServerRendering } from "@angular/platform-server";
import { appConfig } from "./app.config";
import { REQ_TOKEN } from "./req.token";

const serverConfig: ApplicationConfig = {
  providers: [
    provideServerRendering(),
    {
      provide: REQ_TOKEN,
      useValue: "https://jsonplaceholder.typicode.com/users",
    },
  ],
};

export const config = mergeApplicationConfig(appConfig, serverConfig);
//app.config.ts

import { ApplicationConfig } from "@angular/core";
import { provideClientHydration } from "@angular/platform-browser";
import { REQ_TOKEN } from "./req.token";

export const appConfig: ApplicationConfig = {
  providers: [
    provideClientHydration(),
    {
      provide: REQ_TOKEN,
      useValue: "https://api.github.com/users",
    },
  ],
};
//app.component.ts

import { AsyncPipe, NgFor } from "@angular/common";
import { HttpClient, HttpClientModule } from "@angular/common/http";
import { Component, inject } from "@angular/core";
import { Observable, delay } from "rxjs";
import { REQ_TOKEN } from "./req.token";

interface User {
  id: number;
  name: string;
  login: string;
}

@Component({
  selector: "app-root",
  standalone: true,
  imports: [NgFor, AsyncPipe, HttpClientModule],
  template: `
    <div class="container mt-2">
      <div class="card">
        <div class="card-header">
          <h3>Users</h3>
        </div>
        <div class="card-body">
          <table class="table table-border table-hover">
            <thead>
              <tr>
                <th>Id</th>
                <th>Name</th>
              </tr>
            </thead>

            <tbody>
              <tr *ngFor="let user of users$ | async">
                <td>{{ user.id }}</td>
                <td>{{ user?.name || user.login }}</td>
              </tr>
            </tbody>
          </table>
        </div>
      </div>
    </div>
  `,
})
export class AppComponent {
  private readonly URL = inject(REQ_TOKEN);
  private readonly http = inject(HttpClient);

  readonly users$ = this.http.get<User[]>(this.URL).pipe(delay(1000));
}
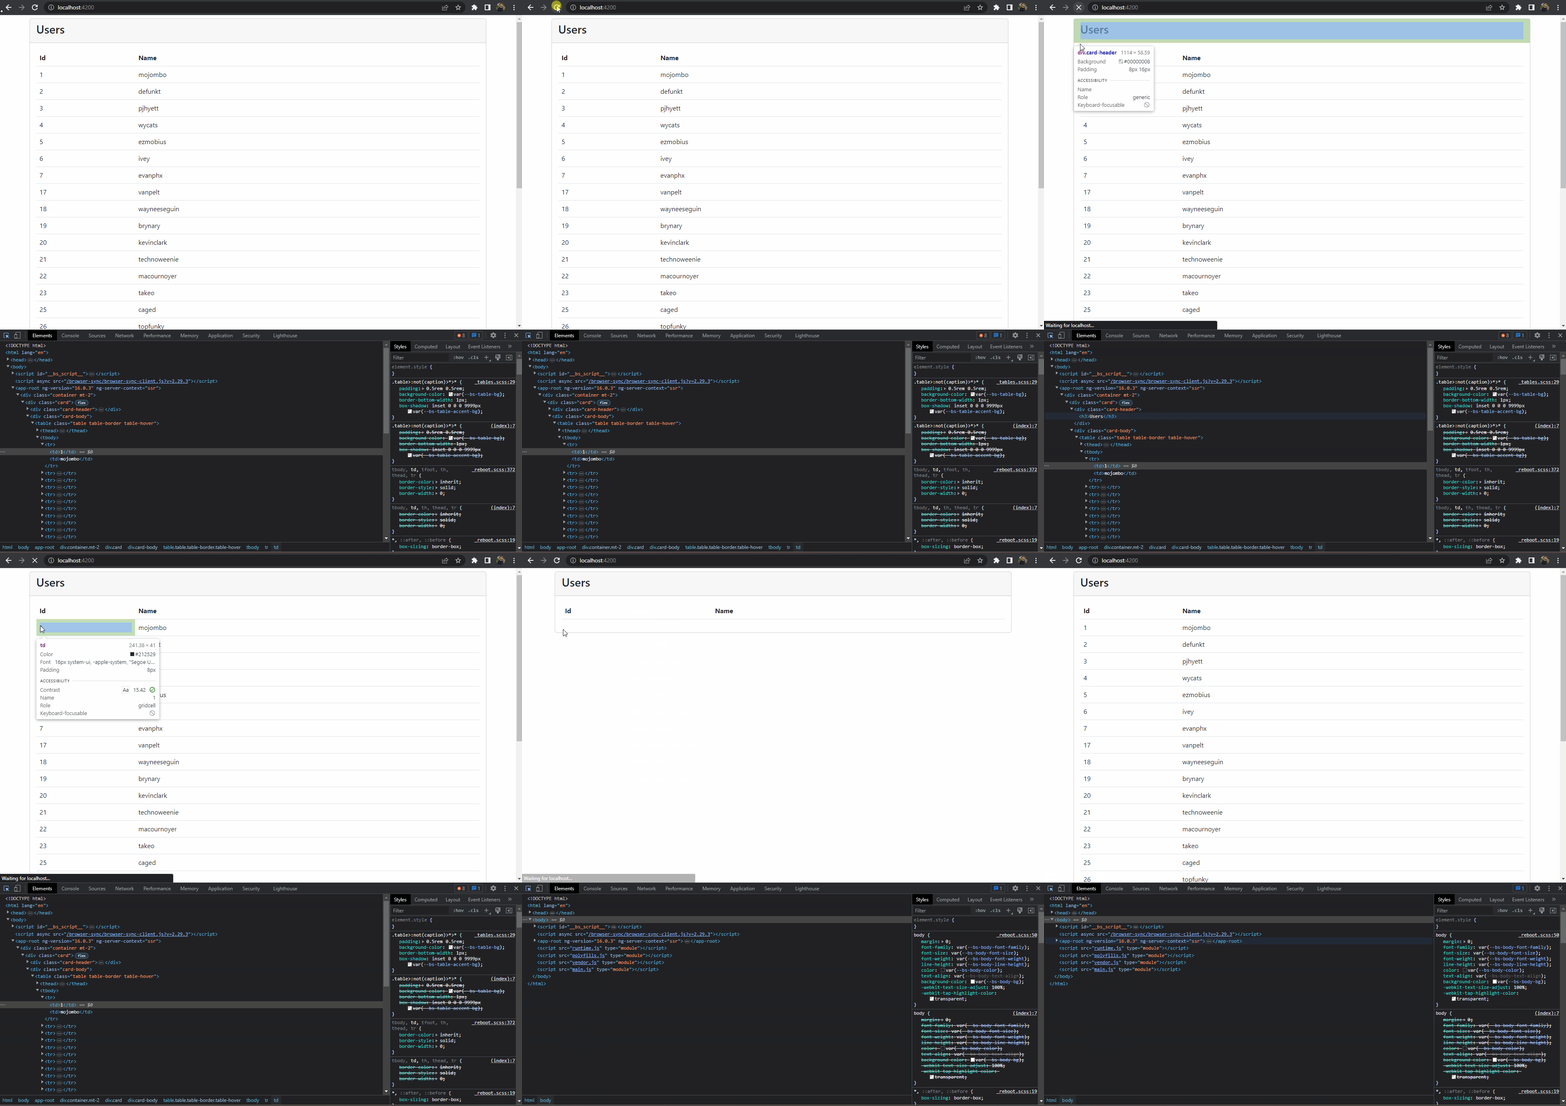
SSR Without Hydration

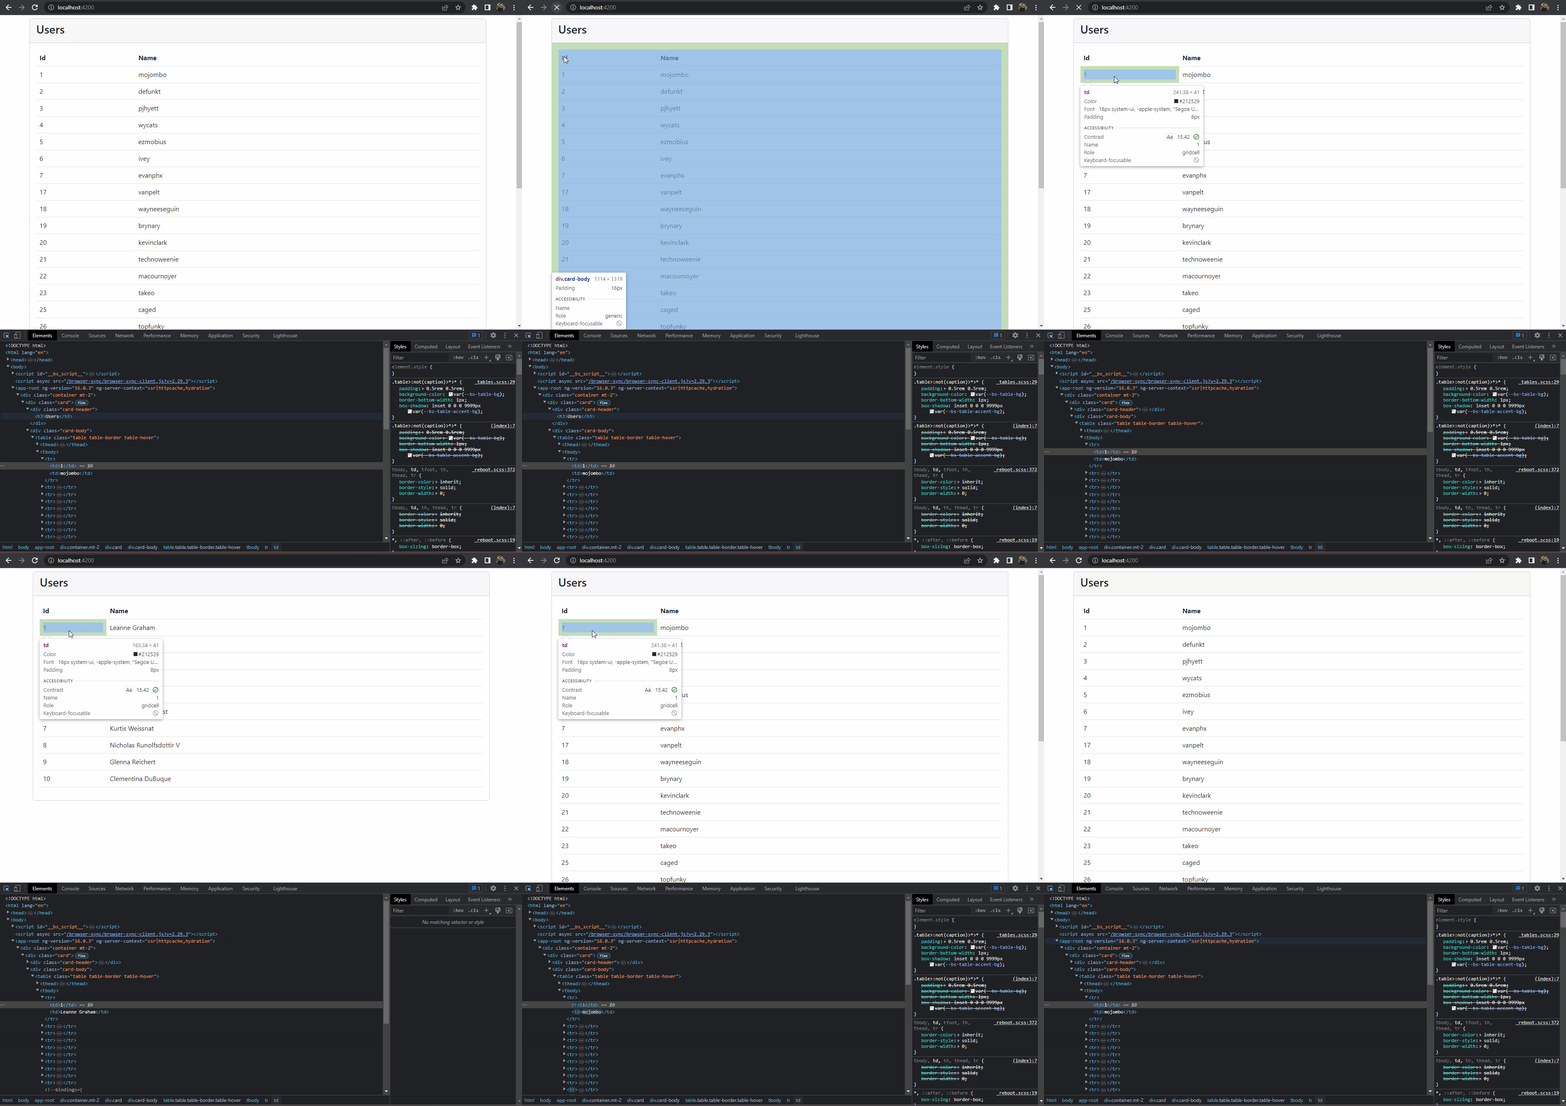
SSR With Hydration

If we look at the carrefully we can see that the SSR with hydration is not re-rendering the whole page, it's just re-rendering the table body.
As we can see, Angular 16 is a huge update and it's coming with a lot of new features. On ABP side we are really excited about the new features and we are looking forward to using them in our projects. We hope you are excited too! If you have any questions or feedback, please let us know in the comments section below. Thanks for reading, see you in the next blog post!👋👋
- Angular blog -
Minko Gechev: https://blog.angular.io/angular-v16-is-here-4d7a28ec680d - Angular documantation: https://angular.io/guide/signals
- InfoWorld - Paul Krill: https://www.infoworld.com/article/3695589/angular-16-previews-new-reactivity-model.html
- Medium - Gaurav Mukherjee: https://itnext.io/angular-16-is-huge-67288a3ff58b
- Medium - Fatima: https://medium.com/gitconnected/angular-16-is-making-big-noise-6a06e9808788
- Twitter Hydration: https://twitter.com/angular/status/1658185482847543311


Comments
Sinan Öztürk 116 weeks ago
Great article