How to use .NET Aspire with ABP framework
.NET Aspire is an opinionated, cloud-ready stack designed for building observable, production-ready, and distributed applications. On the other hand, the ABP framework offers a complete, modular and layered software architecture based on Domain Driven Design principles and patterns. This guide explores how to combine .NET Aspire with ABP, enabling developers to create observable, and feature-rich applications.
When to Use .NET Aspire?
Using .NET Aspire with the ABP framework can be beneficial in various scenarios where you need to combine the strengths of both technologies. Here are some situations when using .NET Aspire with ABP can be advantageous:
- Enterprise Web Applications: ABP is well-suited for building enterprise web applications with its opinionated architecture and best practices. When combined with .NET Aspire, you can leverage ABP's features for rapid development of user interfaces, backend services, and business logic while benefiting from .NET Aspire's cloud-native capabilities and observability features.
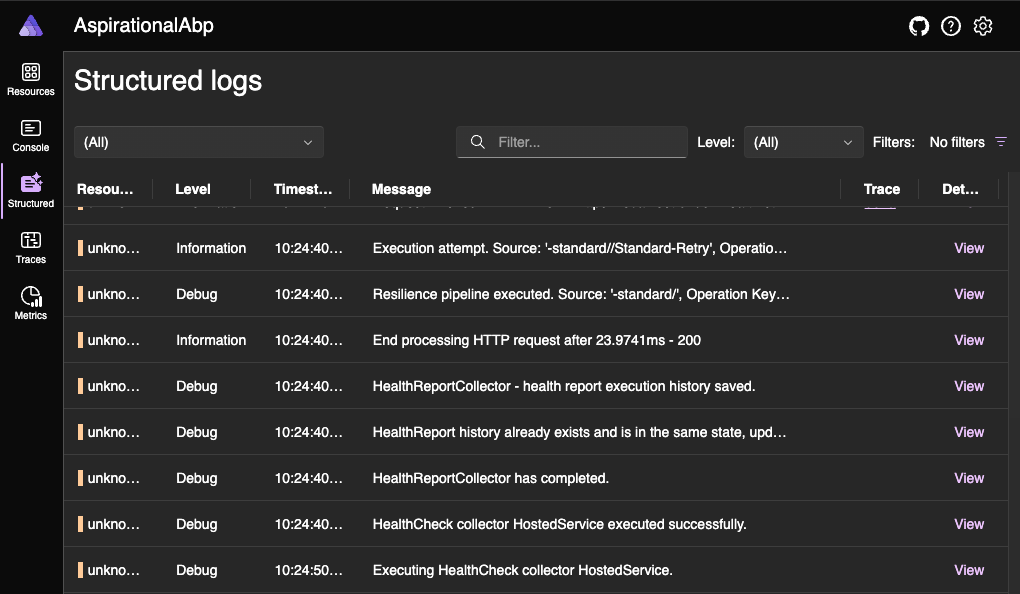
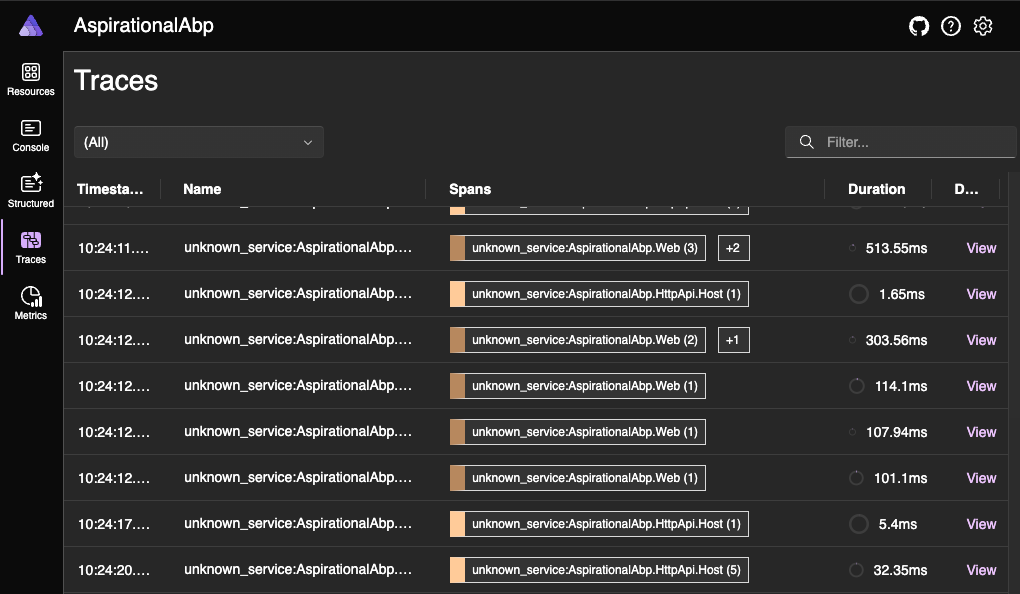
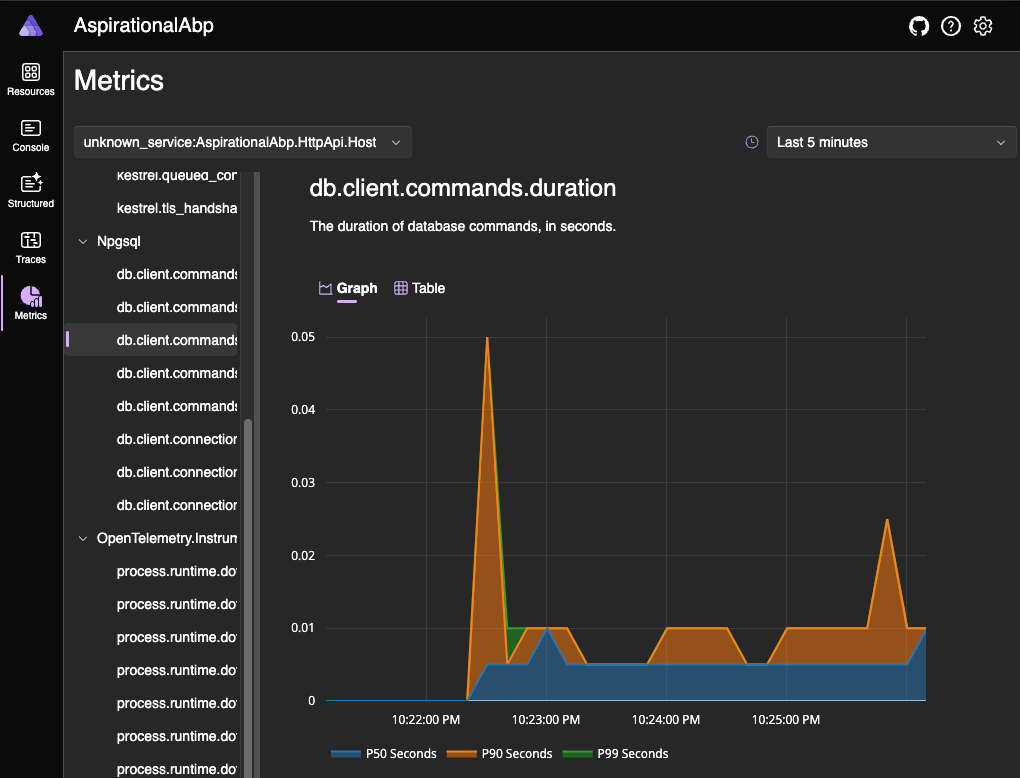
- Observability and Monitoring: .NET Aspire's emphasis on observability, including logging, monitoring, and tracing, can enhance ABP applications by providing deeper insights into system behavior, performance metrics, and diagnostics, which is key for maintaining and optimizing enterprise-grade applications.
Creating a new ABP Solution
To demonstrate the usage of .NET Aspire with the ABP framework, I've created an ABP solution. If you want to create the same solution from scratch, follow the steps below:
Install the ABP CLI if you haven't installed it before:
dotnet tool install -g Volo.Abp.Cli
Create a new solution with the ABP framework's Application Startup Template with Tiered MVC UI and EF Core database:
abp new AspirationalAbp -u mvc --database-provider ef -dbms PostgreSQL --csf --tiered
The startup template selection matters for this article. I chose these options so that the demo solution can cover complex scenarios.
Disclaimer-I: This article is based on version 8.0.1 of .NET Aspire and version 8.2.0 of ABP Framework.
Disclaimer-II: ABP and .NET Aspire may not be fully compatible in some respects. This article aims to explain how these two technologies can be used together in the simplest way possible, even if they are not fully compatible.
Add .NET Aspire
After creating the solution, run the following commands in the src folder of your solution to add .NET Aspire:
// Adding AppHost
dotnet new aspire-apphost -n AspirationalAbp.AppHost
dotnet sln ../AspirationalAbp.sln add ./AspirationalAbp.AppHost/AspirationalAbp.AppHost.csproj

// Adding ServiceDefaults
dotnet new aspire-servicedefaults -n AspirationalAbp.ServiceDefaults
dotnet sln ../AspirationalAbp.sln add ./AspirationalAbp.ServiceDefaults/AspirationalAbp.ServiceDefaults.csproj
These commands add two new projects to the solution:
- AspirationalAbp.AppHost: An orchestrator project designed to connect and configure the different projects and services of your app.
- AspirationalAbp.ServiceDefaults: A .NET Aspire shared project to manage configurations that are reused across the projects in your solution related to resilience, service discovery, and telemetry.
We have added .NET Aspire to our ABP based solution, but we have not registered our projects in the .NET Aspire orchestration. Now, let's enroll our projects, which implement the db migrator, web user interface, API, and auth, in .NET Aspire orchestration.
Registering projects to .NET Aspire orchestration
First of all, we need to add the reference of related projects to the AspirationalAbp.AppHost project. For this, add the following ItemGroups to the AspirationalAbp.AppHost/AspirationalAbp.AppHost.csproj file:
<ItemGroup>
  <ProjectReference Include="..\AspirationalAbp.AuthServer\AspirationalAbp.AuthServer.csproj" />
  <ProjectReference Include="..\AspirationalAbp.HttpApi.Host\AspirationalAbp.HttpApi.Host.csproj" />
  <ProjectReference Include="..\AspirationalAbp.Web\AspirationalAbp.Web.csproj"/>
  <ProjectReference Include="..\AspirationalAbp.DbMigrator\AspirationalAbp.DbMigrator.csproj" />
</ItemGroup>

<ItemGroup>
  <PackageReference Include="Aspire.Hosting.PostgreSQL" Version="8.0.1" />
  <PackageReference Include="Aspire.Hosting.Redis" Version="8.0.1" />
</ItemGroup>
With the first ItemGroup, we added the references of AuthServer, HttpApi.Host, Web, and DbMigrator projects to the app host project. So, we can orchestrate them within the app model.
With the second ItemGroup, to model the PostgreSQL server resource and Redis resource in the app host, installed the Aspire.Hosting.PostgreSQL and Aspire.Hosting.Redis
Now let's update the Program class of the AspirationalAbp.AppHost project as follows:
using Microsoft.Extensions.Hosting;

var builder = DistributedApplication.CreateBuilder(args);

var postgres = builder
    .AddPostgres("postgres")
    .AddDatabase("AspirationalAbp");

var redis = builder.AddRedis("redis");

// DbMigrator
if (builder.Environment.IsDevelopment())
{
    builder
        .AddProject<Projects.AspirationalAbp_DbMigrator>("dbMigrator")
        .WithReference(postgres, "Default")
        .WithReference(redis, "Redis")
        .WithReplicas(1);
}

// AuthServer
var authServerLaunchProfile = "AspirationalAbp.AuthServer";
builder
    .AddProject<Projects.AspirationalAbp_AuthServer>("authserver", launchProfileName: authServerLaunchProfile)
    .WithExternalHttpEndpoints()
    .WithReference(postgres, "Default")
    .WithReference(redis);

// HttpApi.Host
var httpApiHostLaunchProfile = "AspirationalAbp.HttpApi.Host";
builder
    .AddProject<Projects.AspirationalAbp_HttpApi_Host>("httpapihost", launchProfileName: httpApiHostLaunchProfile)
    .WithExternalHttpEndpoints()
    .WithReference(postgres, "Default")
    .WithReference(redis);

// Web
builder
    .AddProject<Projects.AspirationalAbp_Web>("web", "AspirationalAbp.Web")
    .WithReference(redis);

builder.Build().Run();
With the code above, the following operations were performed below:
- Creates an
IDistributedApplicationBuilderinstance by callingDistributedApplication.CreateBuilder(args). - Adds PostgreSQL and the
AspirationalAbpdatabase. - Adds Redis.
- Adds the
DbMigratorproject with references to PostgreSQL and Redis, ensuring one replica in development. - Adds the
AuthServerproject with external HTTP endpoints, referencing PostgreSQL and Redis. - Adds the
HttpApi.Hostproject with external HTTP endpoints, referencing PostgreSQL and Redis. - Adds the
Webproject, referencing Redis. - Builds and runs the application.
Now let's make the projects we added to the app host compatible with .NET Aspire.
Configuring Projects for Aspire
To make the AspirationalAbp.DbMigrator, AspirationalAbp.AuthServer, AspirationalAbp.HttpApi.Host, and AspirationalAbp.Web projects compatible with .NET Aspire, we need to add and configure several packages. For that, we need to add the Aspire.StackExchange.Redis package to all these projects and the Aspire.Npgsql.EntityFrameworkCore.PostgreSQL package to the AspirationalAbp.EntityFrameworkCore project. Additionally, we will add the AspirationalAbp.ServiceDefaults reference to host projects except AspirationalAbp.DbMigrator. Also, we need to convert Serilog events into OpenTelemetry LogRecords, for that we will add a Serilog.Sinks.OpenTelemetry reference to host projects. Let's begin with configuring AspirationalAbp.DbMigrator.
AspirationalAbp.DbMigrator
First, let's add the Aspire.StackExchange.Redis, and Serilog.Sinks.OpenTelemetry packages to the AspirationalAbp.DbMigrator project. For this, let's run the following .NET CLI command inside the AspirationalAbp.DbMigrator project:
dotnet add package Aspire.StackExchange.Redis --version 8.0.1
dotnet add package Serilog.Sinks.OpenTelemetry --version 4.0.0-dev-00313
Then let's override the PreConfigureServices method in AspirationalAbpDbMigratorModule as below:
public override void PreConfigureServices(ServiceConfigurationContext context)
{
    var configuration = context.Services.GetConfiguration();
    configuration["Redis:Configuration"] = configuration["ConnectionStrings:Redis"];
}
To use the OpenTelemetry sink we have installed the Serilog.Sinks.OpenTelemetry package and now let's enable the sink. For this, let's write the following code block just before calling the CreateLogger method in the logger configuration in Program.cs:
/// .WriteTo.Async(c => c.Console())
.WriteTo.Async(c => c.OpenTelemetry())
/// .CreateLogger();
Now let's continue with AspirationalAbp.EntityFrameworkCore.
AspirationalAbp.EntityFrameworkCore
Now let's add the Aspire.Npgsql.EntityFrameworkCore.PostgreSQL package to the AspirationalAbp.EntityFrameworkCore project. For this, you can run the following command in the AspirationalAbp.EntityFrameworkCore project:
dotnet add package Aspire.Npgsql.EntityFrameworkCore.PostgreSQL --version 8.0.1
Now let's continue with AspirationalAbp.AuthServer.
AspirationalAbp.AuthServer
First, let's add the Serilog.Sinks.OpenTelemetry, Aspire.StackExchange.Redis and AspirationalAbp.ServiceDefaults packages to the AspirationalAbp.AuthServer project. For this, let's run the following .NET CLI command inside the AspirationalAbp.AuthServer project:
dotnet add package Aspire.StackExchange.Redis --version 8.0.1
dotnet add reference ../AspirationalAbp.ServiceDefaults/AspirationalAbp.ServiceDefaults.csproj
dotnet add package Serilog.Sinks.OpenTelemetry --version 4.0.0-dev-00313
Then add the following code block after defining the builder variable in Program.cs:
builder.AddServiceDefaults();
builder.AddRedisClient("redis");
builder.AddNpgsqlDbContext<AspirationalAbpDbContext>("Default",
    options =>
    {
        options.DisableRetry = true;
    });
Then add the following code to the PreConfigureServices method in the AspirationalAbpAuthServerModule class:
configuration["Redis:Configuration"] = configuration["ConnectionStrings:Redis"];
To use the OpenTelemetry sink we have installed the Serilog.Sinks.OpenTelemetry package and now let's enable the sink. For this, let's write the following code block just before calling the CreateLogger method in logger configuration in Program.cs:
/// .WriteTo.Async(c => c.Console())
.WriteTo.Async(c => c.OpenTelemetry())
/// .CreateLogger();
So far we have made AspirationalAbp.DbMigrator, AspirationalAbp.EntityFrameworkCore, and AspirationalAbp.AuthServer compatible with .NET Aspire. Now let's continue with AspirationalAbp.HttpApi.Host.
AspirationalAbp.HttpApi.Host
First, let's add the Serilog.Sinks.OpenTelemetry, Aspire.StackExchange.Redis and AspirationalAbp.ServiceDefaults packages to the AspirationalAbp.HttpApi.Host project. For this, let's run the following .NET CLI command inside the AspirationalAbp.HttpApi.Host project:
dotnet add package Aspire.StackExchange.Redis --version 8.0.1
dotnet add reference ../AspirationalAbp.ServiceDefaults/AspirationalAbp.ServiceDefaults.csproj
dotnet add package Serilog.Sinks.OpenTelemetry --version 4.0.0-dev-00313
Then add the following code block after defining the builder variable in Program.cs:
builder.AddServiceDefaults();
builder.AddRedisClient("redis");
builder.AddNpgsqlDbContext<AspirationalAbpDbContext>("Default",
    options =>
    {
        options.DisableRetry = true;
    });
Then let's override the PreConfigureServices method in AspirationalAbpHttpApiHostModule as below:
public override void PreConfigureServices(ServiceConfigurationContext context)
{
    var configuration = context.Services.GetConfiguration();
    configuration["Redis:Configuration"] = configuration["ConnectionStrings:Redis"];
}
To use the OpenTelemetry sink we have installed the Serilog.Sinks.OpenTelemetry package and now let's enable the sink. For this, let's write the following code block just before calling the CreateLogger method in the logger configuration in Program.cs:
/// .WriteTo.Async(c => c.Console())
.WriteTo.Async(c => c.OpenTelemetry())
/// .CreateLogger();
Finally, let's make AspirationalAbp.Web compatible with .NET Aspire.
AspirationalAbp.Web
First, let's add the Serilog.Sinks.OpenTelemetry, Aspire.StackExchange.Redis and AspirationalAbp.ServiceDefaults packages to the AspirationalAbp.Web project. For this, let's run the following .NET CLI command inside the AspirationalAbp.Web project:
dotnet add package Aspire.StackExchange.Redis --version 8.0.1
dotnet add reference ../AspirationalAbp.ServiceDefaults/AspirationalAbp.ServiceDefaults.csproj
dotnet add package Serilog.Sinks.OpenTelemetry --version 4.0.0-dev-00313
Then add the following code block after defining the builder variable in Program.cs:
builder.AddServiceDefaults();
builder.AddRedisClient("redis");
Then add the following code to the PreConfigureServices method in the AspirationalAbpWebModule class:
var configuration = context.Services.GetConfiguration();
configuration["Redis:Configuration"] = configuration["ConnectionStrings:Redis"];
To use the OpenTelemetry sink we have installed the Serilog.Sinks.OpenTelemetry package and now let's enable the sink. For this, let's write the following code block just before calling the CreateLogger method in logger configuration in Program.cs:
/// .WriteTo.Async(c => c.Console())
.WriteTo.Async(c => c.OpenTelemetry())
/// .CreateLogger();
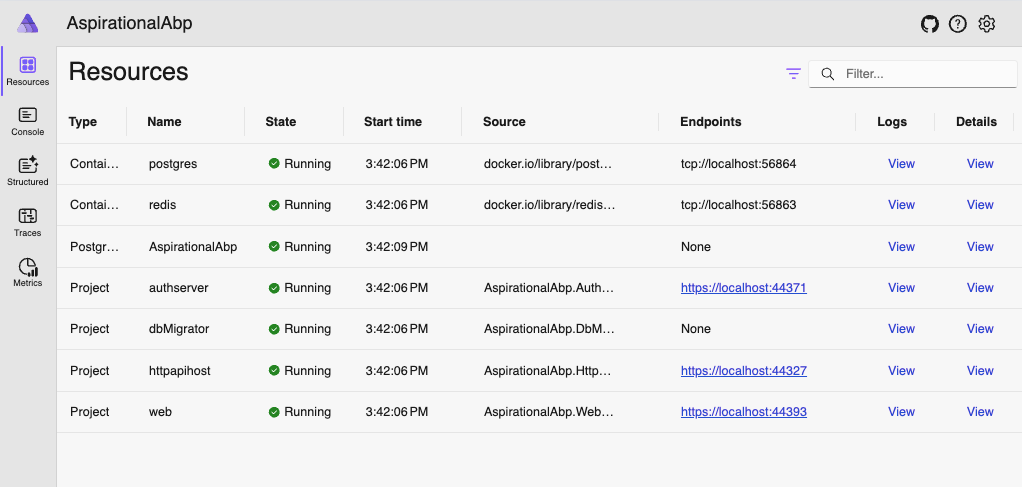
After making all our changes, we can run the AspirationalAbp.AppHost project.


Conclusion
Combining .NET Aspire with the ABP framework creates a powerful setup for building robust, observable, and feature-rich applications. By integrating Aspire's observability and cloud capabilities with ABP's approach of focusing on your business without repeating yourself, you can develop feature-rich, scalable applications with enhanced monitoring and seamless cloud integration. This guide provides a clear path to set up and configure these technologies, ensuring your applications are well-structured, maintainable, and ready for modern cloud environments.


Comments
Serdar Genc 86 weeks ago
ooo beklediğim blog yazısı gelmiş. teşekkürler Berkan
Berkan Şaşmaz 76 weeks ago
You're welcome, I'm happy you like it :)
Serdar Genc 85 weeks ago
github linki var mı ?
Berkan Şaşmaz 76 weeks ago
Sorry for the late reply, I missed this place :(
Of course, you can access it here
xx2321 78 weeks ago
i don't know why adding the client code in program.cs file since the abp added the client in it's code like: ''builder.AddRedisClient("redis");
builder.AddNpgsqlDbContext<AspirationalAbpDbContext>("Default",
options =>
{
options.DisableRetry = true;
});''
Berkan Şaşmaz 76 weeks ago
Yes, this isn't very pleasant but I had to do this to be fully compatible with .NET Aspire's components. Otherwise, observability features, etc. do not work exactly as expected. The problem is that if you want to use .NET Aspire's components in a fully compatible way, we have to use the extension methods written for IHostApplicationBuilder. The first way is to do as I did in the article and ignore the problem you mentioned. The second way is to understand what .NET Aspire does with these extension methods and do the same in our code, but this code is both difficult to maintain and needs to be done for all common components. As it can be understood, the second way is not the subject of an article and has more disadvantages in my opinion.
Mohamed Ragab Moussa 74 weeks ago
nice , but the question why every time apphost run initialize a new container for db and redis
how we configure it to use exist one ?
Berkan Şaşmaz 74 weeks ago
This will be very simple to do. For PostgreSQL it will be a code similar to the one below:
For more information, please refer to the documents below:
Ahmad Almunajjed 70 weeks ago
Thanks for this article, I have a question, please
in PreConfigureServices, this line is added to configure redis
configuration["Redis:Configuration"] = configuration["ConnectionStrings:Redis"];Berkan Şaşmaz 69 weeks ago
Thank you for your question!
We configure Redis for each project (
HttpApiHost,AuthServer, andWeb) because it's used across these tiers for distributed caching. As for the database, it is configured explicitly in theHttpApiHostandAuthServerprojects, while theWebproject does not have direct database configuration. This is because, in a tiered architecture, theWebproject accesses database records through API calls to theHttpApiHost. If you’re curious about where the database configurations are made, you can search forAddNpgsqlDbContextin the article.Let me know if you have more questions!