Using Elsa Workflow with the ABP Framework
UPDATE: There is a newer version of this article, which covers Elsa 3 with ABP Framework. You can check it at https://abp.io/community/articles/using-elsa-3-workflow-with-abp-framework-usqk8afg
Elsa Core is an open-source workflows library that can be used in any kind of .NET Core application. Using such a workflow library can be useful to implement business rules visually or programmatically.

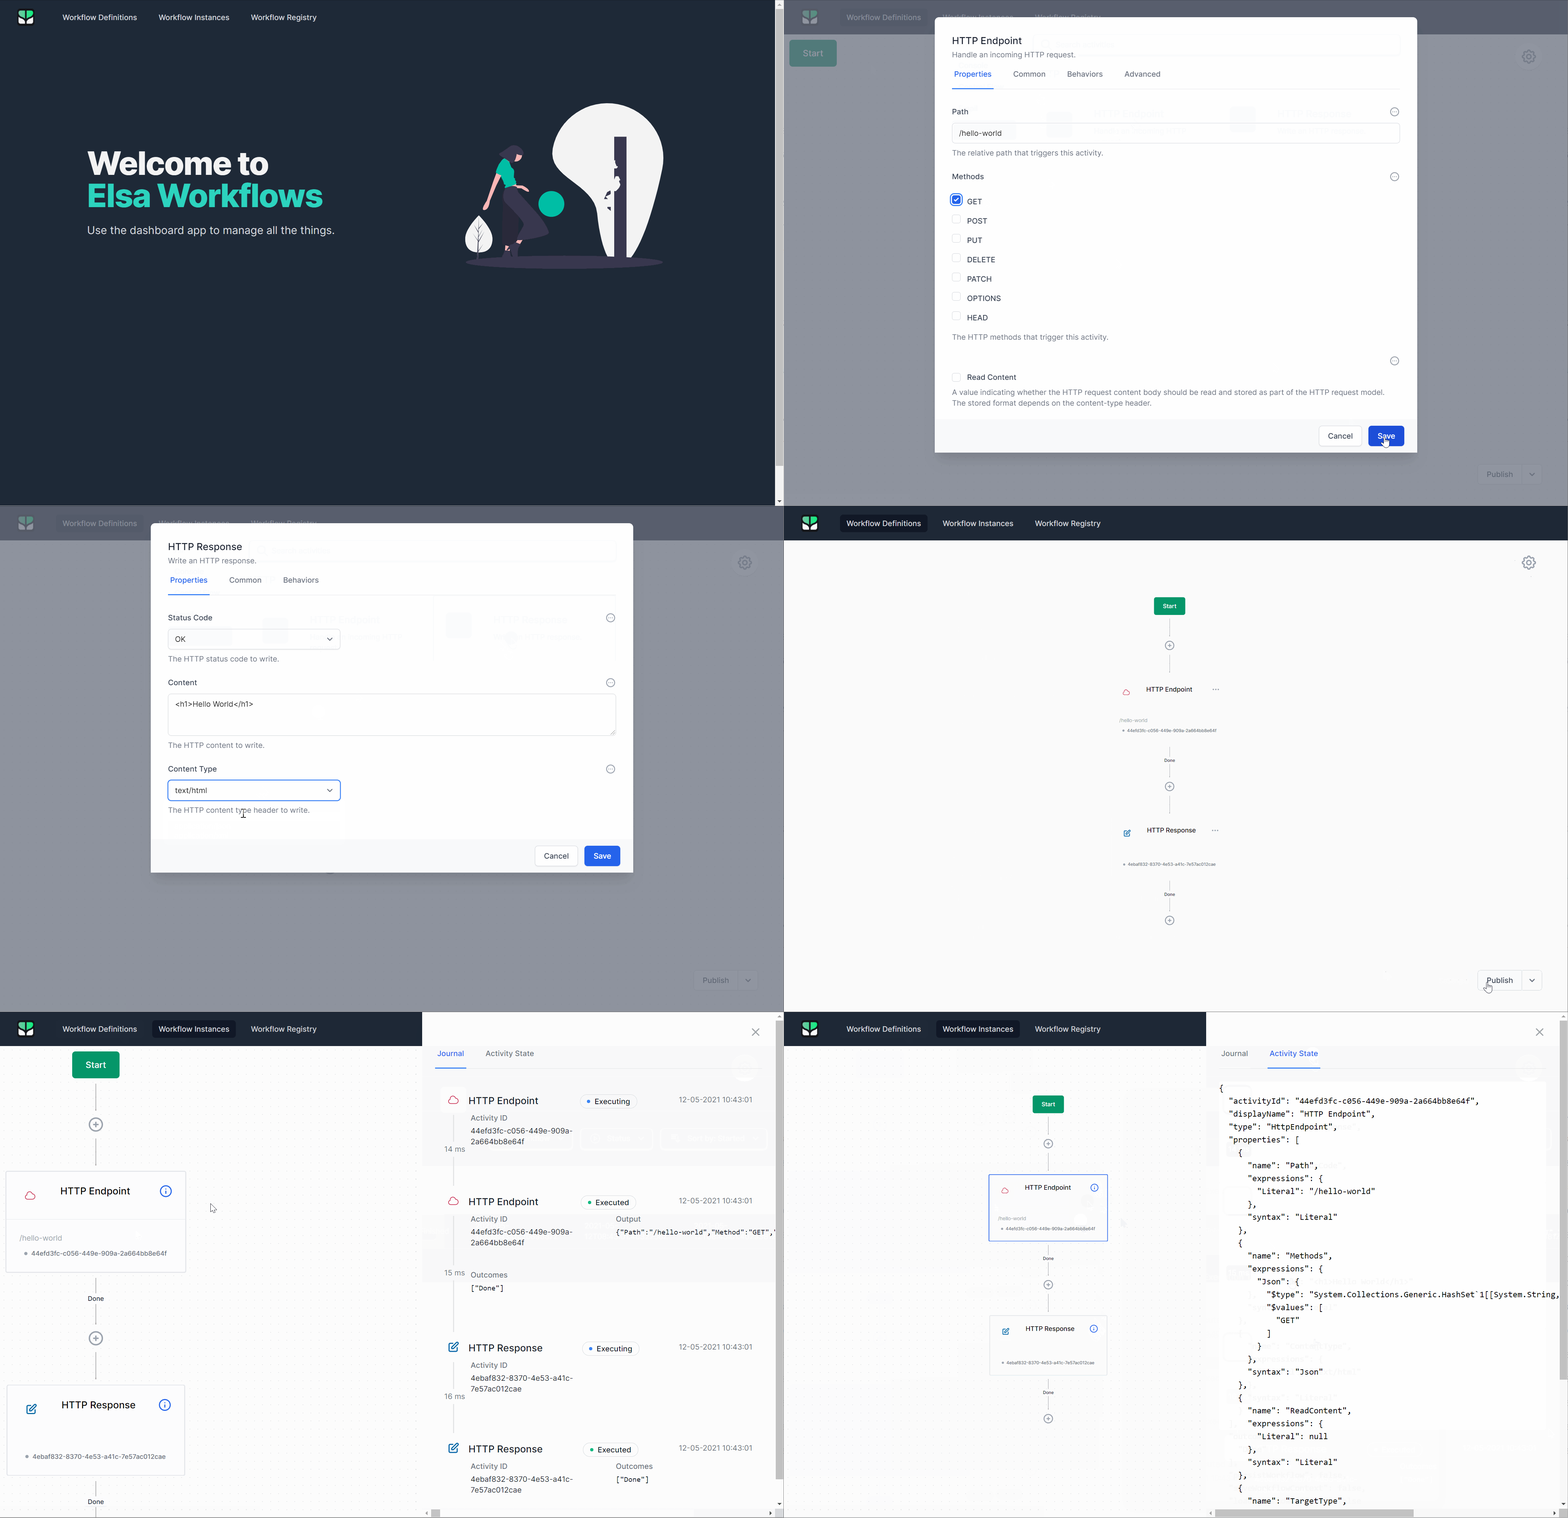
This article shows how we can use this workflow library within our ABP-based application. We will start with a couple of examples and then we will integrate the Elsa Dashboard (you can see it in the above gif) into our application to be able to design our workflows visually.
🛠 Liked this post? I now share all my content on Substack — real-world .NET, AI, and scalable software design.
👉 Subscribe here → engincanveske.substack.com
🎥 Also, check out my YouTube channel for hands-on demos and deep dives: https://www.youtube.com/@engincanv
Source Code
You can find the source of the example solution used in this article here.
Create the Project
In this article, I will create a new startup template with EF Core as a database provider and MVC/Razor-Pages for the UI framework.
If you already have a project with MVC/Razor-Pages or Blazor UI, you don't need to create a new startup template, you can directly implement the following steps to your existing project (you can skip this section).
- We will create a new solution named
ElsaDemo(or whatever you want). We will create a new startup template with EF Core as a database provider and MVC/Razor-Pages for the UI framework by using the ABP CLI:
abp new ElsaDemo
Our project boilerplate will be ready after the download is finished. Then, we can open the solution in the Visual Studio (or any other IDE).
We can run the
ElsaDemo.DbMigratorproject to apply migration into our database and seed initial data.After the database and initial data created, we can run the
ElsaDemo.Webto see our UI working properly.
Default admin username is admin and password is 1q2w3E*
Let's Create The First Workflow (Console Activity)
We can start with creating our first workflow. Let's get started with creating a basic hello-world workflow by using console activity. In this example, we will programmatically define a workflow definition that displays the text "Hello World from Elsa!" to the console using Elsa's Workflow Builder API and run this workflow when the application initialized.
Install Packages
We need to add two packages: Elsa and Elsa.Activities.Console into our ElsaDemo.Web project. We can add these two packages with the following command:
dotnet add package Elsa
dotnet add package Elsa.Activities.Console
- After the packages installed, we can define our first workflow. To do this, create a folder named Workflows and in this folder create a class named
HelloWorldConsole.
using Elsa.Activities.Console;
using Elsa.Builders;

namespace ElsaDemo.Web.Workflows
{
    public class HelloWorldConsole : IWorkflow
    {
        public void Build(IWorkflowBuilder builder) => builder.WriteLine("Hello World from Elsa!");
    }
}
In here we've basically implemented the
IWorkflowinterface which only has one method named Build. In this method, we can define our workflow's execution steps (activities).As you can see in the example above, we've used an activity named WriteLine, which writes a line of text to the console. Elsa Core has many pre-defined activities like that. E.g HttpEndpoint and WriteHttpResponse (we will see them both in the next section).
"An activity is an atomic building block that represents a single executable step on the workflow." - Elsa Core Activity Definition
- After defining our workflow, we need to define service registrations which required for the Elsa Core library to work properly. To do that, open your
ElsaDemoWebModuleclass and update yourElsaDemoWebModulewith the following lines. Most of the codes are abbreviated for simplicity.
using ElsaDemo.Web.Workflows;
using Elsa.Services;

public override void ConfigureServices(ServiceConfigurationContext context)
{
    var hostingEnvironment = context.Services.GetHostingEnvironment();
    var configuration = context.Services.GetConfiguration();

    //...

    ConfigureElsa(context);
}

private void ConfigureElsa(ServiceConfigurationContext context)
{
    context.Services.AddElsa(options =>
    {
        options
            .AddConsoleActivities()
            .AddWorkflow<HelloWorldConsole>();
    });
}

public override void OnApplicationInitialization(ApplicationInitializationContext context)
{
    //...

    var workflowRunner = context.ServiceProvider.GetRequiredService<IBuildsAndStartsWorkflow>();
    workflowRunner.BuildAndStartWorkflowAsync<HelloWorldConsole>();
}
Here we basically, configured Elsa's services in our
ConfigureServicesmethod and after that in ourOnApplicationInitializationmethod we started theHelloWorldConsoleworkflow.If we run the application and examine the console outputs, we should see the message that we defined in our workflow.

Creating A Workflow By Using Http Activities
In this example, we will create a workflow that uses Http Activities. It will basically listen the specified route for incoming HTTP Request and writes back a simple response.
Add Elsa.Activities.Http Package
- To be able to use HTTP Activities we need to add
Elsa(we've already added in the previous section) andElsa.Activities.Httppackages into our web application.
dotnet add package Elsa.Activities.Http
- After the package installed, we can create our workflow. Let's started with creating a class named
HelloWorldHttpunder Workflows folder.
using System.Net;
using Elsa.Activities.Http;
using Elsa.Builders;

namespace ElsaDemo.Web.Workflows
{
    public class HelloWorldHttp : IWorkflow
    {
        public void Build(IWorkflowBuilder builder)
        {
            builder
                .HttpEndpoint("/hello-world")
                .WriteHttpResponse(HttpStatusCode.OK, "<h1>Hello World!</h1>", "text/html");
        }
    }
}
The above workflow has two activities. The first activity
HttpEndpointrepresents an HTTP endpoint, which can be invoked using an HTTP client, including a web browser. The first activity is connected to the second activityWriteHttpResponse, which returns a simple response to us.After defined the HelloWorldHttp workflow we need to define this class as workflow. So, open your
ElsaDemoWebModuleand update theConfigureElsamethod as below.
private void ConfigureElsa(ServiceConfigurationContext context)
{
    context.Services.AddElsa(options =>
    {
        options
            .AddConsoleActivities()
            .AddHttpActivities() //add this line to be able to use the http activities
            .AddWorkflow<HelloWorldConsole>()
            .AddWorkflow<HelloWorldHttp>(); //workflow that we defined
    });
}
- And add the UseHttpActivities middleware to
OnApplicationInitilizationmethod of yourElsaDemoWebModuleclass.
public override void OnApplicationInitialization(ApplicationInitializationContext context)
{
    // ...
    app.UseAuditing();
    app.UseAbpSerilogEnrichers();
    app.UseHttpActivities(); //add this line
    app.UseConfiguredEndpoints();

    var workflowRunner = context.ServiceProvider.GetRequiredService<IBuildsAndStartsWorkflow>();
    workflowRunner.BuildAndStartWorkflowAsync<HelloWorldConsole>();
}
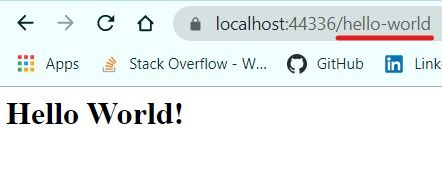
- If we run the application and navigate to the "/hello-world" route we should see the response message that we've defined (by using WriteHttpResponse activity) in our
HelloWorldHttpworkflow.

Integrate Elsa Dashboard To Application
Until now we've created two workflows programmatically. But also we can create workflows visually by using Elsa's HTML5 Workflow Designer.
Being able to design our workflows easily and taking advantage of HTML5 Workflow Designer we will integrate the Elsa Dashboard to our application.
Install Packages
- Following three packages required for Elsa Server.
dotnet add package Elsa.Activities.Temporal.Quartz
dotnet add package Elsa.Persistence.EntityFramework.SqlServer
dotnet add package Elsa.Server.Api
Also, we need to install the Elsa and Elsa.Activities.Http packages but we've already installed these packages in the previous sections.
- We need to install one more package named
Elsa.Designer.Components.Web. This package provides us the Elsa Dashboard component.
dotnet add package Elsa.Designer.Components.Web
- After the package installations completed, we need to make the necessary configurations to be able to use the Elsa Server and Elsa Dashboard. Therefore, open your
ElsaDemoWebModuleclass and make the necessary changes as below.
public override void ConfigureServices(ServiceConfigurationContext context)
{
    var configuration = context.Services.GetConfiguration();

    //...

    ConfigureElsa(context, configuration);
}

private void ConfigureElsa(ServiceConfigurationContext context, IConfiguration configuration)
{
    var elsaSection = configuration.GetSection("Elsa");

    context.Services.AddElsa(elsa =>
    {
        elsa
            .UseEntityFrameworkPersistence(ef =>
                DbContextOptionsBuilderExtensions.UseSqlServer(ef,
                    configuration.GetConnectionString("Default")))
            .AddConsoleActivities()
            .AddHttpActivities(elsaSection.GetSection("Server").Bind)
            .AddQuartzTemporalActivities()
            .AddJavaScriptActivities()
            .AddWorkflowsFrom<Startup>();
    });

    context.Services.AddElsaApiEndpoints();
    context.Services.Configure<ApiVersioningOptions>(options =>
    {
        options.UseApiBehavior = false;
    });

    context.Services.AddCors(cors => cors.AddDefaultPolicy(policy => policy
        .AllowAnyHeader()
        .AllowAnyMethod()
        .AllowAnyOrigin()
        .WithExposedHeaders("Content-Disposition"))
    );

    //Uncomment the below line if your abp version is lower than v4.4 to register controllers of Elsa .
    //See https://github.com/abpframework/abp/pull/9299 (we will no longer need to specify this line of code from v4.4)
    // context.Services.AddAssemblyOf<Elsa.Server.Api.Endpoints.WorkflowRegistry.Get>();

    //Disable antiforgery validation for elsa
    Configure<AbpAntiForgeryOptions>(options =>
    {
        options.AutoValidateFilter = type =>
        	type.Assembly != typeof(Elsa.Server.Api.Endpoints.WorkflowRegistry.Get).Assembly;
    });
}

public override void OnApplicationInitialization(ApplicationInitializationContext context)
{
    app.UseCors();

    //...

    app.UseHttpActivities();
    app.UseConfiguredEndpoints(endpoints =>
    {
        endpoints.MapFallbackToPage("/_Host");
    });

    var workflowRunner = context.ServiceProvider.GetRequiredService<IBuildsAndStartsWorkflow>();
    workflowRunner.BuildAndStartWorkflowAsync<HelloWorldConsole>();
}
These services required for the dashboard.
We don't need to register our workflows one by one anymore. Because now we use
.AddWorkflowsFrom<Startup>(), and this registers workflows on our behalf.As you may notice here, we use a section named
Elsaand its sub-sections from the configuration system but we didn't define them yet. To define them open yourappsettings.jsonand add the following Elsa section into this file.
{
  //...

  "Elsa": {
    "Http": {
      "BaseUrl": "https://localhost:44336"
    }
  }
}
Define Permission For Elsa Dashboard
We can define a permission to be assured of only allowed users can see the Elsa Dashboard.
Open your
ElsaDemoPermissionsclass under the Permissions folder (in theElsaDemo.Application.Contractslayer) and add the following permission name.
namespace ElsaDemo.Permissions
{
    public static class ElsaDemoPermissions
    {
        public const string GroupName = "ElsaDemo";

        public const string ElsaDashboard = GroupName + ".ElsaDashboard";
    }
}
- After that, open your
ElsaDemoPermissionDefinitionProviderclass and define the permission for Elsa Dashboard.
using ElsaDemo.Localization;
using Volo.Abp.Authorization.Permissions;
using Volo.Abp.Localization;

namespace ElsaDemo.Permissions
{
    public class ElsaDemoPermissionDefinitionProvider : PermissionDefinitionProvider
    {
        public override void Define(IPermissionDefinitionContext context)
        {
            var myGroup = context.AddGroup(ElsaDemoPermissions.GroupName);

            myGroup.AddPermission(ElsaDemoPermissions.ElsaDashboard, L("Permission:ElsaDashboard"));
        }

        private static LocalizableString L(string name)
        {
            return LocalizableString.Create<ElsaDemoResource>(name);
        }
    }
}
- As you can notice, we've used a localized value (L("Permission:ElsaDashboard")) but haven't added this localization key and value to the localization file, so let's add this localization key and value. To do this, open your
en.jsonfile under Localization/ElsaDemo folder (under the DomainShared layer) and add this localization key.
{
  "culture": "en",
  "texts": {
    "Menu:Home": "Home",
    "Welcome": "Welcome",
    "LongWelcomeMessage": "Welcome to the application. This is a startup project based on the ABP framework. For more information, visit abp.io.",
    "Permission:ElsaDashboard": "Elsa Dashboard"
  }
}
Add Elsa Dashboard Component To Application
- After those configurations, now we can add Elsa Dashboard to our application with an authorization check. To do this, create a razor page named _Host.cshtml (under Pages folder) and update its content as below.
@page "/elsa"
@using ElsaDemo.Permissions
@using Microsoft.AspNetCore.Authorization
@attribute [Authorize(ElsaDemoPermissions.ElsaDashboard)]
@{
    var serverUrl = $"{Request.Scheme}://{Request.Host}";
    Layout = null;
}
<!DOCTYPE html>
<html lang="en">
<head>
    <meta charset="utf-8"/>
    <meta name="viewport" content="width=device-width, initial-scale=1.0"/>
    <title>Elsa Workflows</title>
    <link rel="icon" type="image/png" sizes="32x32" href="/_content/Elsa.Designer.Components.Web/elsa-workflows-studio/assets/images/favicon-32x32.png">
    <link rel="icon" type="image/png" sizes="16x16" href="/_content/Elsa.Designer.Components.Web/elsa-workflows-studio/assets/images/favicon-16x16.png">
    <link rel="stylesheet" href="/_content/Elsa.Designer.Components.Web/elsa-workflows-studio/assets/fonts/inter/inter.css">
    <link rel="stylesheet" href="/_content/Elsa.Designer.Components.Web/elsa-workflows-studio/elsa-workflows-studio.css">
    <script src="/_content/Elsa.Designer.Components.Web/monaco-editor/min/vs/loader.js"></script>
    <script type="module" src="/_content/Elsa.Designer.Components.Web/elsa-workflows-studio/elsa-workflows-studio.esm.js"></script>
</head>
<body class="h-screen" style="background-size: 30px 30px; background-image: url(/_content/Elsa.Designer.Components.Web/elsa-workflows-studio/assets/images/tile.png); background-color: #FBFBFB;">
    <elsa-studio-root server-url="@serverUrl" monaco-lib-path="_content/Elsa.Designer.Components.Web/monaco-editor/min">
        <elsa-studio-dashboard></elsa-studio-dashboard>
    </elsa-studio-root>
</body>
</html>
- We've defined an attribute for authorization check here. With this authorization check, only the user who has the Elsa Dashboard permission allowed to see this page.
Add Elsa Dashboard Page To Main Menu
- We can open the
ElsaDemoMenuContributorclass under the Menus folder and define the menu item for reaching the Elsa Dashboard easily.
using System.Threading.Tasks;
using ElsaDemo.Localization;
using ElsaDemo.MultiTenancy;
using ElsaDemo.Permissions;
using Volo.Abp.Identity.Web.Navigation;
using Volo.Abp.SettingManagement.Web.Navigation;
using Volo.Abp.TenantManagement.Web.Navigation;
using Volo.Abp.UI.Navigation;

namespace ElsaDemo.Web.Menus
{
    public class ElsaDemoMenuContributor : IMenuContributor
    {
        public async Task ConfigureMenuAsync(MenuConfigurationContext context)
        {
            if (context.Menu.Name == StandardMenus.Main)
            {
                await ConfigureMainMenuAsync(context);
            }
        }

        private async Task ConfigureMainMenuAsync(MenuConfigurationContext context)
        {
            var administration = context.Menu.GetAdministration();
            var l = context.GetLocalizer<ElsaDemoResource>();

            context.Menu.Items.Insert(
                0,
                new ApplicationMenuItem(
                    ElsaDemoMenus.Home,
                    l["Menu:Home"],
                    "~/",
                    icon: "fas fa-home",
                    order: 0
                )
            );

            //add Workflow menu-item
            context.Menu.Items.Insert(
                1,
                new ApplicationMenuItem(
                    ElsaDemoMenus.Home,
                    "Workflow",
                    "~/elsa",
                    icon: "fas fa-code-branch",
                    order: 1,
                    requiredPermissionName: ElsaDemoPermissions.ElsaDashboard
                )
            );

            //...
        }
    }
}
- With that menu item configuration, only the user who has Elsa Dashboard permission allowed to see the defined menu item.
Result
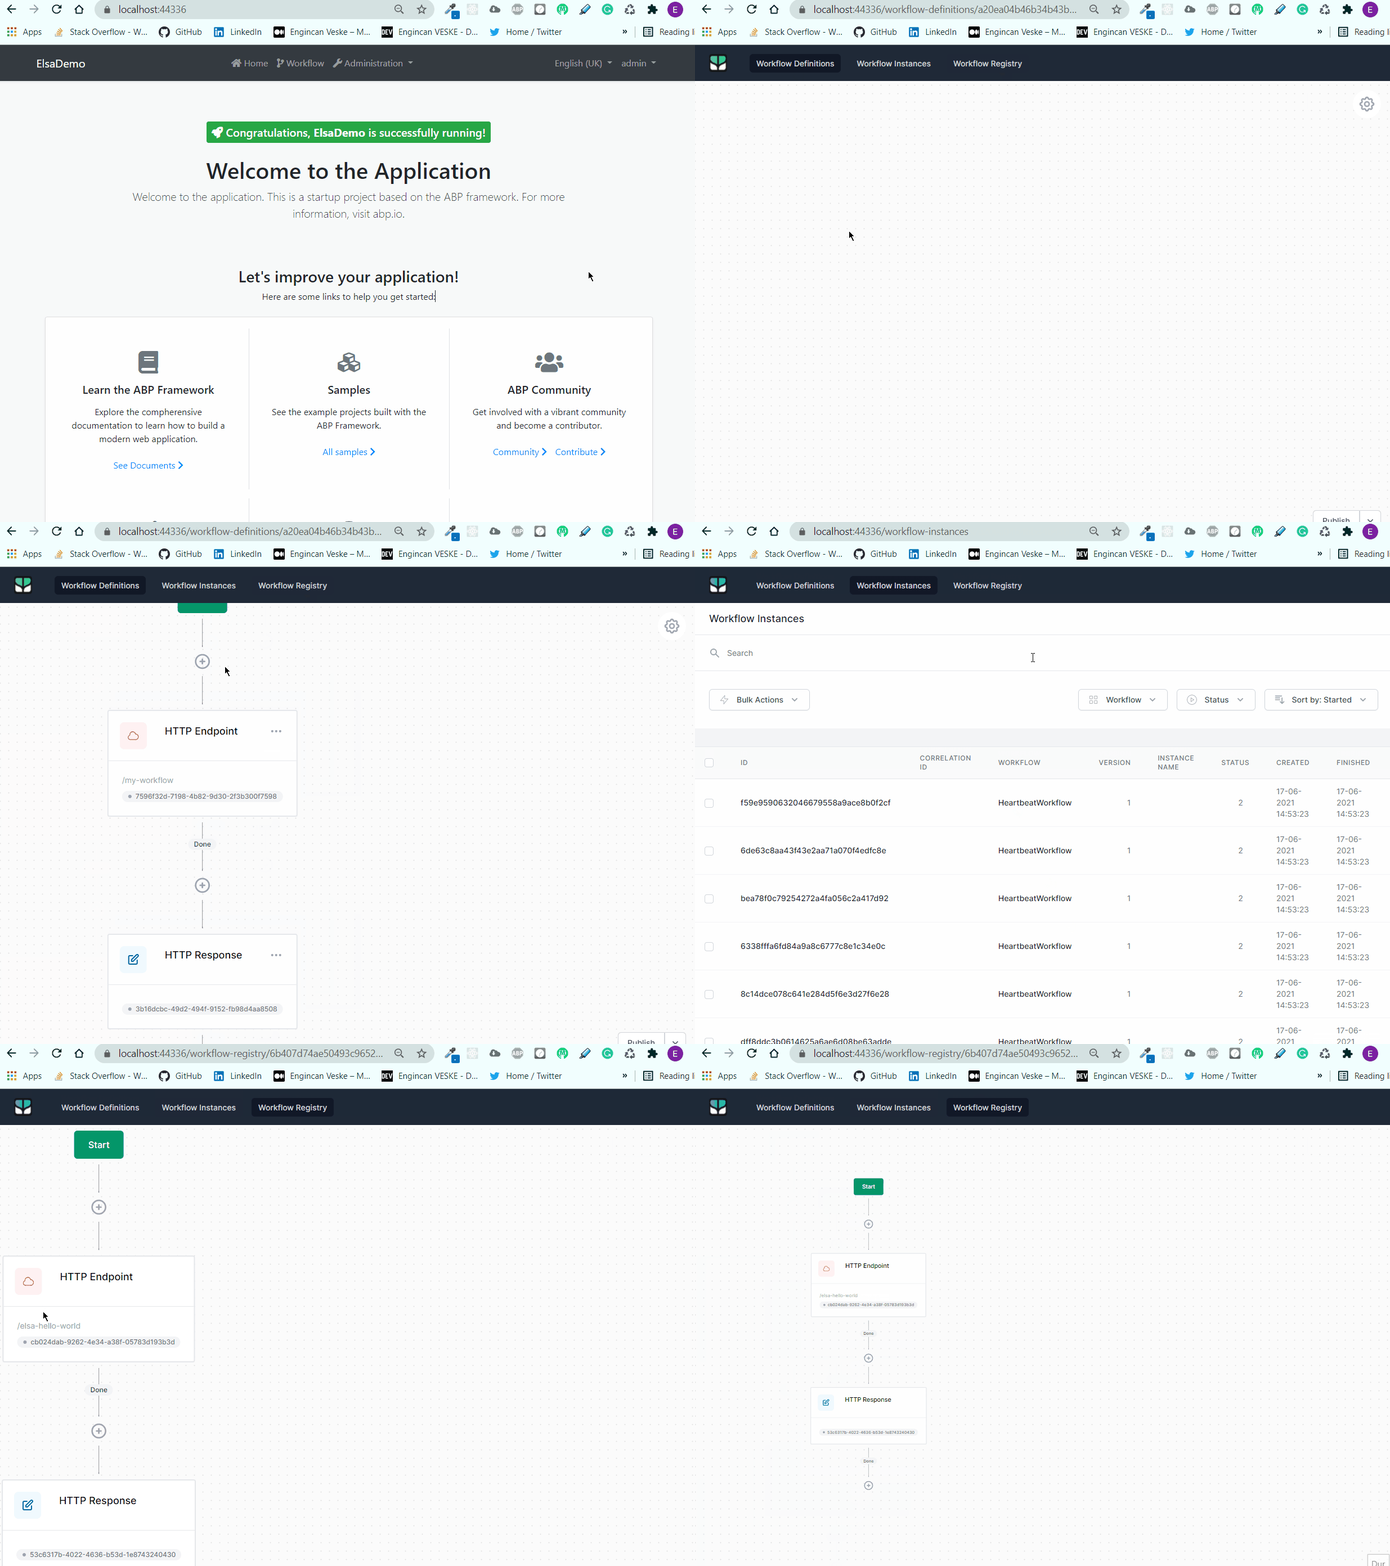
- Let's run the application and see how it looks like.
If the account you are logged in has the ElsaDemoPermissions.ElsaDashboard permission, you should see the Workflow menu item. If you do not see this menu item, please be assured that your logged-in account has that permission.
- Now we can click the "Workflow" menu item, display the Elsa Dashboard and designing workflows.

🛠 Liked this post? I now share all my content on Substack — real-world .NET, AI, and scalable software design.
👉 Subscribe here → engincanveske.substack.com
🎥 Also, check out my YouTube channel for hands-on demos and deep dives: https://www.youtube.com/@engincanv


Comments
Serdar Genc 243 weeks ago
very good article. thanks.
Engincan Veske 243 weeks ago
Thank you.
behzad 243 weeks ago
THIS IS AWESOME! THANK YOU
Engincan Veske 243 weeks ago
Thank you.
xx xx 243 weeks ago
Thank you.
but I could not understand how to use the workflow in a real world,such as apply a job request,
Engincan Veske 243 weeks ago
Hi, thanks for the feedback. In this article, I just wanted to basically introduce the Elsa Workflow library and show how we can integrate the Elsa Dashboard into our ABP-based application. I may write another article about a real-time scenario in the future. You can check the Elsa Core's documentation for a real-time application, like document-approval (https://elsa-workflows.github.io/elsa-core/docs/next/guides/guides-document-approval).
Henry Chan 243 weeks ago
Could you provide a way to add ABP's Authorization to the Elsa API Server ?
Thanks.
Vivek Koppula 242 weeks ago
Thanks for the article.
If you want the final elsa dashboard to be within the layout of abp, try removing the line Layout = null; from _Host.cshtml file.
My _Host.cshtml file now looks like as follows.
@page "elsa/workflows" @using AbpAppTmpltMvcPvt.Permissions @using Microsoft.AspNetCore.Authorization @attribute [Authorize(AbpAppTmpltMvcPvtPermissions.ElsaDashboard)] @{ var serverUrl = $"{Request.Scheme}://{Request.Host}"; //Layout = null; } ....
Engincan Veske 242 weeks ago
Thanks, Vivek.
viswajwalith 242 weeks ago
Thanks for the article. We implemented this in our ABP application. We can able to create workflow but when we modify workflow, we are facing error.
Error: ArgumentException: A different value already has the Id '6'. Newtonsoft.Json.Utilities.BidirectionalDictionary<TFirst, TSecond>.Set(TFirst first, TSecond second)
Could you provide a way to solve the error.
Engincan Veske 242 weeks ago
Hi @viswajwalith, I think this is related to the Elsa Core library because there are several issues (e.g. https://github.com/elsa-workflows/elsa-core/issues/1008) in the Elsa repository like you're facing. I've encountered this problem as well. I wasn't using it in production so I deleted the workflow and create the new one by exporting the previous workflow's JSON file via the designer.
viswajwalith 242 weeks ago
We are trying to integrate elsa dashboard, it worked perfectly in Application template, but when we try to integrate in microservice based ABP solution getting following error when accessing the elsa dashboard. TypeLoadException: Could not load type 'System.Web.Security.MembershipPasswordAttribute' from assembly 'System.Web, Version=4.0.0.0, Culture=neutral, PublicKeyToken=b03f5f7f11d50a3a'.
Massimiliano Rizzuto 238 weeks ago
Great! Thanks! I was looking for a good workflow solution with abp
tolo 234 weeks ago
Great! How to replace ElsaContext with AbpDbContext?Any good ideas?
510423039@qq.com 228 weeks ago
https://localhost:44336/_content/Elsa.Designer.Components.Web/elsa-workflows-studio/assets/styles/tailwind.css net::ERR_ABORTED 404
lic0914@163.com 217 weeks ago
the same to you !! How to resolved ,I have tried to run elsa demo in github ,but it still so
Waleed Alshoubaki 106 weeks ago
AbpException: Could not find the bundle file '/libs/abp/core/abp.css' for the bundle 'Basic.Global'!
Massimiliano Rizzuto 203 weeks ago
Thanks!
shijo 196 weeks ago
I am trying to implement Elsa in my ABP project ver 5.2.2 and facing issues. Do you have any working Elsa sample project with the latest ABP version (5.2.2) ?
Engincan Veske 196 weeks ago
Hi, what is the version of Elsa?
shijo 196 weeks ago
Hi, ABP Ver 5.2.2 has some Automapper issue with Elsa 2.7, I used the ABP Preview version 5.3.0rc.1 it is working. Do you have any samples for Angular Front End with Elsa?
Engincan Veske 196 weeks ago
Hi, I don't have any samples with Angular. It seems with Elsa 2.6.0, AutoMapper upgraded to v11 and we've also upgraded the AutoMapper to v11 in v5.3.0, so if you want to go with Elsa 2.6.0+ you need to use v5.3.0+ of ABP.
shijo 196 weeks ago
Thanks.
manuel42 170 weeks ago
There is a little mistake in the tutorial. In the apsettings.json the "Http" tag should replaced with the "Server" tag because it is used in the elsa configuration. -> AddHttpActivities(elsaSection.GetSection("Server").Bind)
Utku Ozal 166 weeks ago
Great article, thank you.
asrar.a.makrani@gmail.com 163 weeks ago
Great article and easy to implement. I used MySQL instead of SQL. Used this article to configure for MySQL: https://elsa-workflows.github.io/elsa-core/docs/next/installation/installing-persistence
One thing i noticed was when using MySQL, everytime i run the project, it seems to run the migration again and will throw errors of existing tables in the db. If i drop the Elsa related tables and the _EFMigration table, it runs fine and if i stop it and run again, same issue happens again. The solution to this was to disable auto migration in the context string:
.UseEntityFrameworkPersistence(ef => DbContextOptionsBuilderExtensions.UseMySql(ef, configuration.GetConnectionString("Default")),false)
We can add the migration code to the DBMigrator project.
ivy 139 weeks ago
Hello, thank you for the article.
I did all the steps in the tutorial, and now i've to implement this on an existing project in .NET. What do i have to do to do this ?
Thank you for the help.
hanntd Han Nguyen 130 weeks ago
Can we integrate Elsa with Blazor Assembly? Thanks
faisalhz 125 weeks ago
I just created my first workflow. Helpful and great article, many thanks!
Robson Paproski 97 weeks ago
There is any updated instructions for Elsa version 3.0? I'm trying to integrate with Abp Commercial for a client and aparently is facing some dependency injection issues, but i coudlnt figure out yet. The instructions on the V2 with abp doesnt work with this one =/
[20:25:07 FTL] Application startup exception Autofac.Core.DependencyResolutionException: An exception was thrown while activating Microsoft.AspNetCore.Authentication.AuthenticationSchemeProvider. ---> Autofac.Core.DependencyResolutionException: An exception was thrown while invoking the constructor 'Void .ctor(Microsoft.Extensions.Options.IOptions`1[Microsoft.AspNetCore.Authentication.AuthenticationOptions])' on type 'AuthenticationSchemeProvider'. ---> System.InvalidOperationException: Scheme already exists: Bearer .
If i disable authentication on elsa, it then throws other errors that i believe is due to the wrapper result, but also no idea on how to disable it. Following the old v2 guide dont work. Please help, would really appreciate it. This will be a game changer and a possibly will result in a purchase of another license abp.commercial for myself.
Engincan Veske 40 weeks ago
Hi, sorry for the late response. I've created an article for Elsa 3 just before.
Check it out: https://abp.io/community/articles/using-elsa-3-workflow-with-abp-framework-usqk8afg
linhntt 84 weeks ago
Great article, thank you. Now Elsa update to version 3.0 ,Can you updated instructions for Elsa version 3.0 ?
Gary Medina 64 weeks ago
Has anyone had any success with Elsa v3 yet?
Engincan Veske 40 weeks ago
Hi, sorry for the late response. I've created an article for Elsa 3 just before. Check it out: https://abp.io/community/articles/using-elsa-3-workflow-with-abp-framework-usqk8afg