


Web Application Development Tutorial - Part 3: Creating, Updating and Deleting Books
About This Tutorial
In this tutorial series, you will build an ABP based web application named Acme.BookStore. This application is used to manage a list of books and their authors. It is developed using the following technologies:
- Entity Framework Core as the ORM provider.
- Angular as the UI Framework.
This tutorial is organized as the following parts;
- Part 1: Creating the server side
- Part 2: The book list page
- Part 3: Creating, updating and deleting books (this part)
- Part 4: Integration tests
- Part 5: Authorization
- Part 6: Authors: Domain layer
- Part 7: Authors: Database Integration
- Part 8: Authors: Application Layer
- Part 9: Authors: User Interface
- Part 10: Book to Author Relation
Download the Source Code
This tutorial has multiple versions based on your UI and Database preferences. We've prepared a few combinations of the source code to be downloaded:
If you encounter the "filename too long" or "unzip error" on Windows, it's probably related to the Windows maximum file path limitation. Windows has a maximum file path limitation of 250 characters. To solve this, enable the long path option in Windows 10.
If you face long path errors related to Git, try the following command to enable long paths in Windows. See https://github.com/msysgit/msysgit/wiki/Git-cannot-create-a-file-or-directory-with-a-long-path
git config --system core.longpaths true
Creating a New Book
In this section, you will learn how to create a new modal dialog form to create a new book.
BookComponent
Open /src/app/book/book.component.ts and replace the content as below:
import { ListService, PagedResultDto } from '@abp/ng.core';
import { Component, OnInit } from '@angular/core';
import { BookService, BookDto } from '@proxy/books';

@Component({
  selector: 'app-book',
  templateUrl: './book.component.html',
  styleUrls: ['./book.component.scss'],
  providers: [ListService],
})
export class BookComponent implements OnInit {
  book = { items: [], totalCount: 0 } as PagedResultDto<BookDto>;

  isModalOpen = false; // add this line

  constructor(public readonly list: ListService, private bookService: BookService) {}

  ngOnInit() {
    const bookStreamCreator = (query) => this.bookService.getList(query);

    this.list.hookToQuery(bookStreamCreator).subscribe((response) => {
      this.book = response;
    });
  }

  // add new method
  createBook() {
    this.isModalOpen = true;
  }
}
- We defined a property called
isModalOpenand a method calledcreateBook.
Open /src/app/book/book.component.html and make the following changes:
<div class="card">
  <div class="card-header">
    <div class="row">
      <div class="col col-md-6">
        <h5 class="card-title">{{ '::Menu:Books' | abpLocalization }}</h5>
      </div>
      <div class="text-end col col-md-6">

        <!-- Add the "new book" button here -->
        <div class="text-lg-end pt-2">
          <button id="create" class="btn btn-primary" type="button" (click)="createBook()">
            <i class="fa fa-plus mr-1"></i>
            <span>{{ "::NewBook" | abpLocalization }}</span>
          </button>
        </div>

      </div>
    </div>
  </div>
  <div class="card-body">
    <!-- ngx-datatable should be here! -->
  </div>
</div>

<!-- Add the modal here -->
<abp-modal [(visible)]="isModalOpen">
  <ng-template #abpHeader>
    <h3>{{ '::NewBook' | abpLocalization }}</h3>
  </ng-template>

  <ng-template #abpBody> </ng-template>

  <ng-template #abpFooter>
    <button type="button" class="btn btn-secondary" abpClose>
      {{ '::Close' | abpLocalization }}
    </button>
  </ng-template>
</abp-modal>
- Added
New bookbutton to the card header.. - Added the
abp-modalwhich renders a modal to allow user to create a new book.abp-modalis a pre-built component to show modals. While you could use another approach to show a modal,abp-modalprovides additional benefits.
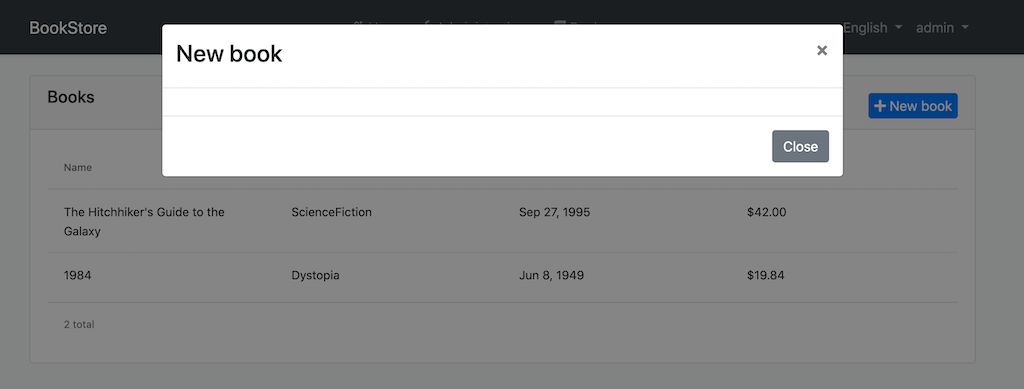
You can open your browser and click New book button to see the new modal.
Create a Reactive Form
Reactive forms provide a model-driven approach to handling form inputs whose values change over time.
Open /src/app/book/book.component.ts and replace the content as below:
import { ListService, PagedResultDto } from '@abp/ng.core';
import { Component, OnInit } from '@angular/core';
import { BookService, BookDto, bookTypeOptions } from '@proxy/books'; // add bookTypeOptions
import { FormGroup, FormBuilder, Validators } from '@angular/forms'; // add this

@Component({
  selector: 'app-book',
  templateUrl: './book.component.html',
  styleUrls: ['./book.component.scss'],
  providers: [ListService],
})
export class BookComponent implements OnInit {
  book = { items: [], totalCount: 0 } as PagedResultDto<BookDto>;

  form: FormGroup; // add this line

  // add bookTypes as a list of BookType enum members
  bookTypes = bookTypeOptions;

  isModalOpen = false;

  constructor(
    public readonly list: ListService,
    private bookService: BookService,
    private fb: FormBuilder // inject FormBuilder
  ) {}

  ngOnInit() {
    const bookStreamCreator = (query) => this.bookService.getList(query);

    this.list.hookToQuery(bookStreamCreator).subscribe((response) => {
      this.book = response;
    });
  }

  createBook() {
    this.buildForm(); // add this line
    this.isModalOpen = true;
  }

  // add buildForm method
  buildForm() {
    this.form = this.fb.group({
      name: ['', Validators.required],
      type: [null, Validators.required],
      publishDate: [null, Validators.required],
      price: [null, Validators.required],
    });
  }

  // add save method
  save() {
    if (this.form.invalid) {
      return;
    }

    this.bookService.create(this.form.value).subscribe(() => {
      this.isModalOpen = false;
      this.form.reset();
      this.list.get();
    });
  }
}
- Imported
FormGroup,FormBuilderandValidatorsfrom@angular/forms. - Added
form: FormGroupproperty. - Added
bookTypesproperty as a list ofBookTypeenum members. That will be used in form options. - Injected
FormBuilderinto the constructor. FormBuilder provides convenient methods for generating form controls. It reduces the amount of boilerplate needed to build complex forms. - Added
buildFormmethod to the end of the file and executed thebuildForm()in thecreateBookmethod. - Added
savemethod.
Open /src/app/book/book.component.html and replace <ng-template #abpBody> </ng-template> with the following code part:
<ng-template #abpBody>
  <form [formGroup]="form" (ngSubmit)="save()">
    <div class="form-group">
      <label for="book-name">Name</label><span> * </span>
      <input type="text" id="book-name" class="form-control" formControlName="name" autofocus />
    </div>

    <div class="form-group">
      <label for="book-price">Price</label><span> * </span>
      <input type="number" id="book-price" class="form-control" formControlName="price" />
    </div>

    <div class="form-group">
      <label for="book-type">Type</label><span> * </span>
      <select class="form-control" id="book-type" formControlName="type">
        <option [ngValue]="null">Select a book type</option>
        <option [ngValue]="type.value" *ngFor="let type of bookTypes"> {{ type.key }}</option>
      </select>
    </div>

    <div class="form-group">
      <label>Publish date</label><span> * </span>
      <input
        #datepicker="ngbDatepicker"
        class="form-control"
        name="datepicker"
        formControlName="publishDate"
        ngbDatepicker
        (click)="datepicker.toggle()"
      />
    </div>
  </form>
</ng-template>
Also replace <ng-template #abpFooter> </ng-template> with the following code part:
<ng-template #abpFooter>
  <button type="button" class="btn btn-secondary" abpClose>
      {{ '::Close' | abpLocalization }}
  </button>

  <!--added save button-->
  <button class="btn btn-primary" (click)="save()" [disabled]="form.invalid">
        <i class="fa fa-check mr-1"></i>
        {{ '::Save' | abpLocalization }}
  </button>
</ng-template>
Datepicker
We've used NgBootstrap datepicker in this component. So, need to arrange dependencies related to this component.
Open /src/app/book/book.module.ts and replace the content as below:
import { NgModule } from '@angular/core';
import { SharedModule } from '../shared/shared.module';
import { BookRoutingModule } from './book-routing.module';
import { BookComponent } from './book.component';
import { NgbDatepickerModule } from '@ng-bootstrap/ng-bootstrap'; // add this line

@NgModule({
  declarations: [BookComponent],
  imports: [
    BookRoutingModule,
    SharedModule,
    NgbDatepickerModule, // add this line
  ]
})
export class BookModule { }
- We imported
NgbDatepickerModuleto be able to use the date picker.
Open /src/app/book/book.component.ts and replace the content as below:
import { ListService, PagedResultDto } from '@abp/ng.core';
import { Component, OnInit } from '@angular/core';
import { BookService, BookDto, bookTypeOptions } from '@proxy/books';
import { FormGroup, FormBuilder, Validators } from '@angular/forms';

// added this line
import { NgbDateNativeAdapter, NgbDateAdapter } from '@ng-bootstrap/ng-bootstrap';

@Component({
  selector: 'app-book',
  templateUrl: './book.component.html',
  styleUrls: ['./book.component.scss'],
  providers: [
    ListService,
    { provide: NgbDateAdapter, useClass: NgbDateNativeAdapter } // add this line
  ],
})
export class BookComponent implements OnInit {
  book = { items: [], totalCount: 0 } as PagedResultDto<BookDto>;

  form: FormGroup;

  bookTypes = bookTypeOptions;

  isModalOpen = false;

  constructor(
    public readonly list: ListService,
    private bookService: BookService,
    private fb: FormBuilder
  ) {}

  ngOnInit() {
    const bookStreamCreator = (query) => this.bookService.getList(query);

    this.list.hookToQuery(bookStreamCreator).subscribe((response) => {
      this.book = response;
    });
  }

  createBook() {
    this.buildForm();
    this.isModalOpen = true;
  }

  buildForm() {
    this.form = this.fb.group({
      name: ['', Validators.required],
      type: [null, Validators.required],
      publishDate: [null, Validators.required],
      price: [null, Validators.required],
    });
  }

  save() {
    if (this.form.invalid) {
      return;
    }

    this.bookService.create(this.form.value).subscribe(() => {
      this.isModalOpen = false;
      this.form.reset();
      this.list.get();
    });
  }
}
- Imported
NgbDateNativeAdapterandNgbDateAdapter. - We added a new provider
NgbDateAdapterthat converts Datepicker value toDatetype. See the datepicker adapters for more details.
Now, you can open your browser to see the changes:

Updating a Book
Open /src/app/book/book.component.ts and replace the content as shown below:
import { ListService, PagedResultDto } from '@abp/ng.core';
import { Component, OnInit } from '@angular/core';
import { BookService, BookDto, bookTypeOptions } from '@proxy/books';
import { FormGroup, FormBuilder, Validators } from '@angular/forms';
import { NgbDateNativeAdapter, NgbDateAdapter } from '@ng-bootstrap/ng-bootstrap';

@Component({
  selector: 'app-book',
  templateUrl: './book.component.html',
  styleUrls: ['./book.component.scss'],
  providers: [ListService, { provide: NgbDateAdapter, useClass: NgbDateNativeAdapter }],
})
export class BookComponent implements OnInit {
  book = { items: [], totalCount: 0 } as PagedResultDto<BookDto>;

  selectedBook = {} as BookDto; // declare selectedBook

  form: FormGroup;

  bookTypes = bookTypeOptions;

  isModalOpen = false;

  constructor(
    public readonly list: ListService,
    private bookService: BookService,
    private fb: FormBuilder
  ) {}

  ngOnInit() {
    const bookStreamCreator = (query) => this.bookService.getList(query);

    this.list.hookToQuery(bookStreamCreator).subscribe((response) => {
      this.book = response;
    });
  }

  createBook() {
    this.selectedBook = {} as BookDto; // reset the selected book
    this.buildForm();
    this.isModalOpen = true;
  }

  // Add editBook method
  editBook(id: string) {
    this.bookService.get(id).subscribe((book) => {
      this.selectedBook = book;
      this.buildForm();
      this.isModalOpen = true;
    });
  }

  buildForm() {
    this.form = this.fb.group({
      name: [this.selectedBook.name || '', Validators.required],
      type: [this.selectedBook.type || null, Validators.required],
      publishDate: [
        this.selectedBook.publishDate ? new Date(this.selectedBook.publishDate) : null,
        Validators.required,
      ],
      price: [this.selectedBook.price || null, Validators.required],
    });
  }

  // change the save method
  save() {
    if (this.form.invalid) {
      return;
    }

    const request = this.selectedBook.id
      ? this.bookService.update(this.selectedBook.id, this.form.value)
      : this.bookService.create(this.form.value);

    request.subscribe(() => {
      this.isModalOpen = false;
      this.form.reset();
      this.list.get();
    });
  }
}
- We declared a variable named
selectedBookasBookDto. - We added
editBookmethod. This method fetches the book with the givenidand sets it toselectedBookobject. - We replaced the
buildFormmethod so that it creates the form with theselectedBookdata. - We replaced the
createBookmethod so it setsselectedBookto an empty object. - We changed the
savemethod to handle both of create and update operations.
Add "Actions" Dropdown to the Table
Open the /src/app/book/book.component.html and add the following ngx-datatable-column definition as the first column in the ngx-datatable:
<ngx-datatable-column
  [name]="'::Actions' | abpLocalization"
  [maxWidth]="150"
  [sortable]="false"
>
  <ng-template let-row="row" ngx-datatable-cell-template>
    <div ngbDropdown container="body" class="d-inline-block">
      <button
        class="btn btn-primary btn-sm dropdown-toggle"
        data-toggle="dropdown"
        aria-haspopup="true"
        ngbDropdownToggle
      >
        <i class="fa fa-cog mr-1"></i>{{ '::Actions' | abpLocalization }}
      </button>
      <div ngbDropdownMenu>
        <button ngbDropdownItem (click)="editBook(row.id)">
          {{ '::Edit' | abpLocalization }}
        </button>
      </div>
    </div>
  </ng-template>
</ngx-datatable-column>
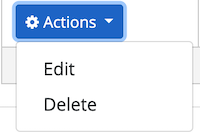
Added an "Actions" dropdown as the first column of the table that is shown below:

Also, change the ng-template #abpHeader section as shown below:
<ng-template #abpHeader>
    <h3>{{ (selectedBook.id ? '::Edit' : '::NewBook' ) | abpLocalization }}</h3>
</ng-template>
This template will show Edit text for edit record operation, New Book for new record operation in the title.
Deleting a Book
Open the /src/app/book/book.component.ts and inject the ConfirmationService.
Replace the constructor as below:
// ...

// add new imports
import { ConfirmationService, Confirmation } from '@abp/ng.theme.shared';

//change the constructor
constructor(
  public readonly list: ListService,
  private bookService: BookService,
  private fb: FormBuilder,
  private confirmation: ConfirmationService // inject the ConfirmationService
) {}

// Add a delete method
delete(id: string) {
  this.confirmation.warn('::AreYouSureToDelete', '::AreYouSure').subscribe((status) => {
    if (status === Confirmation.Status.confirm) {
      this.bookService.delete(id).subscribe(() => this.list.get());
    }
  });
}
- We imported
ConfirmationService. - We injected
ConfirmationServiceto the constructor. - Added a
deletemethod.
See the Confirmation Popup documentation for more about this service.
Add a Delete Button
Open /src/app/book/book.component.html and modify the ngbDropdownMenu to add the delete button as shown below:
<div ngbDropdownMenu>
  <!-- add the Delete button -->
    <button ngbDropdownItem (click)="delete(row.id)">
        {{ '::Delete' | abpLocalization }}
    </button>
</div>
The final actions dropdown UI looks like below:
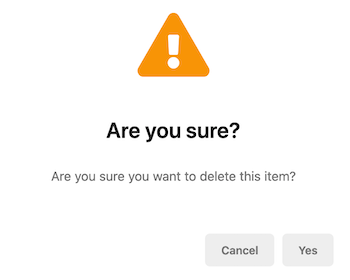
Clicking the "Delete" action calls the delete method which then shows a confirmation popup as shown below:
The Next Part
See the next part of this tutorial.


