


Building the Catalog Module
In this part, you will learn how to create entities, services and a basic user interface for the catalog module.
This module's functionality will be minimal to focus on modularity. You can follow the Book Store tutorial to learn building more real-world applications with ABP.
If it is still running, please stop the web application before continuing with the tutorial.
Creating a Product Entity
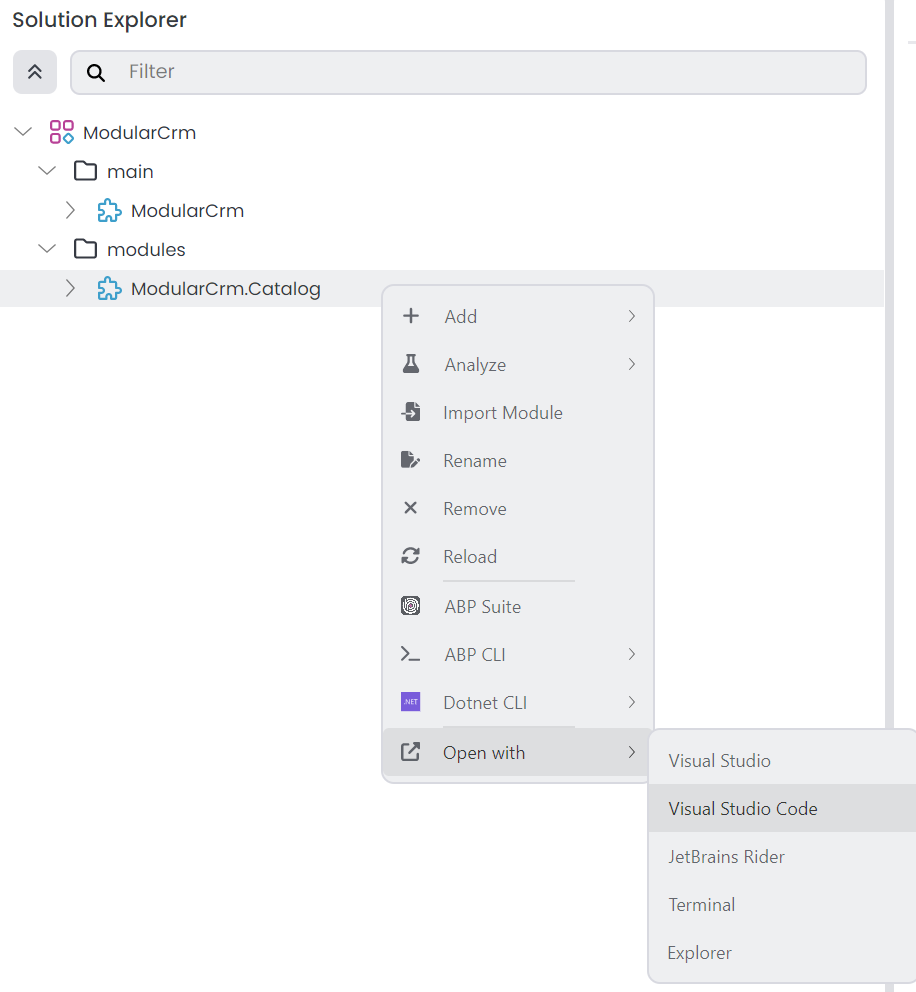
Open the ModularCrm.Catalog module in your favorite IDE. You can right-click the ModularCrm.Catalog module and select the Open With -> Visual Studio Code command to open the ModularCrm.Catalog module's .NET solution with Visual Studio. If you can not find your IDE in the Open with list, open with the Explorer, then open the .sln file with your IDE:
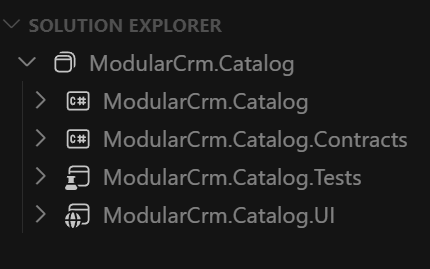
The ModularCrm.Catalog .NET solution should look like the following figure:
Add a new Product class under the ModularCrm.Catalog project:
using System;
using Volo.Abp.Domain.Entities;

namespace ModularCrm.Catalog;

public class Product : AggregateRoot<Guid>
{
    public string Name { get; set; }
    public int StockCount { get; set; }
}
Note that in this tutorial, we create classes directly in the project's root folder to keep things simple. It is up to you to create subfolders (namespaces) in your project to achieve finer code organization, especially for large modules.
Mapping Entity to Database
The next step is to configure the Entity Framework Core DbContext class and the database for the new entity.
Add a DbSet Property
Open the CatalogDbContext under the Data folder in the same project and add a new DbSet property for the Product entity. The final CatalogDbContext.cs file content should be the following:
using Microsoft.EntityFrameworkCore;
using Volo.Abp.Data;
using Volo.Abp.EntityFrameworkCore;

namespace ModularCrm.Catalog.Data;

[ConnectionStringName(CatalogDbProperties.ConnectionStringName)]
public class CatalogDbContext : AbpDbContext<CatalogDbContext>, ICatalogDbContext
{
    public DbSet<Product> Products { get; set; } //NEW: DBSET FOR THE PRODUCT ENTITY

    public CatalogDbContext(DbContextOptions<CatalogDbContext> options)
        : base(options)
    {
    }

    protected override void OnModelCreating(ModelBuilder builder)
    {
        base.OnModelCreating(builder);
        builder.ConfigureCatalog();
    }
}
The CatalogDbContext class implements the ICatalogDbContext interface. Add the following property to the ICatalogDbContext interface:
DbSet<Product> Products { get; set; }
The final ICatalogDbContext interface should be the following:
using Microsoft.EntityFrameworkCore;
using Volo.Abp.Data;
using Volo.Abp.EntityFrameworkCore;

namespace ModularCrm.Catalog.Data;

[ConnectionStringName(CatalogDbProperties.ConnectionStringName)]
public interface ICatalogDbContext : IEfCoreDbContext
{
    DbSet<Product> Products { get; set; }
}
Having such an ICatalogDbContext interface allows us to decouple our repositories (and other classes) from the concrete CatalogDbContext class. This provides flexibility to the final application to merge multiple DbContexts into a single DbContext to manage database migrations easier and have a database level transaction support for multi-module database operations. We will do it later in this tutorial.
Configure the Table Mapping
The Standard Module template is designed to be flexible so that your module can have a separate physical database or store its tables inside another database (typically in the main database of your application). To make that possible, it configures the database mapping in an extension method (ConfigureCatalog()) called inside the OnModelCreating method above. Find that extension method (in the CatalogDbContextModelCreatingExtensions class) and change its content as the following code block:
using Microsoft.EntityFrameworkCore;
using Volo.Abp;
using Volo.Abp.EntityFrameworkCore.Modeling;

namespace ModularCrm.Catalog.Data;

public static class CatalogDbContextModelCreatingExtensions
{
    public static void ConfigureCatalog(
        this ModelBuilder builder)
    {
        Check.NotNull(builder, nameof(builder));

        builder.Entity<Product>(b =>
        {
            //Configure table & schema name
            b.ToTable(CatalogDbProperties.DbTablePrefix + "Products",
                      CatalogDbProperties.DbSchema);

            //Always call this method to setup base entity properties
            b.ConfigureByConvention();

            //Properties of the entity
            b.Property(q => q.Name).IsRequired().HasMaxLength(100);
        });
    }
}
First, you are setting the database table name with the ToTable method. CatalogDbProperties.DbTablePrefix defines a constant that is added as a prefix to all database table names of this module. If you see the CatalogDbProperties class, DbTablePrefix value is Catalog. In that case, the table name for the Product entity will be CatalogProducts. You can change the CatalogDbProperties class if you are not happy with the default table prefix, or set a schema for your tables.
At that point, build the ModularCrm.Catalog .NET solution in your IDE (or on the ABP Studio UI). Then, switch to the main application's .NET solution.
Configuring the Main Application Database
You changed the Entity Framework Core configuration. The next step should be adding a new code-first database migration and updating the database so the new CatalogProducts table is created on the database.
You are not managing the database migrations in the module. Instead, the main application decides which DBMS (Database Management System) to use and how to share physical database(s) among modules. We will store all the modules' data in a single physical database in this tutorial.
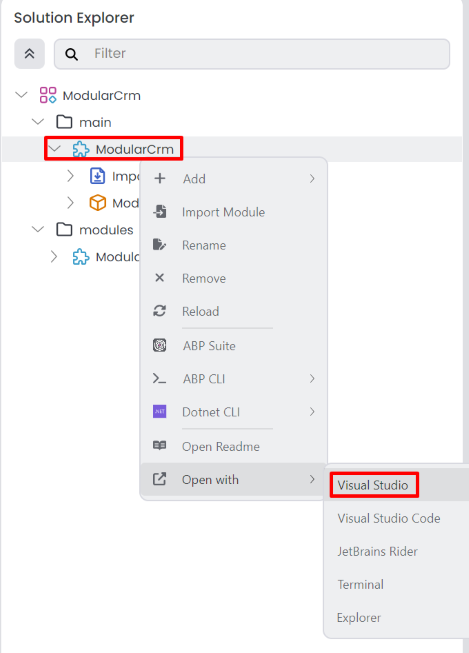
Open the ModularCrm module (which is the main application) in your IDE:
Open the ModularCrmDbContext class under the ModularCrm project's Data folder:
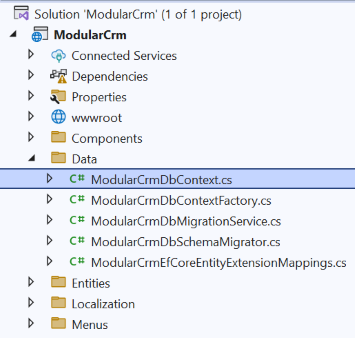
You will merge module's database configuration into ModularCrmDbContext.
Replace the ICatalogDbContext Service
Follow the three steps below;
(1) Add the following attribute on top of the ModularCrmDbContext class:
[ReplaceDbContext(typeof(ICatalogDbContext))]
ReplaceDbContext attribute makes it possible to use the ModularCrmDbContext class in the services in the Catalog module.
(2) Implement the ICatalogDbContext by the ModularCrmDbContext class:
[ReplaceDbContext(typeof(ICatalogDbContext))]
public class ModularCrmDbContext :
    AbpDbContext<ModularCrmDbContext>,
    ICatalogDbContext //NEW: IMPLEMENT THE INTERFACE
{
    public DbSet<Product> Products { get; set; } //NEW: ADD DBSET PROPERTY
	...
}
(3) Finally, ensure that the ConfigureCatalog() extension method is called inside the OnModelCreating method (this should be already done because you set the Setup as a modular solution option in the Modularity step while creating the initial solution).
In this way, ModularCrmDbContext can be used by the catalog module over the ICatalogDbContext interface. This part is only needed once for a module. Next time, you can directly add a new database migration, as explained in the next section.
Add a Database Migration
You can use Entity Framework Core's Add-Migration (or dotnet ef migrations add) terminal command, but we will use ABP Studio's shortcut UI in this tutorial.
Ensure that the solution has built. You can right-click the ModularCrm (under the main folder) on ABP Studio Solution Runner and select the Dotnet CLI -> Graph Build command.
Right-click the ModularCrm package and select the EF Core CLI -> Add Migration command:
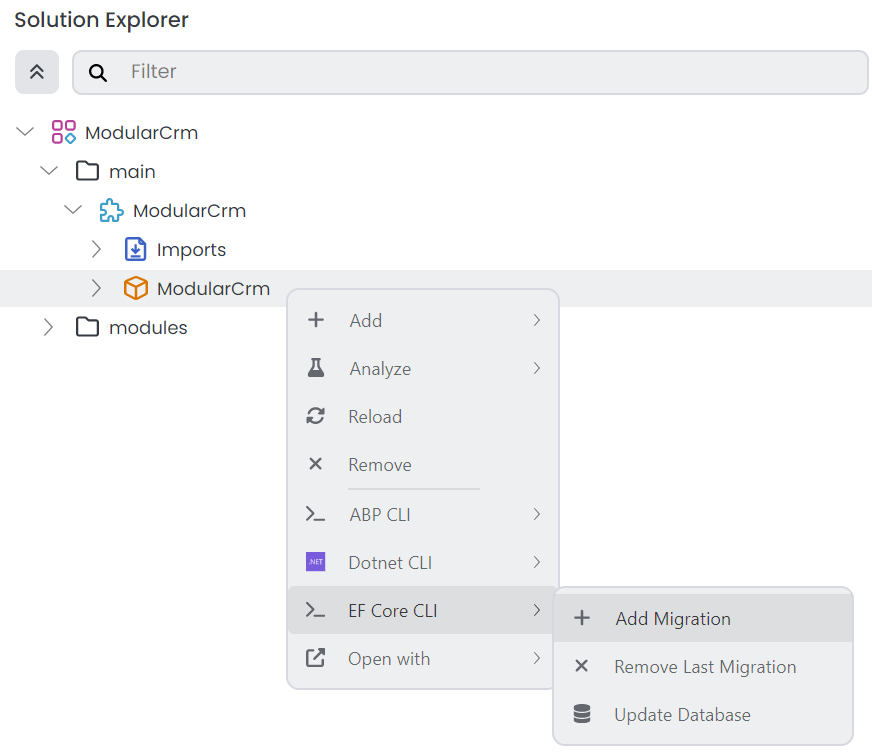
The Add Migration command opens a new dialog to get a migration name:
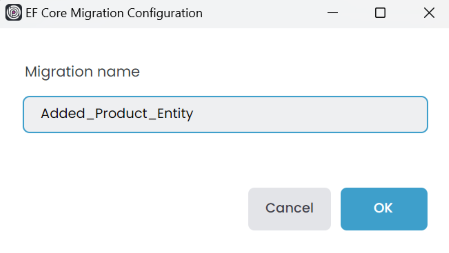
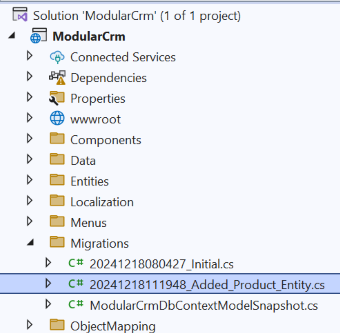
Once you click the OK button, a new database migration class is added to the Migrations folder of the ModularCrm project:
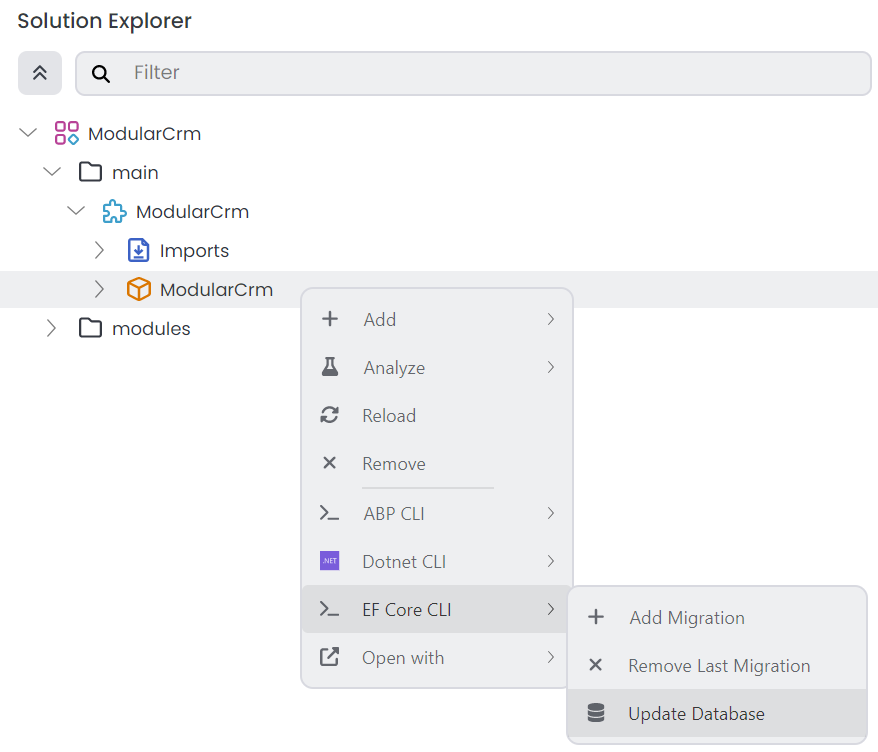
Now, you can return to ABP Studio, right-click the ModularCrm package again and select the EF Core CLI -> Update Database command:
After the operation completes, you can check your database to see the new CatalogProducts table has been created:

Creating the Application Service
Now, you can create an application service to perform some use cases related to products.
Defining the Application Service Contract
Return to your IDE (e.g. Visual Studio), open the ModularCrm.Catalog module's .NET solution and create an IProductAppService interface under the ModularCrm.Catalog.Contracts project:
using System.Collections.Generic;
using System.Threading.Tasks;
using Volo.Abp.Application.Services;

namespace ModularCrm.Catalog;

public interface IProductAppService : IApplicationService
{
    Task<List<ProductDto>> GetListAsync();
    Task CreateAsync(ProductCreationDto input);
}
We are defining application service interfaces and data transfer objects in the ModularCrm.Catalog.Contracts project. That way, you can share those contracts with clients without sharing the actual implementation classes.
Defining Data Transfer Objects
The GetListAsync and CreateAsync methods use the ProductDto and ProductCreationDto classes, which have not been defined yet. So, you need to define them.
Create a ProductCreationDto class under the ModularCrm.Catalog.Contracts project:
using System.ComponentModel.DataAnnotations;

namespace ModularCrm.Catalog;

public class ProductCreationDto
{
    [Required]
    [StringLength(100)]
    public string Name { get; set; }

    [Range(0, int.MaxValue)]
    public int StockCount { get; set; }
}
And create a ProductDto class under the ModularCrm.Catalog.Contracts project:
using System;

namespace ModularCrm.Catalog;

public class ProductDto
{
    public Guid Id { get; set; }
    public string Name { get; set; }
    public int StockCount { get; set; }
}
The new files under the ModularCrm.Catalog.Contracts project are shown below:

Implementing the Application Service
Now, you can implement the IProductAppService interface. Create a ProductAppService class under the ModularCrm.Catalog project:
using System;
using System.Collections.Generic;
using System.Threading.Tasks;
using Volo.Abp.Domain.Repositories;

namespace ModularCrm.Catalog;

public class ProductAppService : CatalogAppService, IProductAppService
{
    private readonly IRepository<Product, Guid> _productRepository;

    public ProductAppService(IRepository<Product, Guid> productRepository)
    {
        _productRepository = productRepository;
    }

    public async Task<List<ProductDto>> GetListAsync()
    {
        var products = await _productRepository.GetListAsync();
        return ObjectMapper.Map<List<Product>, List<ProductDto>>(products);
    }

    public async Task CreateAsync(ProductCreationDto input)
    {
        var product = new Product
        {
            Name = input.Name,
            StockCount = input.StockCount
        };

        await _productRepository.InsertAsync(product);
    }
}
Notice that ProductAppService class implements the IProductAppService and also inherits from the CatalogAppService class. The CatalogAppService is a base class and it makes a few configurations for localization and object mapping (you can see in the same ModularCrm.Catalog project). You can inherit all of your application services from that base class. This way, you can define some common properties and methods to share among all your application services. You can rename the base class if you feel that you may be confused later.
Object Mapping
ProductAppService.GetListAsync method uses the ObjectMapper service to convert Product entities to ProductDto objects. The mapping should be configured. So, create a new mapping class in the ModularCrm.Catalog project that implements the MapperBase<Product, ProductDto> class with the [Mapper] attribute as follows:
[Mapper]
public partial class ProductToProductDtoMapper : MapperBase<Product, ProductDto>
{
    public override partial ProductDto Map(Product source);

    public override partial void Map(Product source, ProductDto destination);
}
Exposing Application Services as HTTP API Controllers
This application doesn't need to expose any functionality as HTTP API, because all the module integration and communication will be done in the same process as a natural aspect of a monolith modular application. However, in this section, we will create HTTP APIs because;
- We will use these HTTP API endpoints in development to create some example data.
- To know how to do it when you need it.
So, follow the instructions in this section and expose the product application service as an HTTP API endpoint.
To create HTTP API endpoints for the catalog module, you have two options:
- You can create a regular ASP.NET Core Controller class in the
ModularCrm.Catalogproject, injectIProductAppServiceand create wrapper methods for each public method of the product application service. You will do this later while you create the Ordering module. (Also, you can check theSampleControllerclass under the Samples folder in theModularCrm.Catalogproject for an example) - Alternatively, you can use the ABP's Auto API Controllers feature to expose your application services as API controllers by conventions.
We will use the second approach here. Open the CatalogModule class in the Catalog module's .NET solution (the ModularCrm.Catalog .NET solution, the ModularCrm.Catalog .NET project) in your IDE, find the ConfigureServices method and add the following code block into that method:
Configure<AbpAspNetCoreMvcOptions>(options =>
{
    options.ConventionalControllers.Create(typeof(CatalogModule).Assembly, settings =>
    {
        settings.RootPath = "catalog";
    });
});
This will tell the ABP framework to create API controllers for the application services in the ModularCrm.Catalog assembly.
Now, ABP will automatically expose the application services defined in the ModularCrm.Catalog project as API controllers. The next section will use these API controllers to create some example products.
Creating Example Products
This section will create a few example products using the Swagger UI. Thus, you will have some sample products to show on the UI.
Open the Solution Runner panel and click the Play button near the solution root. Once the ModularCrm application runs, you can right-click it and select the Browse command to open the user interface.
Once you see the user interface of the web application, type /swagger at the end of the URL to open the Swagger UI. If you scroll down, you should see the Catalog API:
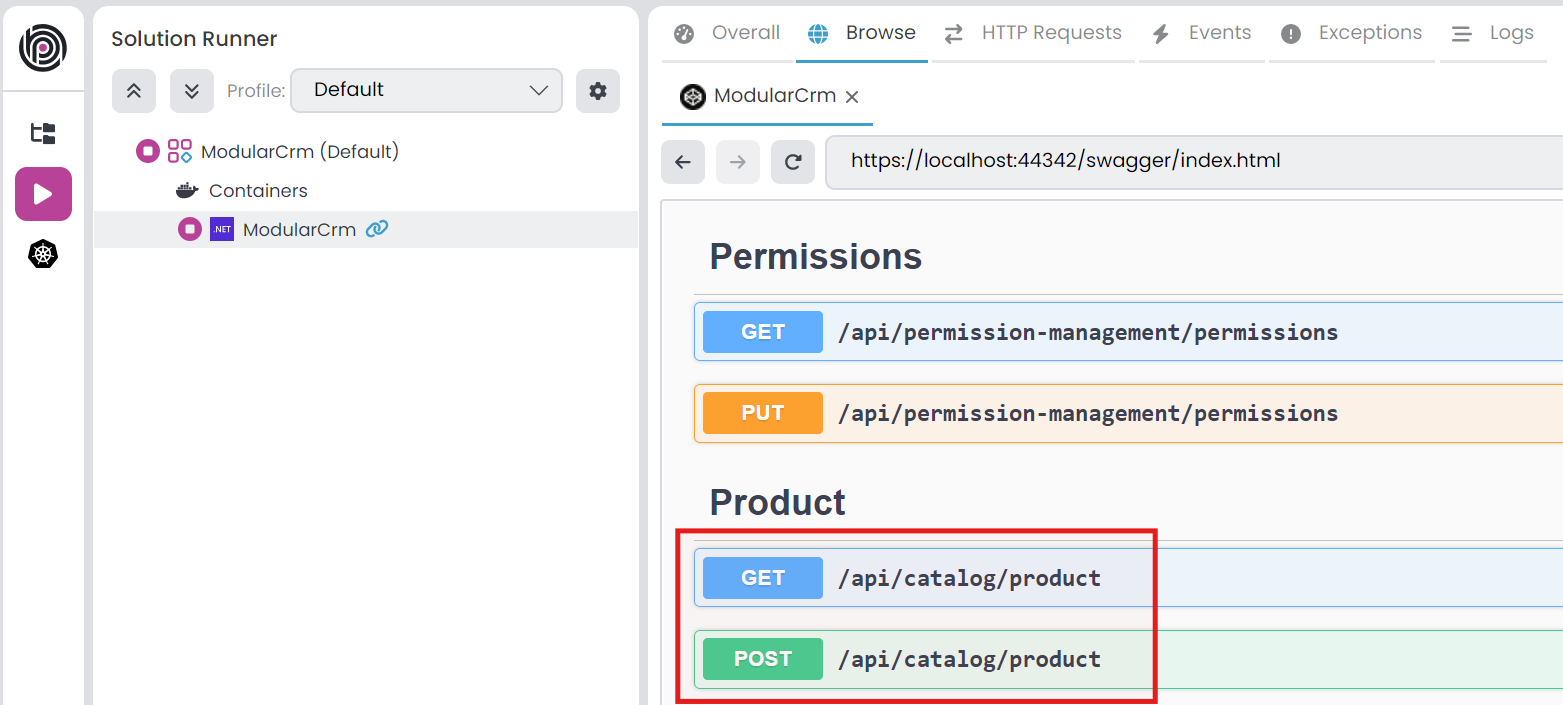
If you don't see the Product API, you may need to re-build the entire solution. Right-click the
ModularCrmunder themainfolder in the ABP Studio Solution Explorer panel and select the Dotnet CLI -> Graph Build command. This will ensure that the catalog module and the main application are completely built.
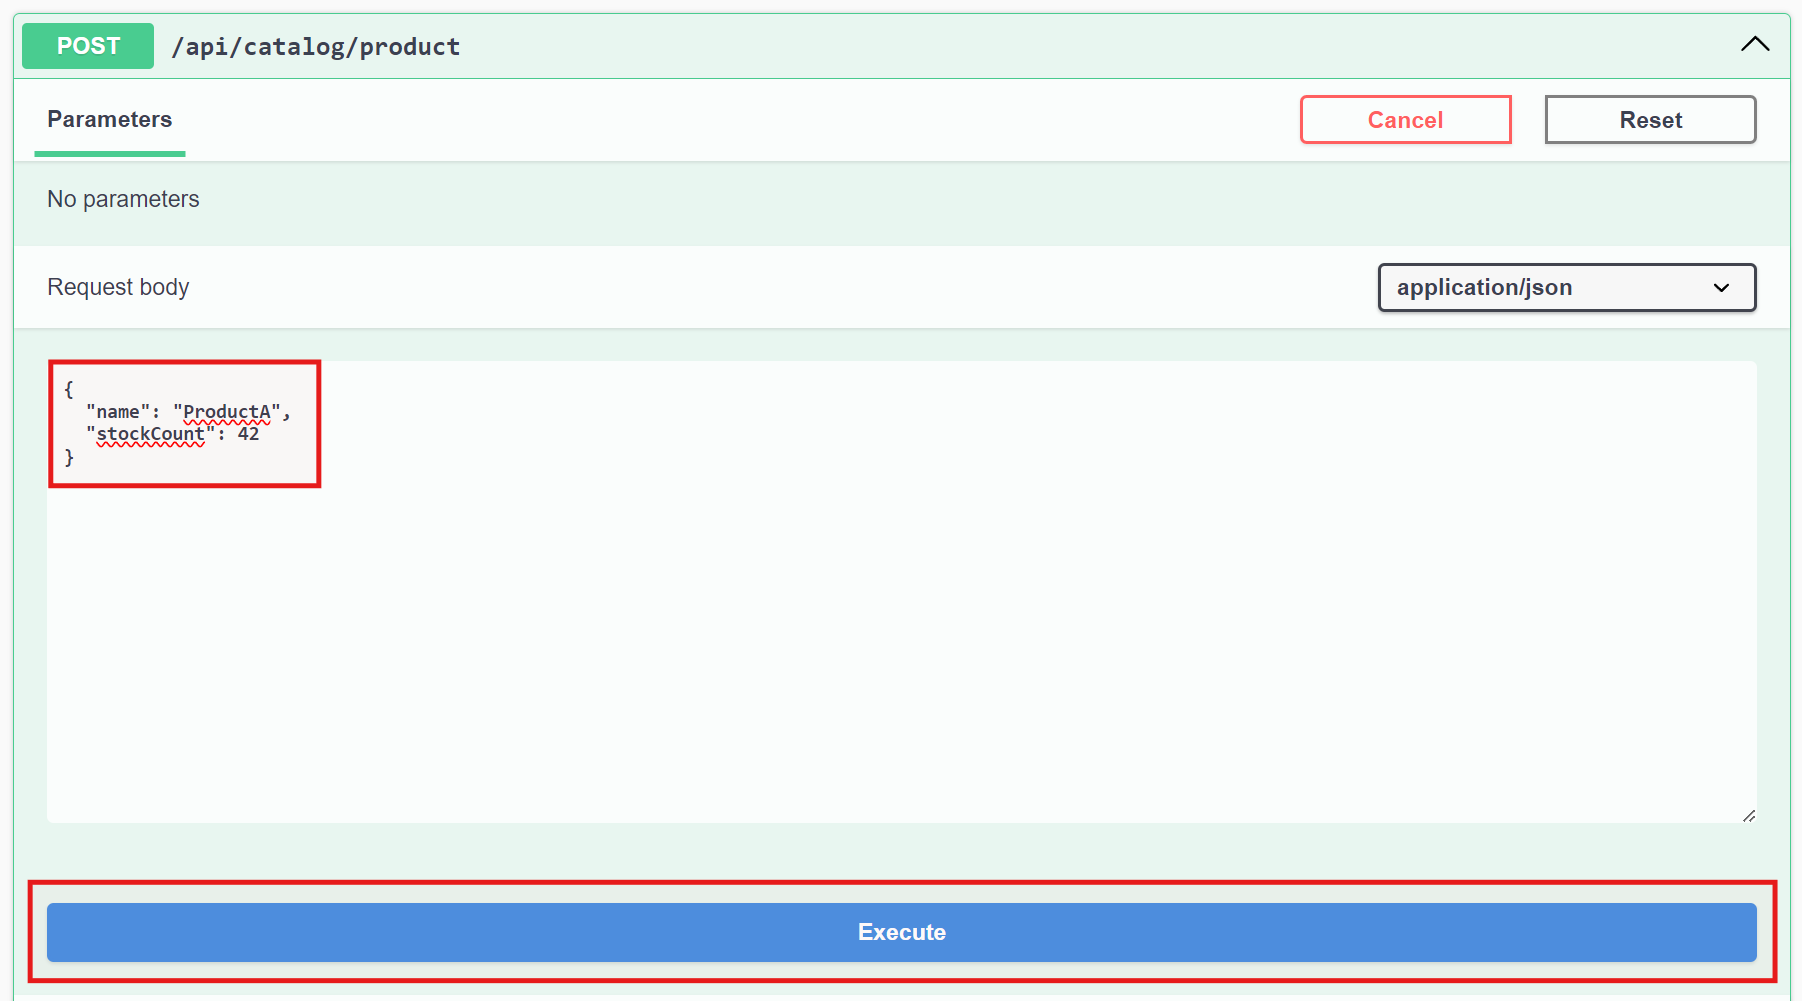
Expand the POST /api/catalog/product API and click the Try it out button as shown in the following figure:

Then, create a few products by filling in the Request body and clicking the Execute button:
If you check the database, you should see the entities created in the Products table:
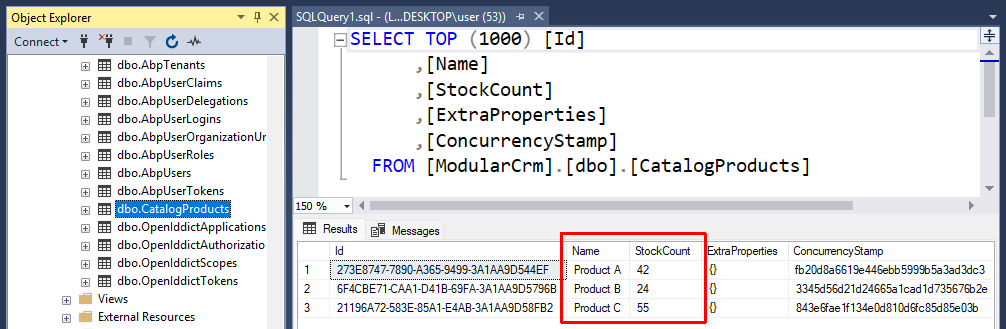
You've some entities in the database and now you can show them on the user interface.
Creating the User Interface
In this section, you will create a very simple user interface to demonstrate how to build UI in the catalog module and make it work in the main application.
As a first step, you can stop the application on ABP Studio's Solution Runner if it is currently running.
Creating the Products Page
Open the ModularCrm.Catalog .NET solution in your IDE, and find the Pages/Catalog/Index.cshtml file under the ModularCrm.Catalog.UI project:

Replace the Index.cshtml.cs file with the following content:
using System.Collections.Generic;
using System.Threading.Tasks;

namespace ModularCrm.Catalog.UI.Pages.Catalog;

public class IndexModel : CatalogPageModel
{
    public List<ProductDto> Products { get; set; }

    private readonly IProductAppService _productAppService;

    public IndexModel(IProductAppService productAppService)
    {
        _productAppService = productAppService;
    }

    public async Task OnGetAsync()
    {
        Products = await _productAppService.GetListAsync();
    }
}
Here, you simply use the IProductAppService to get a list of all products and assign the result to the Products property. You can use it in the Index.cshtml file to show a simple list of products on the UI:
@page
@using Microsoft.Extensions.Localization
@using ModularCrm.Catalog.Localization
@model ModularCrm.Catalog.UI.Pages.Catalog.IndexModel
@inject IStringLocalizer<CatalogResource> L

<h1>Products</h1>

<abp-card>
    <abp-card-body>
        <abp-list-group>
            @foreach (var product in Model.Products)
            {
                <abp-list-group-item>
                    @product.Name <span class="text-muted">(stock: @product.StockCount)</span>
                </abp-list-group-item>
            }
        </abp-list-group>
    </abp-card-body>
</abp-card>
Right-click the ModularCrm application on ABP Studio's solution runner and select the Start command:
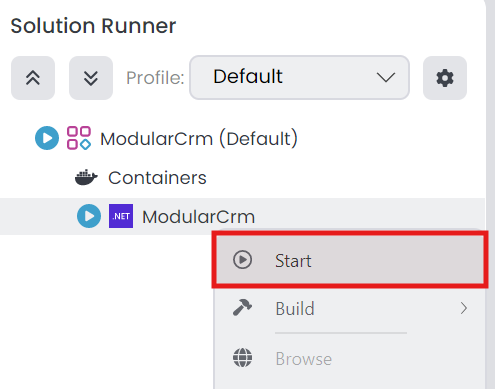
Now, you can browse the Catalog page to see the list of the products:
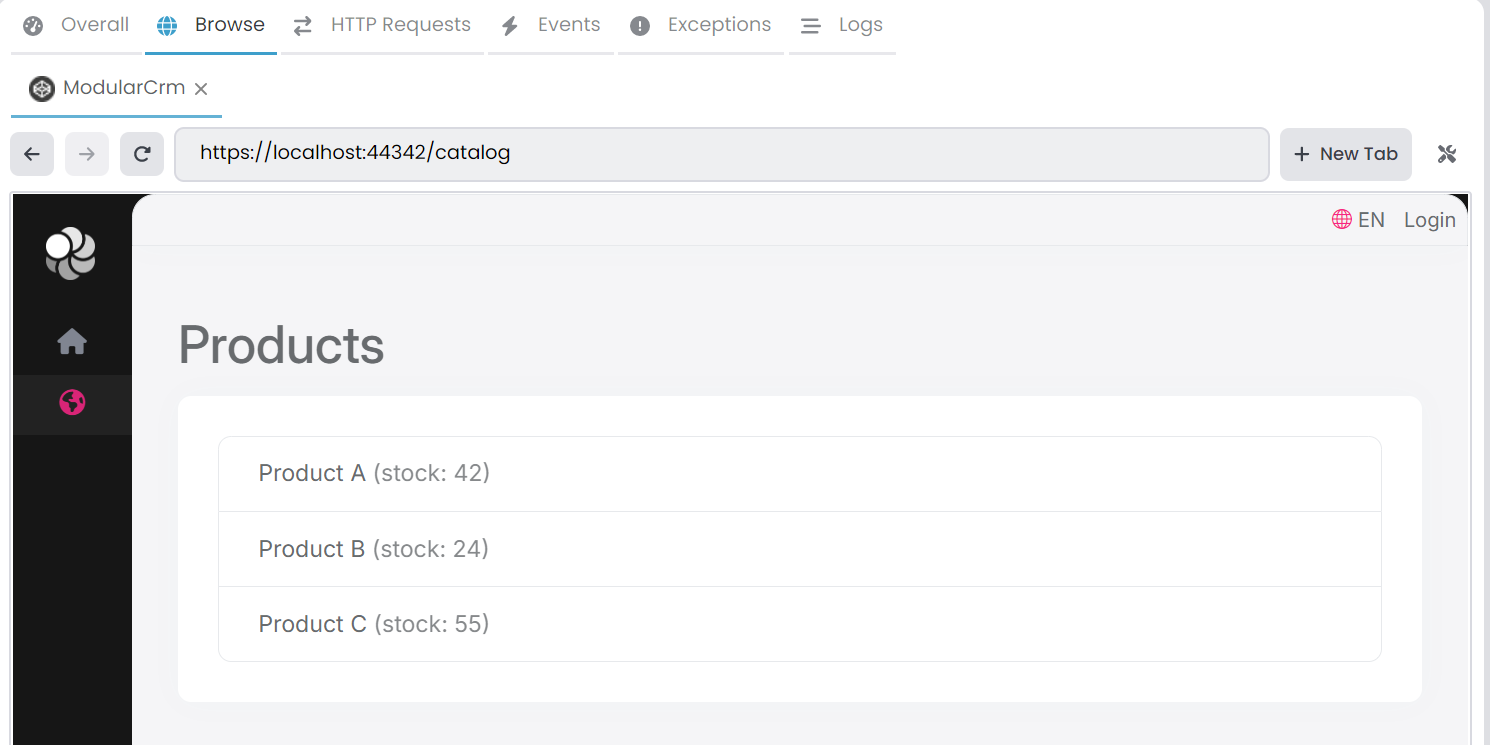
As you can see, developing a UI page in a modular ABP application is pretty straightforward. We kept the UI very simple to focus on modularity. To learn how to build complex application UIs, please check the Book Store Tutorial.
Summary
In this part of the tutorial, you've built the functionality inside the Catalog module, which was created in the previous part. In the next part, you will create a new Ordering module and install it into the main application.


