Identity module
This module implements the User and Role system of an application;
- Built on the Microsoft's ASP.NET Core Identity library.
- Manage roles and users in the system. A user is allowed to have multiple roles.
- Set permissions in role and user levels.
- Enable/disable two factor authentication and user lockout per user.
- Manage basic user profile and password.
- Manage claim types in the system, set claims to roles and users.
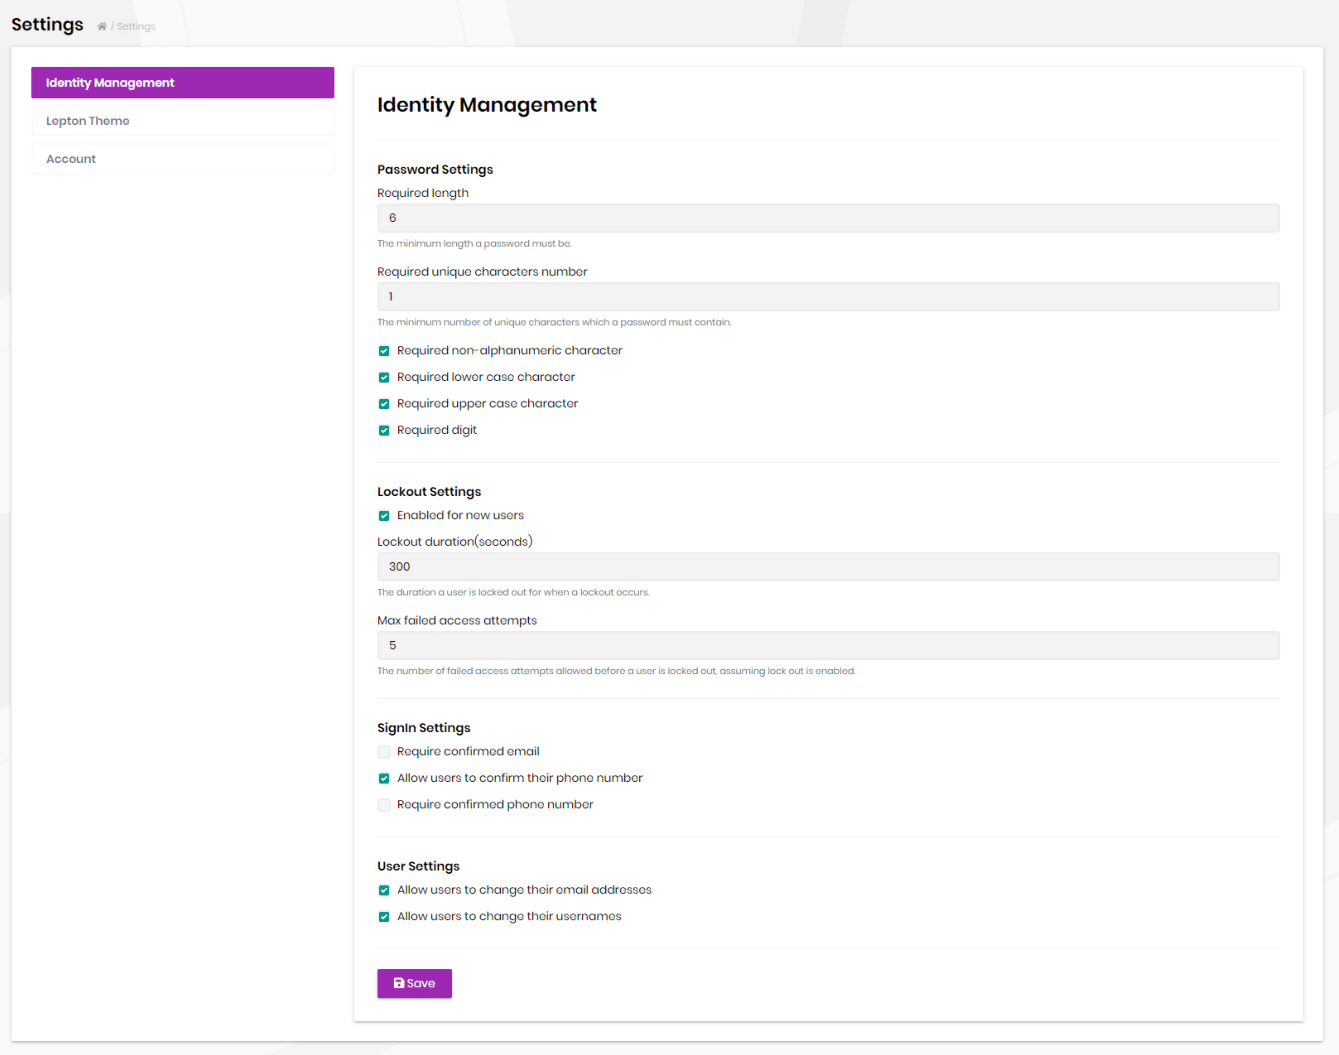
- Setting page to manage password complexity, user sign-in, account and lockout.
- Supports LDAP authentication.
- Provides email & phone number verification.
- Supports social login integrations (Twitter, Facebook, GitHub etc...).
- Manage organization units in the system.
- View security logs (login, logout, change password...) in the system.
See the module description page for an overview of the module features.
How to install
Identity is pre-installed in the startup templates. So, no need to manually install it.
Packages
This module follows the module development best practices guide and consists of several NuGet and NPM packages. See the guide if you want to understand the packages and relations between them.
You can visit Identity module package list page to see list of packages related with this module.
User interface
Menu items
Identity module adds the following items to the "Main" menu, under the "Administration" menu item:
- Roles: Role management page.
- Users: User management page.
- Claim Types: Claim type management page.
- Organization Units: Organization unit management page.
- Security Logs: Security log search page.
IdentityMenuNames class has the constants for the menu item names.
Pages
Role management
Roles page is used to manage roles in the system. A role is a set of permissions assigned to the users.
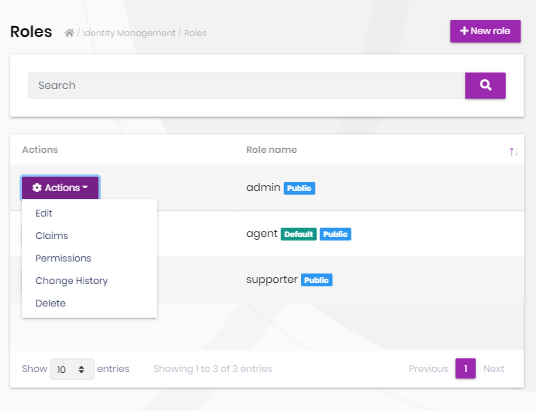
You can create a new role or edit a role in this page:
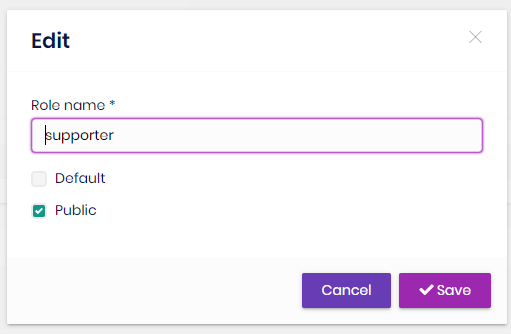
- Default roles are assigned to new users by default.
- Public roles are visible to other users.
Role permissions
You can manage permissions of a role:
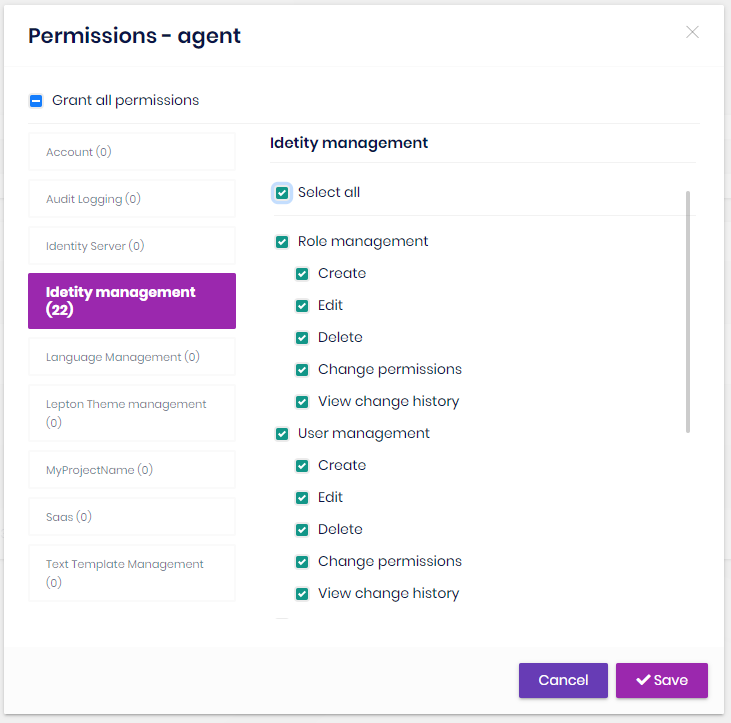
- A permission is an action of the application granted to roles and users.
- A user with a role will inherit all the permissions granted for the role.
- Any module can define permissions. Once you define a new permission, it will be available in this page.
- Left side is the list of modules. Once you click to a module name, you can check/uncheck permissions related to that module.
Role claims
You can set custom claim values for a role:
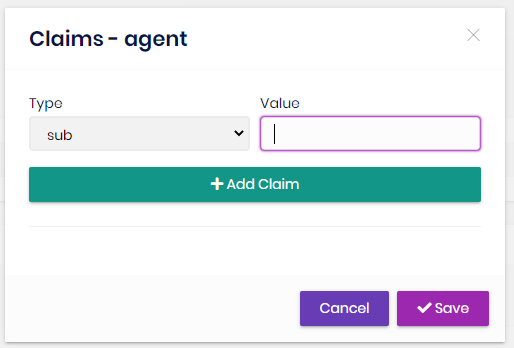
Claim types are retrieved from the claim list defined in the Claim Types Management page (see below).
User management
Users page is used to manage the users in your system.
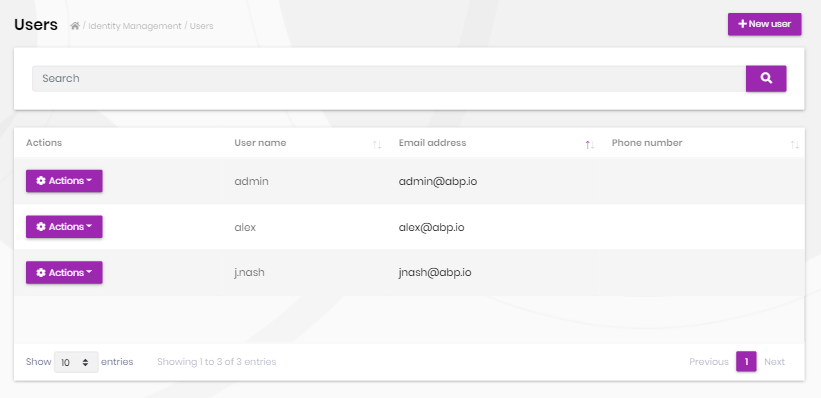
You can create a new user or edit an existing user in this page:
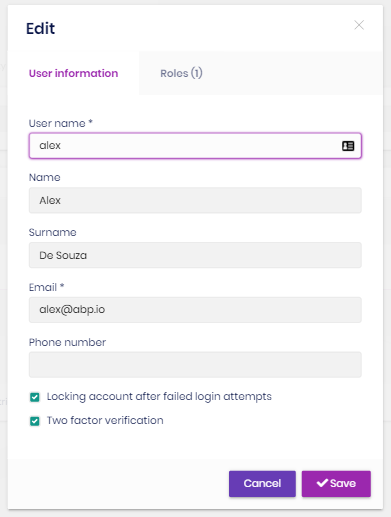
- A user can have zero or more roles in the system.
- You can set two factor verification and user lockout settings per user.
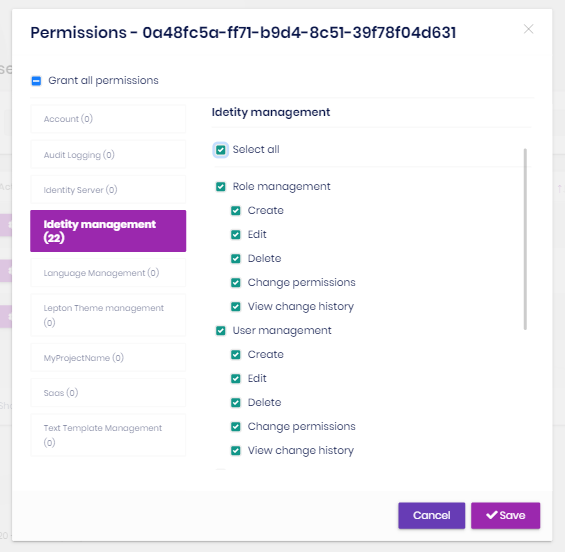
User permissions
A user has union of the permissions of the assigned roles. Identity module also allows to grant extra permissions to a specific user.
User claims
You can also set custom claim values for a user:
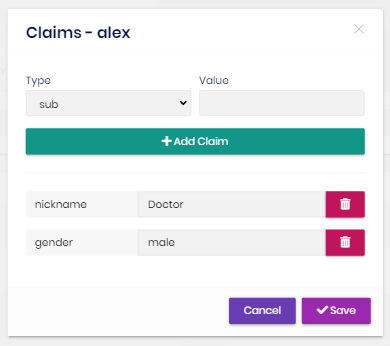
Claim types are retrieved from the claim list defined in the Claim Type Management page (see below).
Claim type management
Identity module allows to define custom claim types.
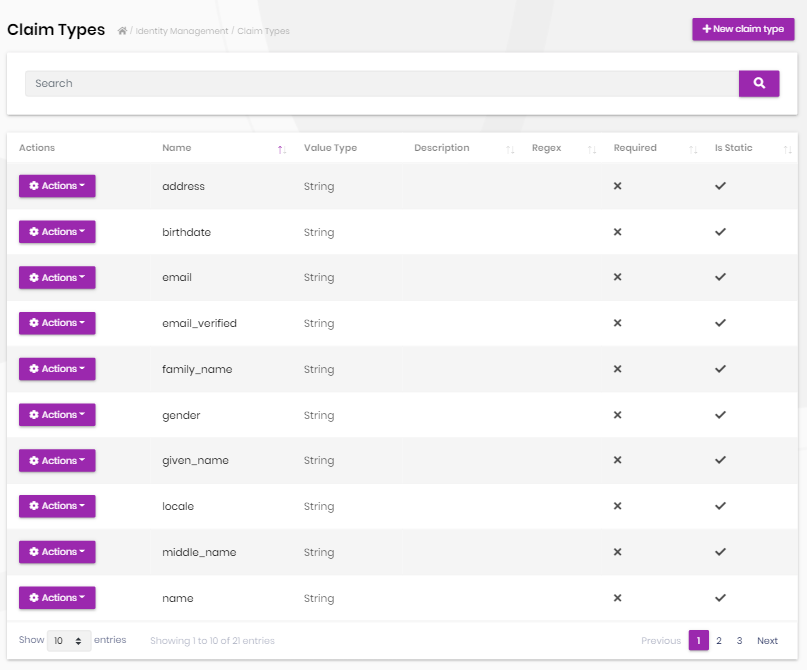
- Custom claims can be used to store additional information to a user or role.
- Custom claim values then can be accessed in the application code for an authenticated user.
- Claim Types are also used by the OpenIddict module if you're using it.
Identity module settings UI
Identity module adds a new tab to the Settings page to customize the behavior on runtime.
Organization Units
Organization units page is used to manage organization units, members of organization units and roles of organization units.
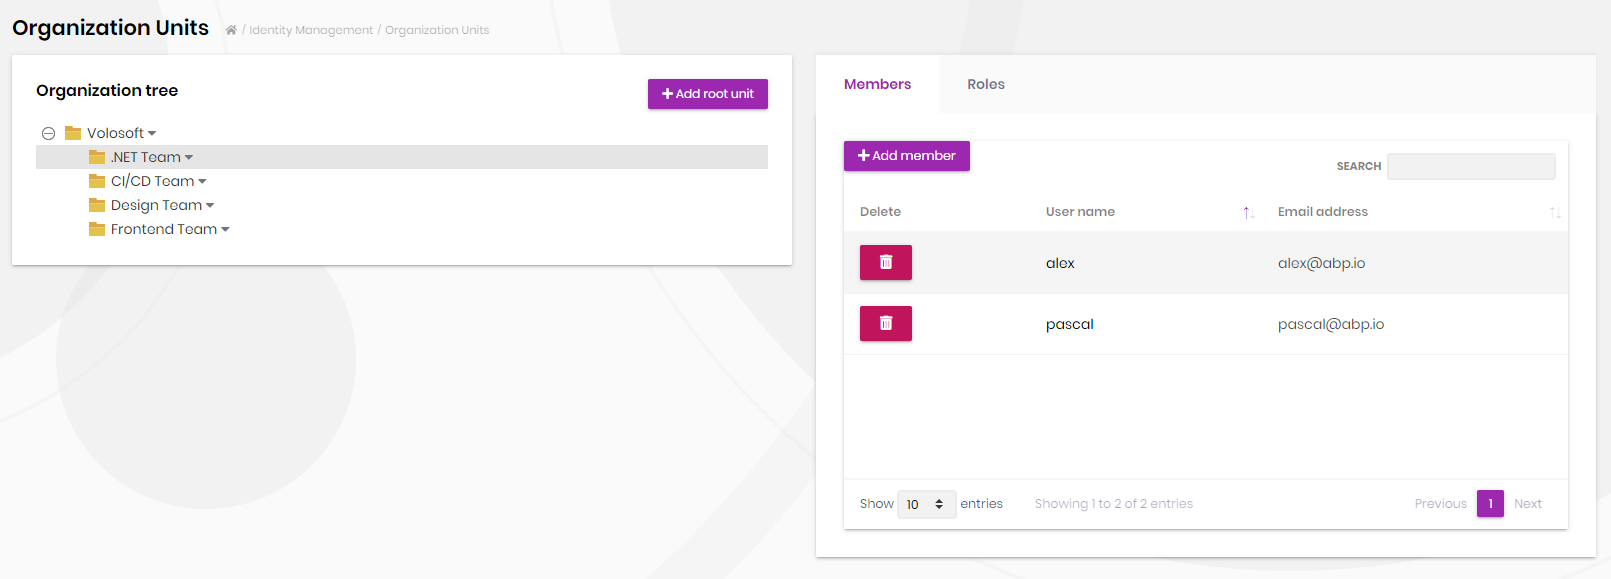
You can add a new organization unit or edit an existing organization unit on this page. In order to add a new root organization unit, click "Add root unit" button and fill the opening form.
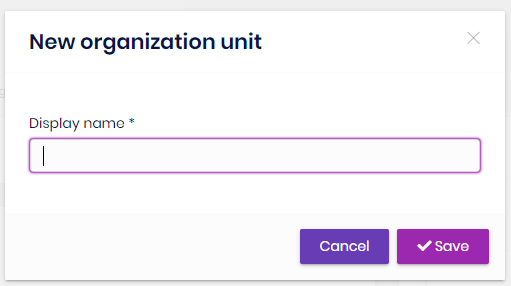
In order to add a sub-unit to an existing organization unit, right click on an existing organization unit and click "Add sub-unit" context menu item. Similarly, in order to edit an organization unit, right click on an existing organization unit and click "Edit" context menu item.
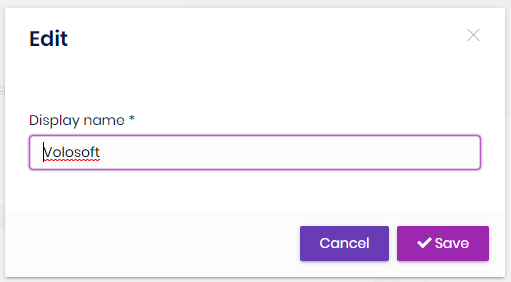
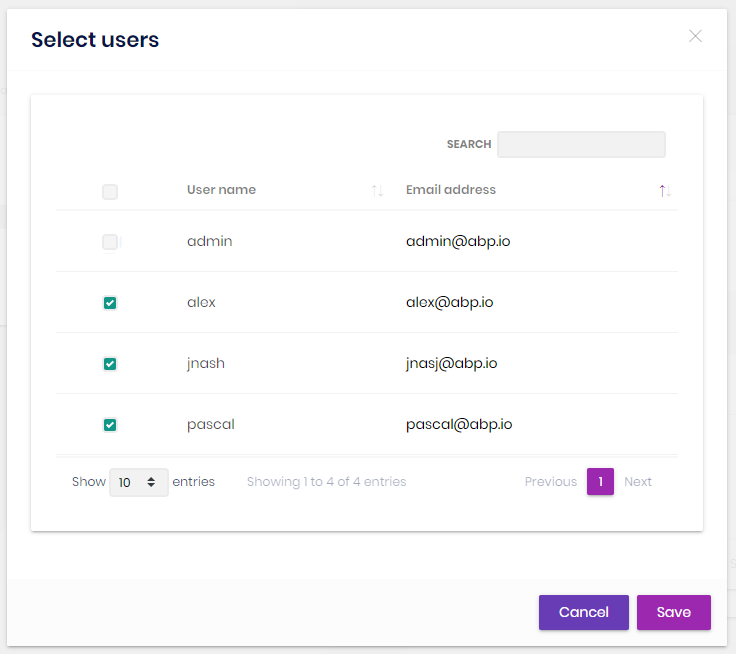
You can manage members of an organization unit using the members tab by selection an organization unit or by right clicking to an item on the organization unit tree.
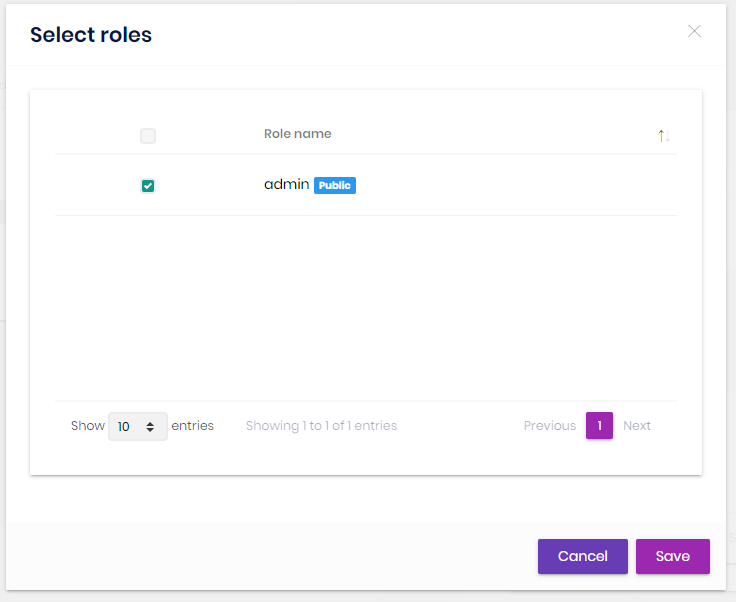
You can manage roles of an organization unit using the members tab or by right clicking to an item on the organization unit tree. An organization unit inherits permissions of its roles.
Security Logs
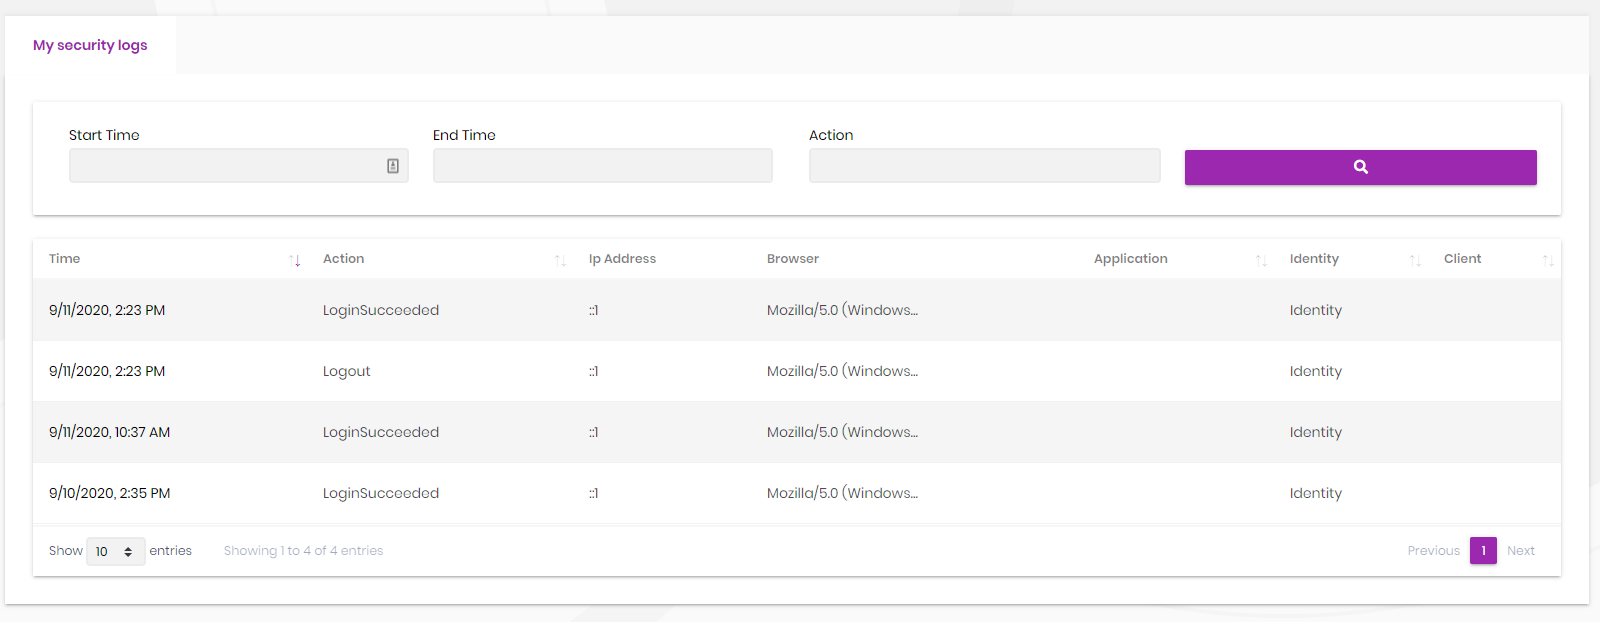
Security logs page is used to search and view authentication related operations (login, logout, change password...) in the system.
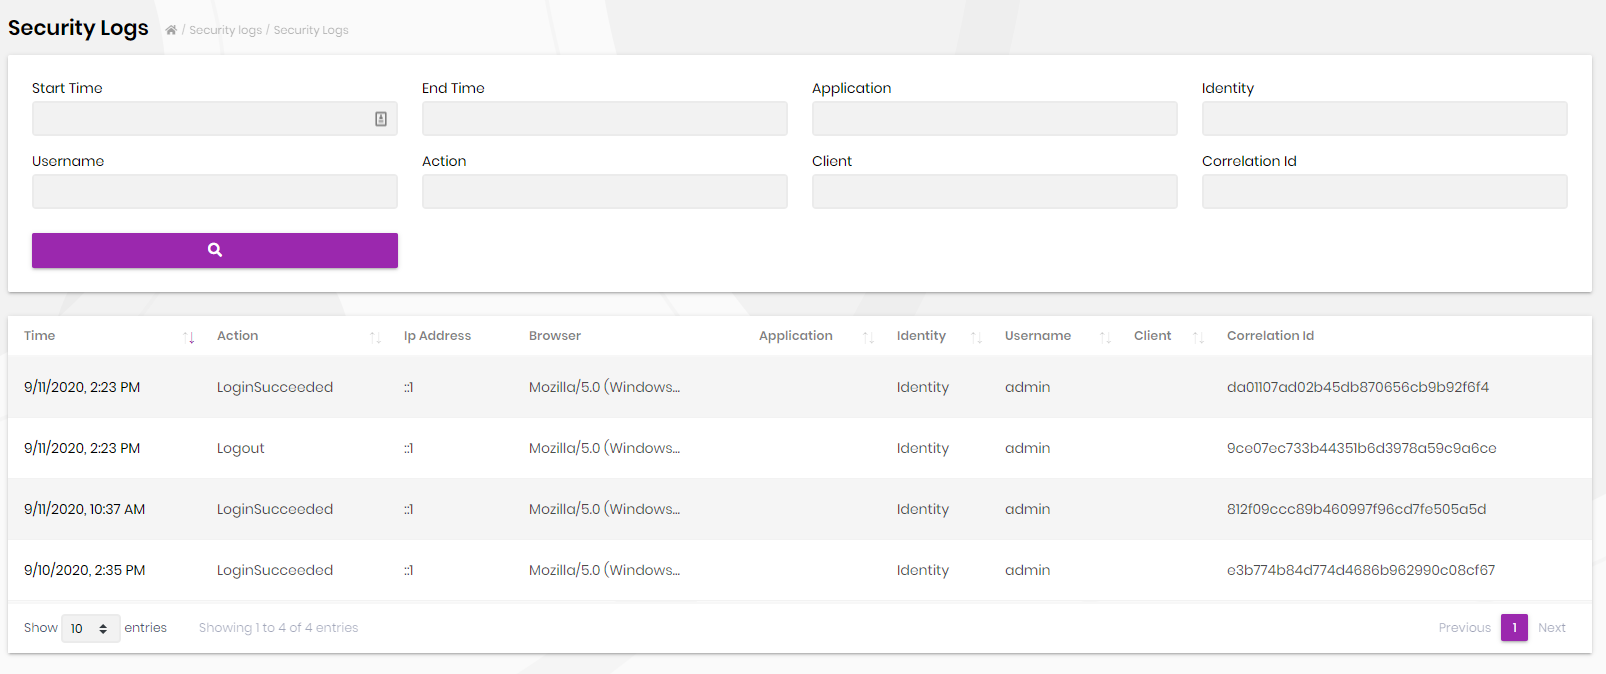
Also, each user can view security logs for his/her account as shown in the screenshot below;
Data seed
This module adds some initial data (see the data seed system) to the database when you run the .DbMigrator application:
- Creates an
adminrole with all the permissions granted. - Creates an
adminuser with theadminrole and1q2w3E*as the password.
You normally change this password when you first run the application in your production environment. But if you want to change the password of the seed data, find the ProjectNameDbMigrationService in your solution, locate to the MigrateAsync method. There will be a line like that:
await _dataSeeder.SeedAsync();
Change it like that:
await _dataSeeder.SeedAsync(
    new DataSeedContext()
        .WithProperty("AdminPassword", "myPassW00rd42")
);
Just like the password, you can also set the admin email (use the AdminEmail key in this case).
The data seed contributor class of the Identity module is
IdentityDataSeedContributorwhich internally uses theIIdentityDataSeederservice.
Options
AbpIdentityAspNetCoreOptions
AbpIdentityAspNetCoreOptions can be configured in the UI layer, in the ConfigureServices method of your module. Example:
Configure<AbpIdentityAspNetCoreOptions>(options =>
{
    //Set options here...
});
AbpIdentityAspNetCoreOptions properties:
ConfigureAuthentication(default: true): Identity module callsAddAuthenticationandAddIdentityCookiesextension methods by default to configure the authentication for the Identity library. It setsDefaultSchemetoIdentityConstants.ApplicationSchemeandDefaultSignInSchemetoIdentityConstants.ExternalScheme. You can set this property tofalseto suppress it and configure it yourself.
Internals
Domain layer
Aggregates
This module follows the Entity Best Practices & Conventions guide.
User
A user is generally a person logins to and uses the application.
IdentityUser(aggregate root): Represents a user in the system.IdentityUserRole(collection): Roles to the user.IdentityUserClaim(collection): Custom claims of the user.IdentityUserLogin(collection): External logins of the user.IdentityUserToken(collection): Tokens of the user (used by the Microsoft Identity services).
Role
A role is typically a group of permissions to assign to the users.
IdentityRole(aggregate root): Represents a role in the system.IdentityRoleClaim(collection): Custom claims of the role.
Claim type
A claim type is a definition of a custom claim that can be assigned to other entities (like roles and users) in the system.
IdentityClaimType(aggregate root): Represents a claim type definition. It contains some properties (e.g. Required, Regex, Description, ValueType) to define the claim type and the validation rules.
Identity Security Log
A IdentitySecurityLog represents an authentication related operation in the system.
IdentitySecurityLog(aggregate root): Represents a security log in the system.
OrganizationUnit
An Organization unit is a entity in a hierarchical structure.
OrganizationUnit(aggregate root): Represents an organization unit in the system.Roles(collection): Roles of the organization unit.
Repositories
This module follows the Repository Best Practices & Conventions guide.
Following custom repositories are defined for this module:
IIdentityUserRepositoryIIdentityRoleRepositoryIIdentityClaimTypeRepositoryIIdentitySecurityLogRepositoryIOrganizationUnitRepository
Domain services
This module follows the Domain Services Best Practices & Conventions guide.
User manager
IdentityUserManager is used to manage users, their roles, claims, passwords, emails, etc. It is derived from Microsoft Identity's UserManager<T> class where T is IdentityUser.
Role manager
IdentityRoleManager is used to manage roles and their claims. It is derived from Microsoft Identity's RoleManager<T> class where T is IdentityRole.
Claim type manager
IdenityClaimTypeManager is used to perform some operations for the IdentityClaimType aggregate root.
Organization unit manager
OrganizationUnitManager is used to perform some operations for the OrganizationUnit aggregate root.
Security log manager
IdentitySecurityLogManager is used to save security logs.
Settings
See the IdentitySettingNames class members for all settings defined for this module.
Application layer
Application services
IdentityUserAppService(implementsIIdentityUserAppService): Implements the use cases of the user management UI.IdentityRoleAppService(implementIIdentityRoleAppService): Implements the use cases of the role management UI.IdentityClaimTypeAppService(implementsIIdentityClaimTypeAppService): Implements the use cases of the claim type management UI.IdentitySettingsAppService(implementsIIdentitySettingsAppService): Used to get and update settings for the Identity module.IdentityUserLookupAppService(implementsIIdentityUserLookupAppService): Used to get information for a user byidoruserName. It is aimed to be used internally by the ABP framework.ProfileAppService(implementsIProfileAppService): Used to change a user's profile and the password.IdentitySecurityLogAppService(implementsIIdentitySecurityLogAppService): Implements the use cases of the security logs UI.OrganizationUnitAppService(implementsOrganizationUnitAppService): Implements the use cases of the organization unit management UI.
Database providers
Common
Table / collection prefix & schema
All tables/collections use the Abp prefix by default. Set static properties on the AbpIdentityDbProperties class if you need to change the table prefix or set a schema name (if supported by your database provider).
Connection string
This module uses AbpIdentity for the connection string name. If you don't define a connection string with this name, it fallbacks to the Default connection string.
See the connection strings documentation for details.
Entity Framework Core
Tables
- AbpRoles
- AbpRoleClaims
- AbpUsers
- AbpUserClaims
- AbpUserLogins
- AbpUserRoles
- AbpUserTokens
- AbpClaimTypes
- AbpOrganizationUnits
- AbpOrganizationUnitRoles
- AbpUserOrganizationUnits
- AbpSecurityLogs
MongoDB
Collections
- AbpRoles
- AbpUsers
- AbpClaimTypes
- AbpOrganizationUnits
- AbpSecurityLogs
Permissions
See the IdentityPermissions class members for all permissions defined for this module.
Angular UI
Installation
In order to configure the application to use the IdentityModule, you first need to import IdentityConfigModule from @volo/abp.ng.identity/config to root module. IdentityConfigModule has a static forRoot method which you should call for a proper configuration.
// app.module.ts
import { IdentityConfigModule } from '@volo/abp.ng.identity/config';

@NgModule({
  imports: [
    // other imports
    IdentityConfigModule.forRoot(),
    // other imports
  ],
  // ...
})
export class AppModule {}
The IdentityModule should be imported and lazy-loaded in your routing module. It has a static forLazy method for configuration. Available options are listed below. It is available for import from @volo/abp.ng.identity.
// app-routing.module.ts
const routes: Routes = [
  // other route definitions
  {
    path: 'identity',
    loadChildren: () =>
      import('@volo/abp.ng.identity').then(m => m.IdentityModule.forLazy(/* options here */)),
  },
];

@NgModule(/* AppRoutingModule metadata */)
export class AppRoutingModule {}
If you have generated your project via the startup template, you do not have to do anything, because it already has both
IdentityConfigModuleandIdentityModule.
Options
You can modify the look and behavior of the module pages by passing the following options to IdentityModule.forLazy static method:
- entityActionContributors: Changes grid actions. Please check Entity Action Extensions for Angular for details.
- toolbarActionContributors: Changes page toolbar. Please check Page Toolbar Extensions for Angular for details.
- entityPropContributors: Changes table columns. Please check Data Table Column Extensions for Angular for details.
- createFormPropContributors: Changes create form fields. Please check Dynamic Form Extensions for Angular for details.
- editFormPropContributors: Changes create form fields. Please check Dynamic Form Extensions for Angular for details.
Services / Models
Identity module services and models are generated via generate-proxy command of the ABP CLI. If you need the module's proxies, you can run the following command in the Angular project directory:
abp generate-proxy --module identity
Replaceable Components
eIdentityComponents enum provides all replaceable component keys. It is available for import from @volo/abp.ng.identity.
Please check Component Replacement document for details.
Remote Endpoint URL
The Identity module remote endpoint URL can be configured in the environment files.
export const environment = {
  // other configurations
  apis: {
    default: {
      url: 'default url here',
    },
    AbpIdentity: {
      url: 'Identity remote url here'
    }
    // other api configurations
  },
};
The Identity module remote URL configuration shown above is optional. If you don't set a URL, the default.url will be used as fallback.
Distributed Events
This module doesn't define any additional distributed event. See the standard distributed events.


