


Building the Products Module
In this part, you will learn how to create entities and services and a basic user interface for the products module.
This module's functionality will be minimal to focus on modularity. You can follow the Book Store tutorial to learn building more real-world applications with ABP.
If it is still running, please stop the web application before continuing with the tutorial.
Creating a Product Entity
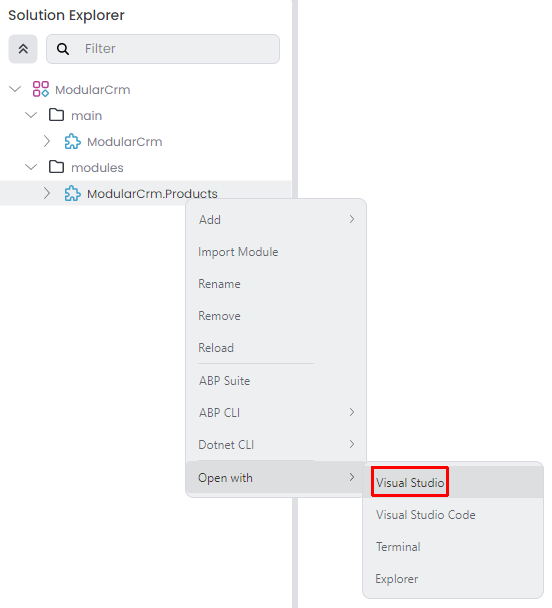
Open the ModularCrm.Products module in your favorite IDE. You can right-click the ModularCrm.Products module and select the Open With -> Visual Studio command to open the ModularCrm.Products module's .NET solution with Visual Studio. If you can not find your IDE in the Open with list, open with the Explorer, then open the .sln file with your IDE:
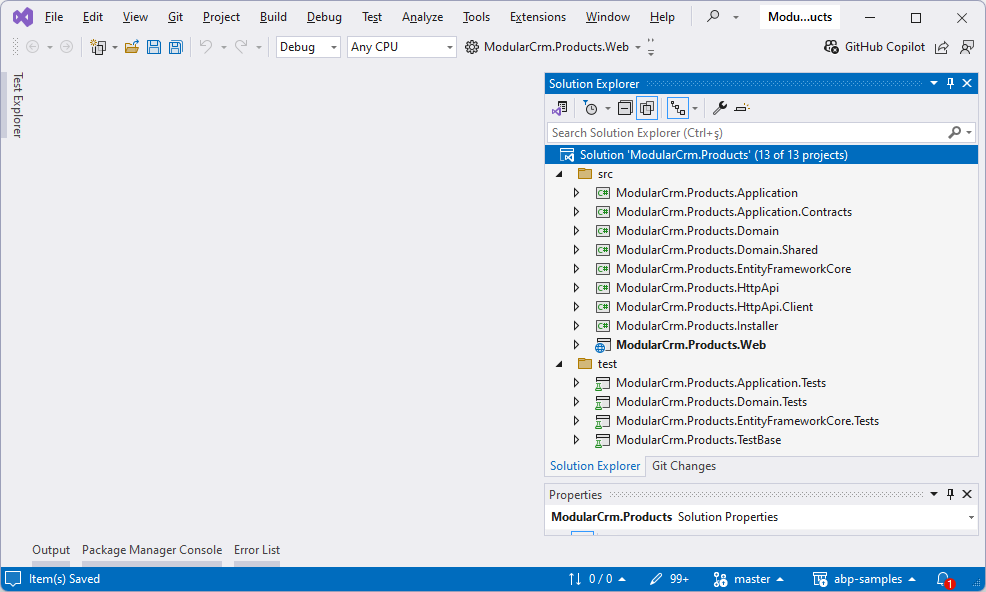
The ModularCrm.Products .NET solution should look like the following figure:
Add a new Product class under the ModularCrm.Products.Domain project (Right-click the ModularCrm.Products.Domain project, select Add -> Class):
using System;
using Volo.Abp.Domain.Entities;

namespace ModularCrm.Products;

public class Product : AggregateRoot<Guid>
{
    public string Name { get; set; }
    public int StockCount { get; set; }
}
Mapping Entity to Database
The next step is to configure the Entity Framework Core DbContext class and the database for the new entity.
Add a DbSet Property
Open the ProductsDbContext in the ModularCrm.Products.EntityFrameworkCore project and add a new DbSet property for the Product entity. The final ProductsDbContext.cs file content should be the following:
using Microsoft.EntityFrameworkCore;
using Volo.Abp.Data;
using Volo.Abp.EntityFrameworkCore;

namespace ModularCrm.Products.EntityFrameworkCore;

[ConnectionStringName(ProductsDbProperties.ConnectionStringName)]
public class ProductsDbContext : AbpDbContext<ProductsDbContext>, IProductsDbContext
{
    public DbSet<Product> Products { get; set; } //NEW: DBSET FOR THE PRODUCT ENTITY

    public ProductsDbContext(DbContextOptions<ProductsDbContext> options)
        : base(options)
    {

    }

    protected override void OnModelCreating(ModelBuilder builder)
    {
        base.OnModelCreating(builder);
        builder.ConfigureProducts();
    }
}
The ProductsDbContext class implements the IProductsDbContext interface. Add the following property to the IProductsDbContext interface:
DbSet<Product> Products { get; set; }
The final IProductsDbContext interface should be the following:
using Microsoft.EntityFrameworkCore;
using Volo.Abp.Data;
using Volo.Abp.EntityFrameworkCore;

namespace ModularCrm.Products.EntityFrameworkCore;

[ConnectionStringName(ProductsDbProperties.ConnectionStringName)]
public interface IProductsDbContext : IEfCoreDbContext
{
    DbSet<Product> Products { get; set; }
}
Having such an IProductsDbContext interface allows us to decouple our repositories (and other classes) from the concrete ProductsDbContext class. This provides flexibility to the final application to merge multiple DbContexts into a single DbContext to manage database migrations easier and have a database level transaction support for multi-module database operations.
Configure the Table Mapping
The DDD module template is designed to be flexible so that your module can have a separate physical database or store its tables inside another database, like the main database of your application. To make that possible, it configures the database mapping in an extension method (ConfigureProducts) called inside the OnModelCreating method above. Find that extension method (in the ProductsDbContextModelCreatingExtensions class) and change its content as the following code block:
using Microsoft.EntityFrameworkCore;
using Volo.Abp;
using Volo.Abp.EntityFrameworkCore.Modeling;

namespace ModularCrm.Products.EntityFrameworkCore;

public static class ProductsDbContextModelCreatingExtensions
{
    public static void ConfigureProducts(
        this ModelBuilder builder)
    {
        Check.NotNull(builder, nameof(builder));

        builder.Entity<Product>(b =>
        {
            //Configure table & schema name
            b.ToTable(ProductsDbProperties.DbTablePrefix + "Products",
                      ProductsDbProperties.DbSchema);

            //Always call this method to setup base entity properties
            b.ConfigureByConvention();

            //Properties of the entity
            b.Property(q => q.Name).IsRequired().HasMaxLength(100);
        });
    }
}
First, we are setting the database table name with the ToTable method. ProductsDbProperties.DbTablePrefix defines a constant that is added as a prefix to all database table names of this module. If you see the ProductsDbProperties class (in the ModularCrm.Products.Domain project), DbTablePrefix value is Products. In that case, the table name for the Product entity will be ProductsProducts. That is unnecessary for such a simple module; we can remove that prefix. So, you can change the ProductsDbProperties class with the following content to set an empty string to the DbTablePrefix property:
namespace ModularCrm.Products;

public static class ProductsDbProperties
{
    public static string DbTablePrefix { get; set; } = "";
    public static string? DbSchema { get; set; } = null;
    public const string ConnectionStringName = "Products";
}
You can set a DbSchema to collect a module's tables under a separate schema (if your DBMS supports it) or use a DbTablePrefix as a prefix for all module table names. We won't set any of them for this tutorial.
At that point, build the ModularCrm.Products .NET solution in your IDE (or ABP Studio UI). We will switch to the main application's .NET solution.
Configuring the Main Application Database
We changed the Entity Framework Core configuration. The next step should be adding a new code-first database migration and updating the database so the new Products table is created on the database.
We are not managing the database migrations in the module. Instead, the main application decides which DBMS (Database Management System) to use and how to share physical database(s) among modules. We will store all the modules' data in a single physical database to simplify this tutorial.
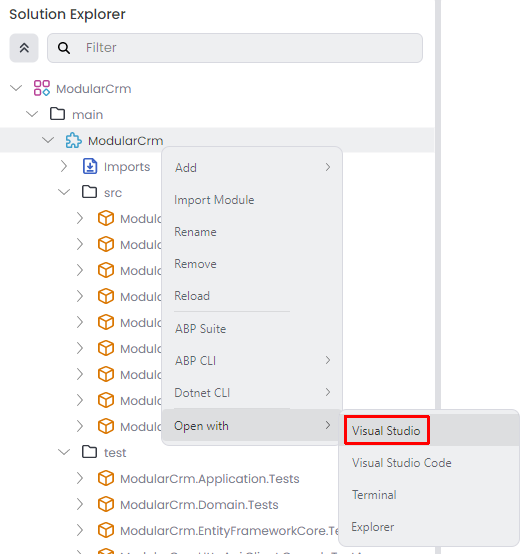
Open the ModularCrm module (which is the main application) in your IDE:
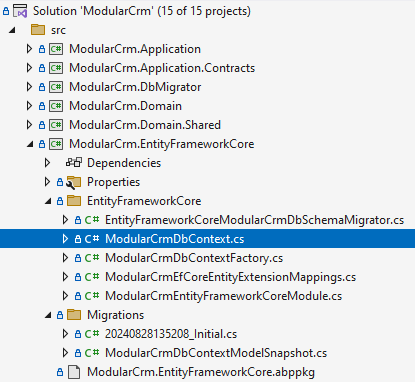
Find the ModularCrmDbContext class under the ModularCrm.EntityFrameworkCore project:
We will merge module's database configuration into ModularCrmDbContext.
Replace the IProductsDbContext Service
Follow the three steps below;
(1) Add the following attribute on top of the ModularCrmDbContext class:
[ReplaceDbContext(typeof(IProductsDbContext))]
ReplaceDbContext attribute makes it possible to use the ModularCrmDbContext class in the services in the Products module.
(2) Implement the IProductsDbContext by the ModularCrmDbContext class:
public class ModularCrmDbContext :
    AbpDbContext<ModularCrmDbContext>,
    ITenantManagementDbContext,
    IIdentityDbContext,
    IProductsDbContext //NEW: IMPLEMENT THE INTERFACE
{
    public DbSet<Product> Products { get; set; } //NEW: ADD DBSET PROPERTY
	...
}
(3) Finally, call the ConfigureProducts() extension method inside the OnModelCreating method after other Configure... module calls:
protected override void OnModelCreating(ModelBuilder builder)
{
    ...
    builder.ConfigureProducts(); //NEW: CALL THE EXTENSION METHOD
}
In this way, ModularCrmDbContext can be used by the products module over the IProductsDbContext interface. This part is only needed once for a module. Next time, you can add a new database migration, as explained in the next section.
Add a Database Migration
Now, we can add a new database migration. You can use Entity Framework Core's Add-Migration (or dotnet ef migrations add) terminal command, but we will use ABP Studio's shortcut UI in this tutorial.
Ensure that the solution has built. You can right-click the ModularCrm (under the main folder) on ABP Studio Solution Runner and select the Dotnet CLI -> Graph Build command.
Right-click the ModularCrm.EntityFrameworkCore package and select the EF Core CLI -> Add Migration command:

The Add Migration command opens a new dialog to get a migration name:

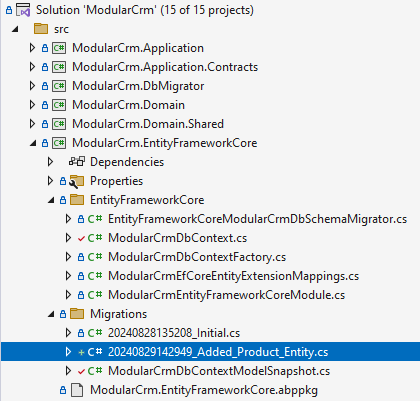
Once you click the OK button, a new database migration class is added to the Migrations folder of the ModularCrm.EntityFrameworkCore project:
Now, you can return to ABP Studio, right-click the ModularCrm.EntityFrameworkCore project and select the EF Core CLI -> Update Database command:

After the operation completes, you can check your database to see the new Products table has been created:

Creating the Application Service
Now, we will create an application service to perform some use cases related to products.
Defining the Application Service Contract
Return to your IDE (e.g. Visual Studio), open the ModularCrm.Products module's .NET solution and create an IProductAppService interface under the ModularCrm.Products.Application.Contracts project:
using System.Collections.Generic;
using System.Threading.Tasks;
using Volo.Abp.Application.Services;

namespace ModularCrm.Products;

public interface IProductAppService : IApplicationService
{
    Task<List<ProductDto>> GetListAsync();
    Task CreateAsync(ProductCreationDto input);
}
We are defining application service interfaces and data transfer objects in the Application.Contracts project. That way, we can share those contracts with clients without sharing the actual implementation class.
Defining Data Transfer Objects
The GetListAsync and CreateAsync methods use the ProductDto and ProductCreationDto classes, which have not been defined yet. So, we need to define them.
Create a ProductCreationDto class under the ModularCrm.Products.Application.Contracts project:
using System.ComponentModel.DataAnnotations;

namespace ModularCrm.Products;

public class ProductCreationDto
{
    [Required]
    [StringLength(100)]
    public string Name { get; set; }

    [Range(0, int.MaxValue)]
    public int StockCount { get; set; }
}
And create a ProductDto class under the ModularCrm.Products.Application.Contracts project:
using System;

namespace ModularCrm.Products
{
    public class ProductDto
    {
        public Guid Id { get; set; }
        public string Name { get; set; }
        public int StockCount { get; set; }
    }
}
The new files under the ModularCrm.Products.Application.Contracts project are shown below:

Implementing the Application Service
Now, we can implement the IProductAppService interface. Create a ProductAppService class under the ModularCrm.Products.Application project:
using System;
using System.Collections.Generic;
using System.Threading.Tasks;
using Volo.Abp.Domain.Repositories;

namespace ModularCrm.Products;

public class ProductAppService : ProductsAppService, IProductAppService
{
    private readonly IRepository<Product, Guid> _productRepository;

    public ProductAppService(IRepository<Product, Guid> productRepository)
    {
        _productRepository = productRepository;
    }

    public async Task<List<ProductDto>> GetListAsync()
    {
        var products = await _productRepository.GetListAsync();
        return ObjectMapper.Map<List<Product>, List<ProductDto>>(products);
    }

    public async Task CreateAsync(ProductCreationDto input)
    {
        var product = new Product
        {
            Name = input.Name,
            StockCount = input.StockCount
        };

        await _productRepository.InsertAsync(product);
    }
}
Notice that ProductAppService class implements the IProductAppService and also inherits from the ProductsAppService class. Do not be confused about the naming (ProductAppService and ProductsAppService). The ProductsAppService is a base class. It makes a few configurations for localization and object mapping (you can see in the ModularCrm.Products.Application project). You can inherit all of your application services from that base class. This way, you can define some common properties and methods to share among all your application services. You can rename the base class if you feel that you may be confused later.
Object Mapping
ProductAppService.GetListAsync method uses the ObjectMapper service to convert Product entities to ProductDto objects. The mapping should be configured. Open the ProductsApplicationAutoMapperProfile class in the ModularCrm.Products.Application project and change it to the following code block:
using AutoMapper;

namespace ModularCrm.Products;

public class ProductsApplicationAutoMapperProfile : Profile
{
    public ProductsApplicationAutoMapperProfile()
    {
        CreateMap<Product, ProductDto>();
    }
}
We've added the CreateMap<Product, ProductDto>(); line to define the mapping.
Exposing Application Services as HTTP API Controllers
For this application, we don't need to create HTTP API endpoints for the products module. But it is good to understand how to do it when you need it. You have two options;
- You can create a regular ASP.NET Core Controller class in the
ModularCrm.Products.HttpApiproject, injectIProductAppServiceand use it to create wrapper methods. We will do this later while we create the Ordering module. - Alternatively, you can use the ABP's Auto API Controllers feature to expose your application services as API controllers by conventions. We will do it here.
Open the ModularCrmWebModule class in the main application's solution (the ModularCrm solution), find the PreConfigureServices method and add the following lines inside that method:
PreConfigure<IMvcBuilder>(mvcBuilder =>
{
    mvcBuilder.AddApplicationPartIfNotExists(typeof(ProductsApplicationModule).Assembly);
});
This will tell the ASP.NET Core to explore the given assembly to discover controllers.
Then open the ConfigureAutoApiControllers method of the same class and add a second ConventionalControllers.Create call as shown in the following code block:
Configure<AbpAspNetCoreMvcOptions>(options =>
{
    options.ConventionalControllers.Create(typeof(ModularCrmApplicationModule).Assembly);

    //ADD THE FOLLOWING LINE:
    options.ConventionalControllers.Create(typeof(ProductsApplicationModule).Assembly);
});
This will tell the ABP framework to create API controllers for the application services in the assembly.
We made these configurations in the main application's solution since there is no project in the product module's solution that references ASP.NET Core MVC packages and uses the product module's application layer. If you add a reference of
ModularCrm.Products.ApplicationtoModularCrm.Products.HttpApi, then you can move these configurations to theModularCrm.Products.HttpApiproject.
Now, ABP will automatically expose the application services defined in the ModularCrm.Products.Application project as API controllers. The next section will use these API controllers to create some example products.
Creating Example Products
This section will create a few example products using the Swagger UI. Thus, we will have some sample products to show on the UI.
Now, right-click the ModularCrm under the main folder in the Solution Explorer panel and select the Dotnet CLI -> Graph Build command. This will ensure that the product module and the main application are built and ready to run.
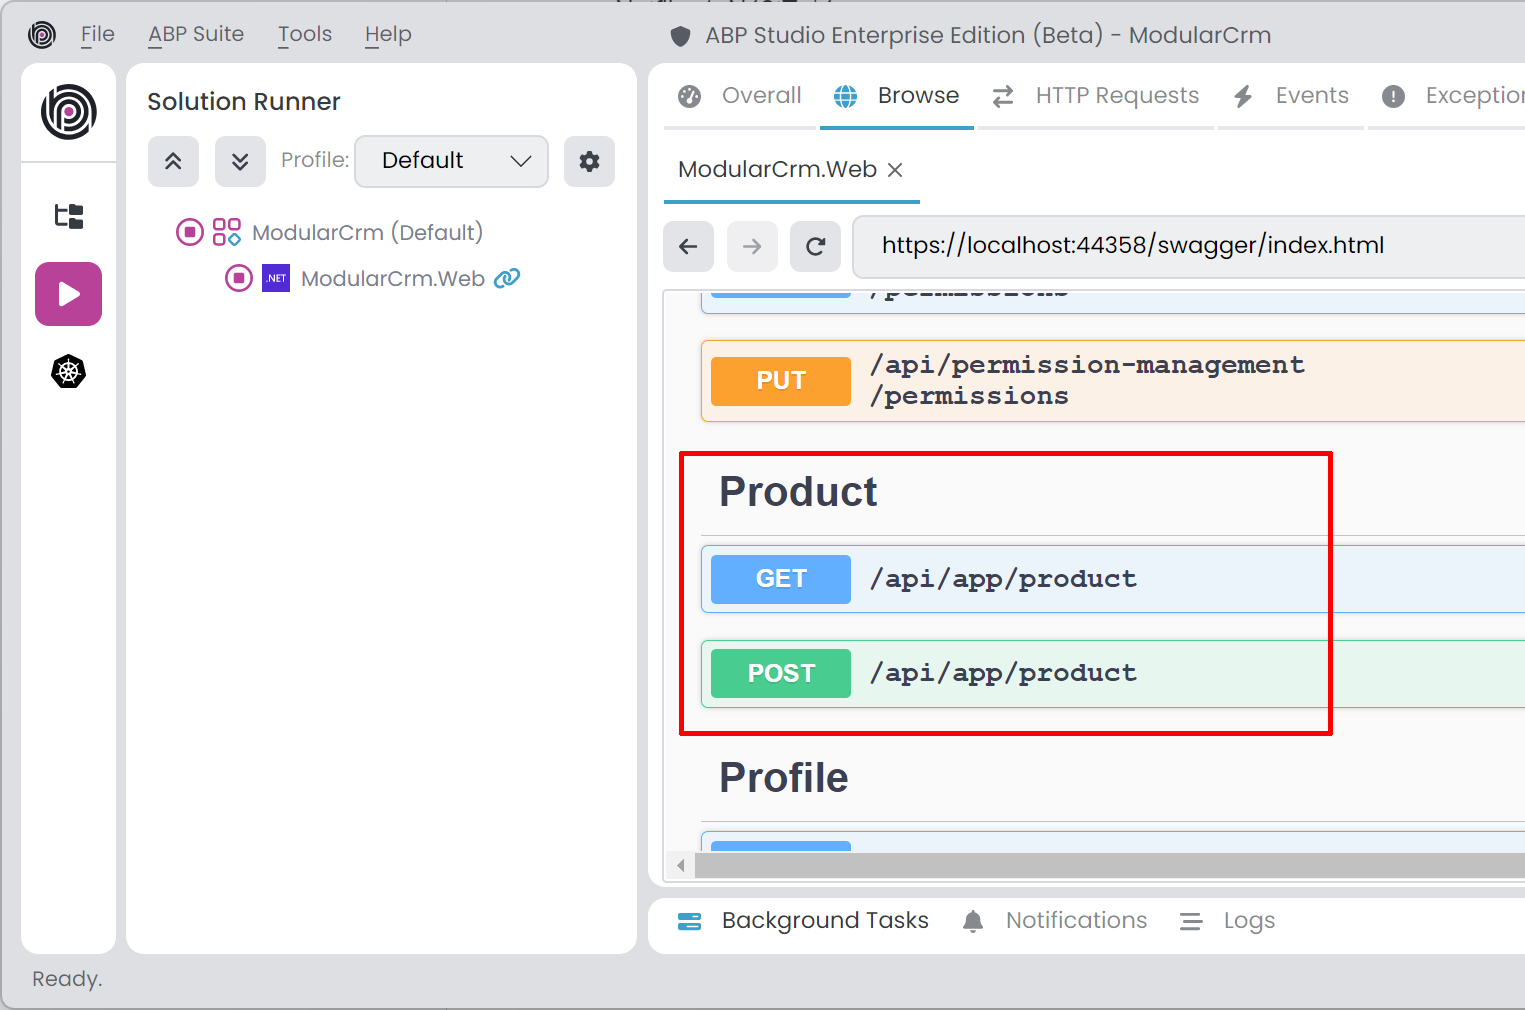
After the build process completes, open the Solution Runner panel and click the Play button near the solution root. Once the ModularCrm.Web application runs, we can right-click it and select the Browse command to open the user interface.
Once you see the user interface of the web application, type /swagger at the end of the URL to open the Swagger UI. If you scroll down, you should see the Products API:
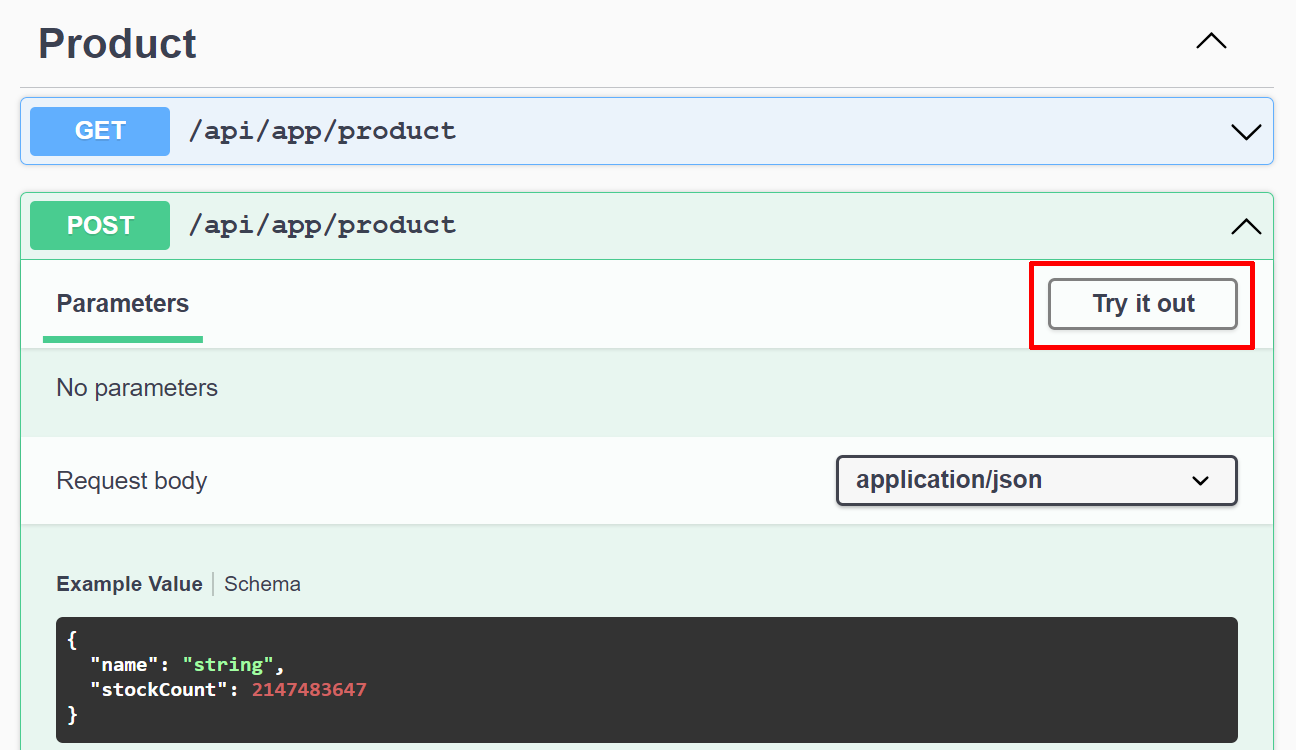
Expand the /api/app/product API and click the Try it out button as shown in the following figure:
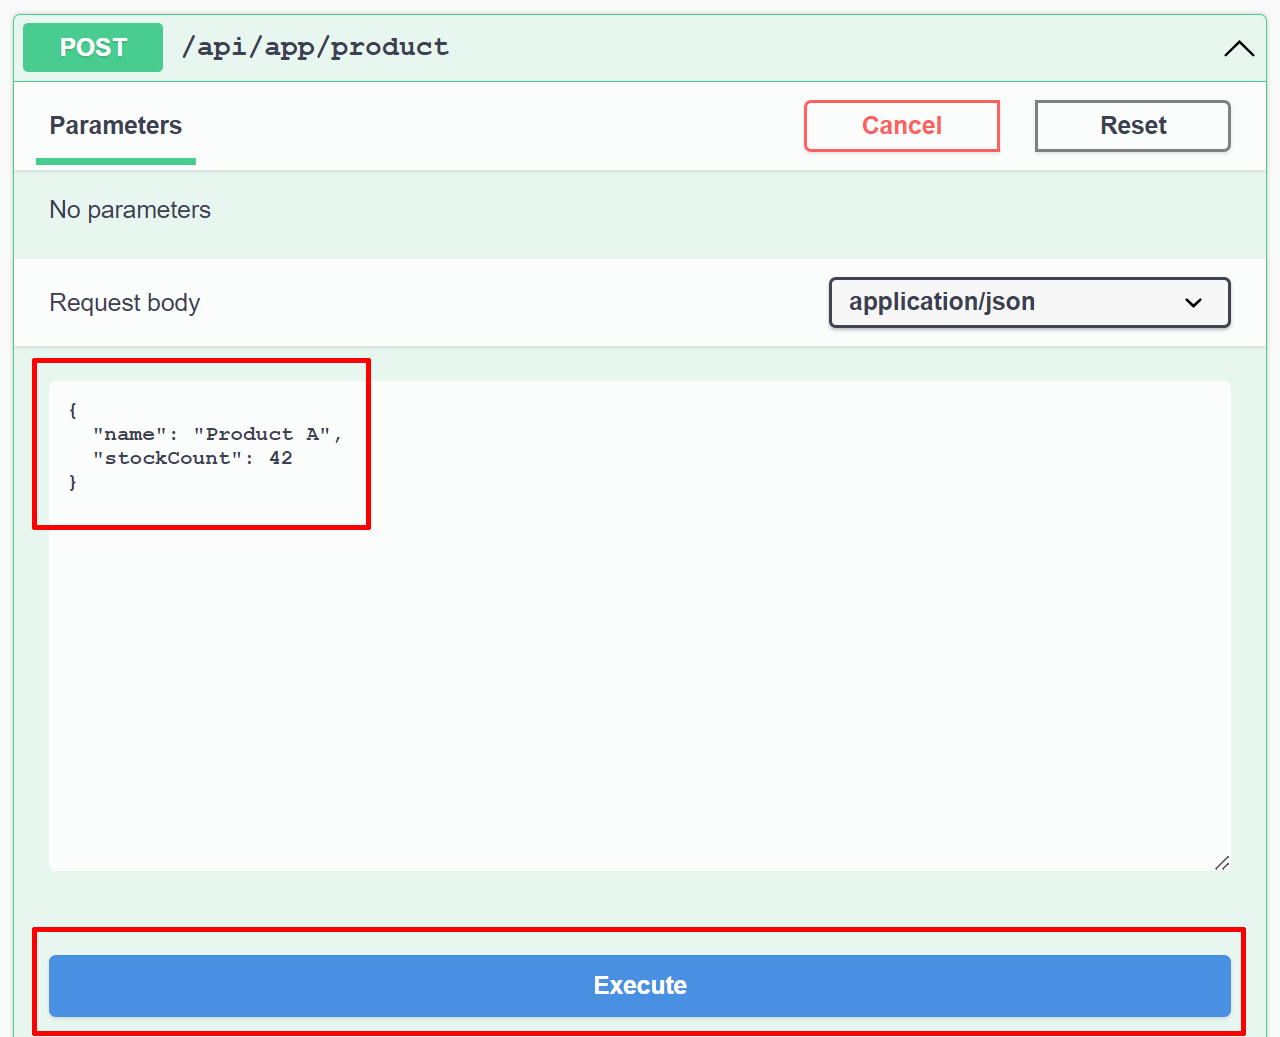
Then, create a few products by filling in the Request body and clicking the Execute button:
If you check the database, you should see the entities created in the Products table:

We've some entities in the database; we can show them on the user interface now.
Creating the User Interface
In this section, we will create a very simple user interface to demonstrate how to build UI in the products module and make it work in the main application.
As a first step, you can stop the application on ABP Studio's Solution Runner if it is currently running.
Open the ModularCrm.Products .NET solution in your IDE, and find the Pages/Products/Index.cshtml file under the ModularCrm.Products.Web project:

Replace the IndexModel.cshtml.cs file with the following content:
using System.Collections.Generic;
using System.Threading.Tasks;

namespace ModularCrm.Products.Web.Pages.Products;

public class IndexModel : ProductsPageModel
{
    public List<ProductDto> Products { get; set; }

    private readonly IProductAppService _productAppService;

    public IndexModel(IProductAppService productAppService)
    {
        _productAppService = productAppService;
    }

    public async Task OnGetAsync()
    {
        Products = await _productAppService.GetListAsync();
    }
}
Here, we simply use the IProductAppService to get a list of all products and assign the result to the Products property. We can use it in the Index.cshtml file to show a simple list of products on the UI:
@page
@using Microsoft.Extensions.Localization
@using ModularCrm.Products.Localization
@using ModularCrm.Products.Web.Pages.Products
@model ModularCrm.Products.Web.Pages.Products.IndexModel
@inject IStringLocalizer<ProductsResource> L

<h1>Products</h1>

<abp-card>
    <abp-card-body>
        <abp-list-group>
            @foreach (var product in Model.Products)
            {
                <abp-list-group-item>
                    @product.Name <span class="text-muted">(stock: @product.StockCount)</span>
                </abp-list-group-item>
            }
        </abp-list-group>
    </abp-card-body>
</abp-card>
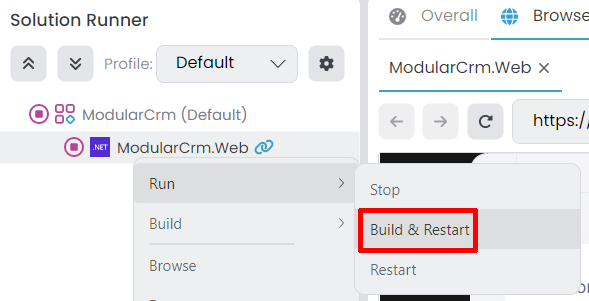
You can build the product module's .NET solution (ModularCrm.Products), then right-click the ModularCrm.Web application on ABP Studio's solution runner and select the Build & Restart command:
Now, you can browse the Products page to see the list of the products:

As you can see, developing a UI page in a modular ABP application is pretty straightforward. We kept the UI very simple to focus on modularity. To learn how to build complex application UIs, please check the Book Store Tutorial.
Final Notes
Some of the projects in the product module's .NET solution (ModularCrm.Products) are not necessary for most of the cases. They are available to support different scenarios. You can delete them from your module (and remove the dependencies on the main application) if you want:
ModularCrm.Products.HttpApi: This project aims to define regular HTTP API controllers. If you will always use ABP's Auto API Controllers feature (like we did in this tutorial), you can delete that project.ModularCrm.Products.HttpApi.Client: That project is generally shared with 3rd-party applications, so they can easily consume your HTTP API endpoints. In a modular monolith application, you typically don't need it.ModularCrm.Products.HttpApi.Installer: That project is used to discover and install a multi-projects module (like the product module) when you deploy it to a package management system (like NuGet). If you use the module with local project references (like we did here), you can delete that project.- You can also delete the test projects (there are 4 of them in the solution) if you don't prefer to write unit/integration tests in the module's solution (Legal warning: it is recommended to write tests 😊)

