Module Solution Template
This template can be used to create a reusable application module based on the module development best practices & conventions. It is also suitable for creating microservices (with or without UI).
How to Start With?
You can use the ABP CLI or ABP Studio to create a new project using this startup template. Alternatively, you can generate a CLI command from the Get Started page. We will use the ABP Studio for this guide.
First, install the ABP Studio if you haven't installed before. You can follow the installation guide for this.
Creating a New Empty Solution
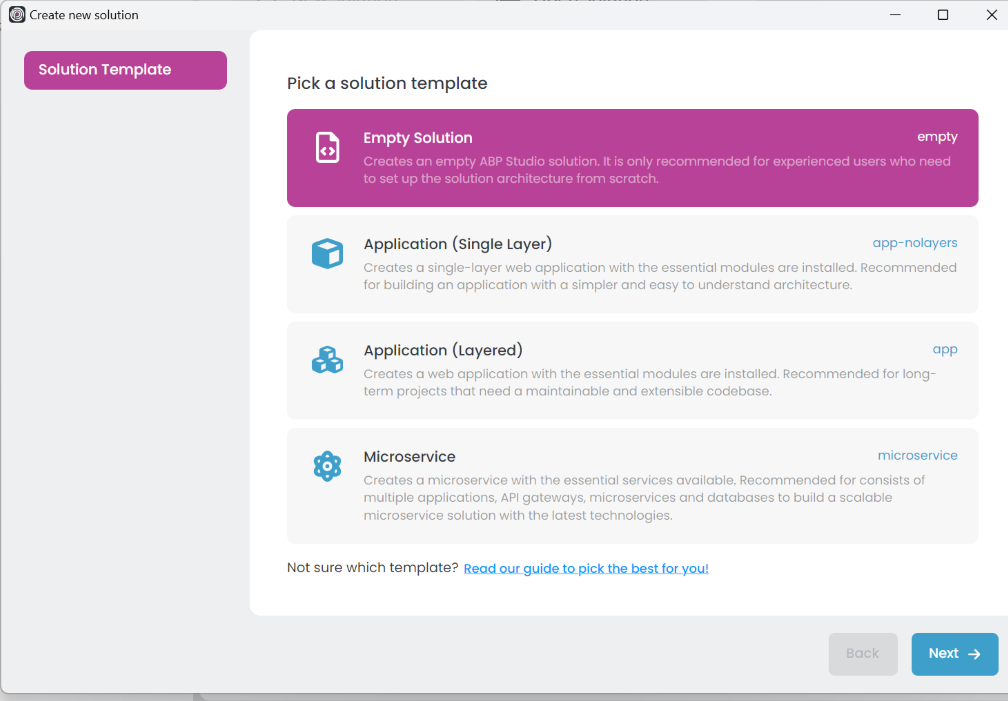
Open the ABP Studio and click the New solution button in the welcome page or the File > New Solution top menu item. Select the Empty Solution template and click the Next button.
Enter the solution name, select the solution folder and click the Create button.
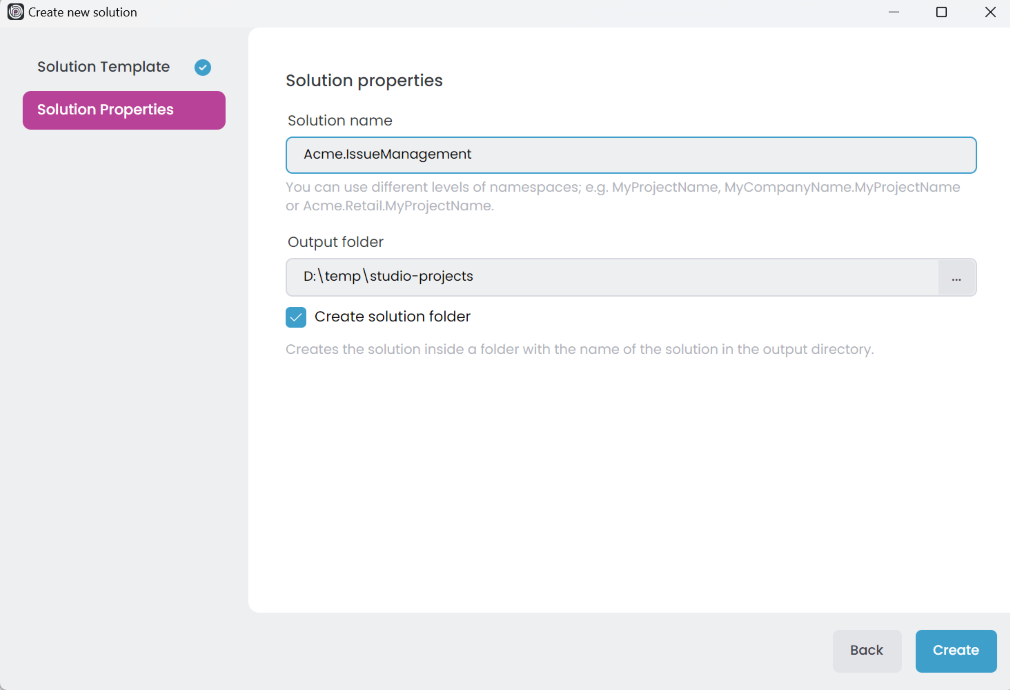
Acme.IssueManagementis the solution name, like YourCompany.YourProduct. You can use single level, two-levels or three-levels naming.
To understand the terms solution, module, and package, refer to the ABP Studio concepts document.
Creating a New DDD Module
When you create a new solution, the solution explorer on the left side of the screen will appear empty. Right-click on the root of the solution and select Add > New Module > DDD Module from the context menu.
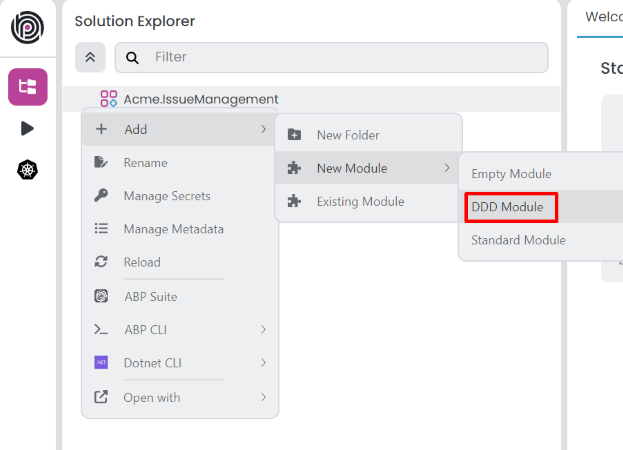
The Create New Module dialog will open. Enter the module name and click the Next button.
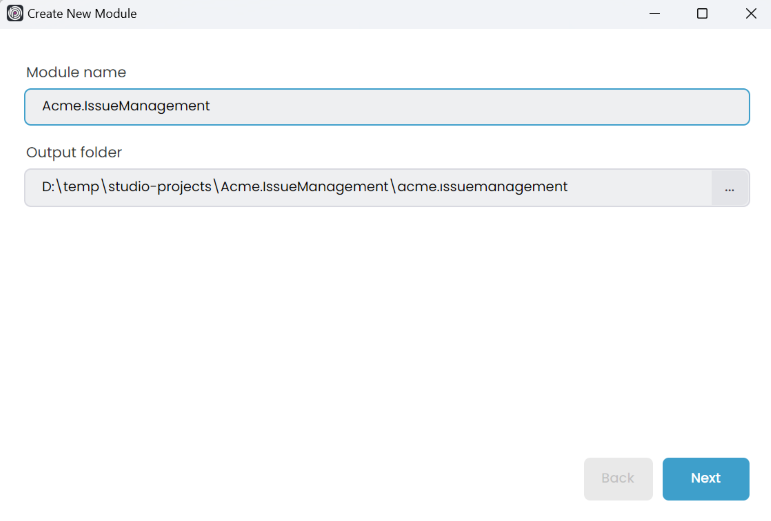
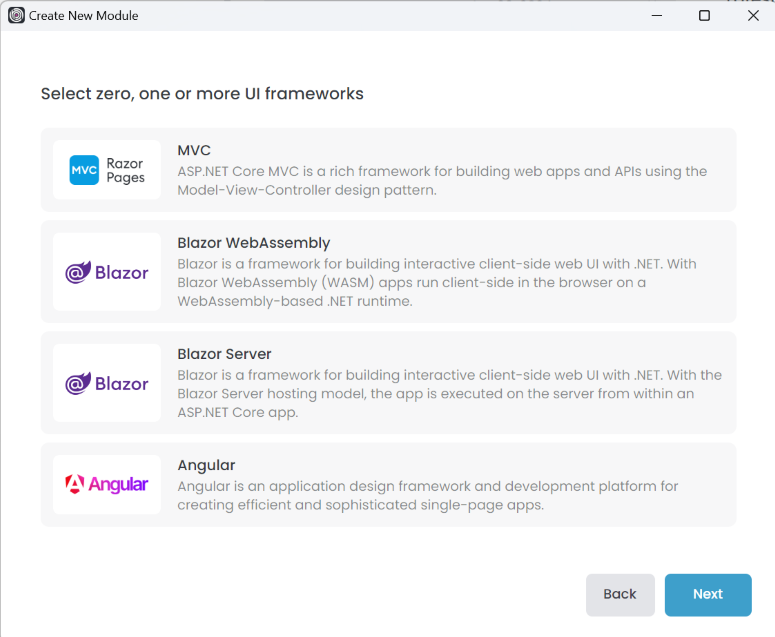
Now, you can select the user interface options or leave it empty to create a module without a user interface. A module can support multiple user interfaces, such as MVC, Blazor, Angular, etc., or none at all. Click the Next button to specify the database provider.
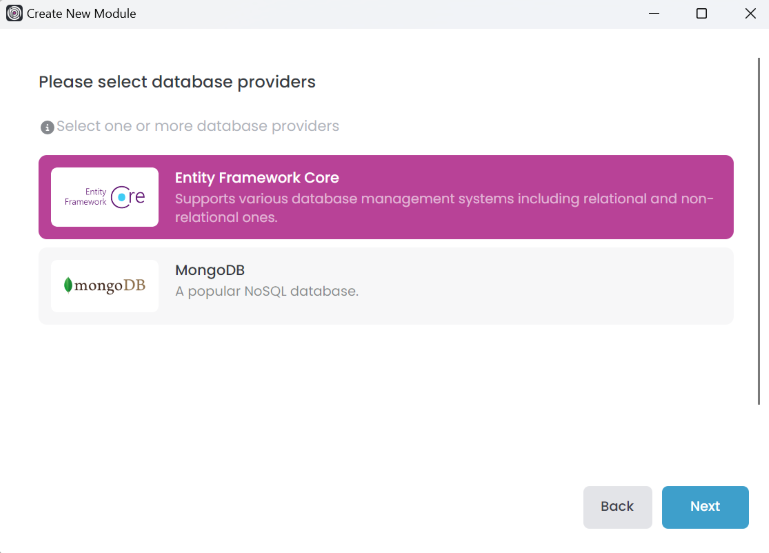
Select the database provider(s) you want to use in your module. You can choose EntityFrameworkCore, MongoDB, or both. Unlike the user interface options, you must select at least one database provider. Click the Next button to see the additional options.
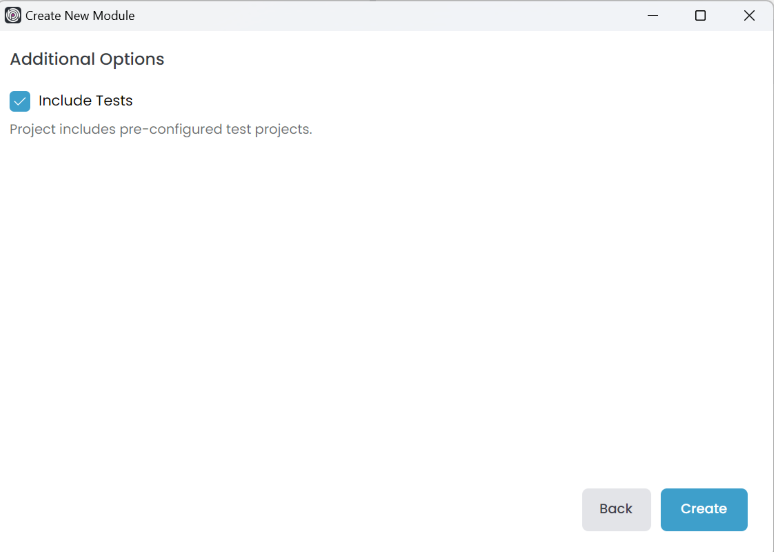
You can exclude the test projects from the module by unchecking the Include Tests option. Click the Create button to create the module.
Solution Structure
Based on the options you've specified, you will get a slightly different solution structure. If you don't specify any option, you will have a solution like shown below:
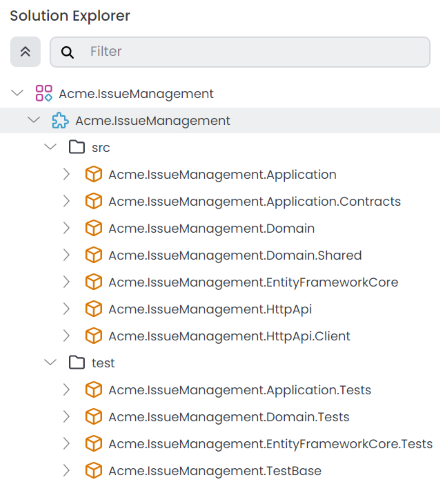
Projects are organized as src andtest folders:
srcfolder contains the actual module which is layered based on DDD principles.testfolder contains unit & integration tests.
The diagram below shows the layers & project dependencies of the module:

Each section below will explain the related project & its dependencies.
.Domain.Shared Project
This project contains constants, enums and other objects these are actually a part of the domain layer, but needed to be used by all layers/projects in the solution.
An IssueType enum and an IssueConsts class (which may have some constant fields for the Issue entity, like MaxTitleLength) are good candidates for this project.
- This project has no dependency to other projects in the solution. All other projects depend on this directly or indirectly.
.Domain Project
This is the domain layer of the solution. It mainly contains entities, aggregate roots, domain services, value types, repository interfaces and other domain objects.
An Issue entity, an IssueManager domain service and an IIssueRepository interface are good candidates for this project.
- Depends on the
.Domain.Sharedbecause it uses constants, enums and other objects defined in that project.
.Application.Contracts Project
This project mainly contains application service interfaces and Data Transfer Objects (DTO) of the application layer. It does exists to separate interface & implementation of the application layer. In this way, the interface project can be shared to the clients as a contract package.
An IIssueAppService interface and an IssueCreationDto class are good candidates for this project.
- Depends on the
.Domain.Sharedbecause it may use constants, enums and other shared objects of this project in the application service interfaces and DTOs.
.Application Project
This project contains the application service implementations of the interfaces defined in the .Application.Contracts project.
An IssueAppService class is a good candidate for this project.
- Depends on the
.Application.Contractsproject to be able to implement the interfaces and use the DTOs. - Depends on the
.Domainproject to be able to use domain objects (entities, repository interfaces... etc.) to perform the application logic.
.EntityFrameworkCore Project
This is the integration project for EF Core. It defines the DbContext and implements repository interfaces defined in the .Domain project.
- Depends on the
.Domainproject to be able to reference to entities and repository interfaces.
You can delete this project if you don't want to support EF Core for your module.
.MongoDB Project
This is the integration project for MongoDB.
- Depends on the
.Domainproject to be able to reference to entities and repository interfaces.
You can delete this project if you don't want to support MongoDB for your module.
Test Projects
The solution has multiple test projects, one for each layer:
.Domain.Testsis used to test the domain layer..Application.Testsis used to test the application layer..EntityFrameworkCore.Testsis used to test EF Core configuration and custom repositories..MongoDB.Testsis used to test MongoDB configuration and custom repositories..TestBaseis a base (shared) project for all tests.
Test projects are prepared for integration testing;
- It is fully integrated to ABP and all services in your application.
- It uses SQLite in-memory database for EF Core. For MongoDB, it uses the EphemeralMongo library.
- Authorization is disabled, so any application service can be easily used in tests.
You can still create unit tests for your classes which will be harder to write (because you will need to prepare mock/fake objects), but faster to run (because it only tests a single class and skips all initialization process).
Domain & Application tests are using EF Core. If you remove EF Core integration or you want to use MongoDB for testing these layers, you should manually change project references & module dependencies.
Host Project
The solution doesn't have a host application to run your module. However, you can create a single-layer or layered application and import the created module into the host application.
UI
Angular UI
The solution will have a folder called angular in it. This is where the Angular client-side code is located. When you open that folder in an IDE, the folder structure will look like below:

- angular/projects/issue-management folder contains the Angular module project.
- angular/projects/dev-app folder contains a development application that runs your module.
The server-side is similar to the solution described above. After you create a Host application, the API and the Angular demo application consume it.
How to Run the Angular Development App
For module development, you will need the dev-app project up and running. So, here is how we can start the development server.
First, we need to install dependencies:
- Open your terminal at the root folder, i.e.
angular. - Run
yarnornpm install.
The dependencies will be installed and some of them are ABP modules published as NPM packages. To see all ABP packages, you can run the following command in the angular folder:
yarn list --pattern abp
There is no equivalent of this command in npm.
The module you will develop depends on two of these ABP packages: @abp/ng.core and @abp/ng.theme.shared. Rest of the ABP modules are included in package.json because of the dev-app project.
Once all dependencies are installed, follow the steps below to serve your development app:
- Make sure Host application project is up and running.
- Change the
environment.tsfile in theangular/projects/dev-app/src/environmentsfolder to match your Host application URL. - Open your terminal at the root folder, i.e.
angular. - Run
yarn startornpm start.

The issue management page is empty in the beginning. You may change the content in IssueManagementComponent at the angular/projects/issue-management/src/lib/issue-management.component.ts path and observe that the view changes accordingly.
Now, let's have a closer look at some key elements of your project.
Main Module
IssueManagementModule at the angular/projects/issue-management/src/lib/issue-management.module.ts path is the main module of your module project. There are a few things worth mentioning in it:
- Essential ABP modules, i.e.
CoreModuleandThemeSharedModule, are imported. IssueManagementRoutingModuleis imported.IssueManagementComponentis declared.- It is prepared for configurability. The
forLazystatic method enables a configuration to be passed to the module when it is loaded by the router.
Main Routing Module
IssueManagementRoutingModule at the angular/projects/issue-management/src/lib/issue-management-routing.module.ts path is the main routing module of your module project. It currently does two things:
- Loads
DynamicLayoutComponentat base path it is given. - Loads
IssueManagementComponentas child to the layout, again at the given base path.
You can rearrange this module to load more than one component at different routes, but you need to update the route provider at angular/projects/issue-management/config/src/providers/route.provider.ts to match the new routing structure with the routes in the menu. Please check Modifying the Menu to see how route providers work.
Config Module
There is a config module at the angular/projects/issue-management/config/src/issue-management-config.module.ts path. The static forRoot method of this module is supposed to be called at the route level. So, you may assume the following will take place:
@NgModule({
  imports: [
    /* other imports */

    IssueManagementConfigModule.forRoot(),
  ],

  /* rest of the module meta data */
})
export class AppModule {}
You can use this static method to configure an application that uses your module project. An example of such configuration is already implemented and the ISSUE_MANAGEMENT_ROUTE_PROVIDERS token is provided here. The method can take options which enables further configuration possibilities.
The difference between the forRoot method of the config module and the forLazy method of the main module is that, for smallest bundle size, the former should only be used when you have to configure an app before your module is even loaded.
Testing Angular UI
Please see the testing document.


 Hurry up, ends March 14!


