


Getting Started with React Native
The React Native mobile option is available for Team or higher licenses
The ABP platform provides a basic React Native startup template to develop mobile applications integrated with your ABP-based backends.

How to Prepare Development Environment
Please follow the steps below to prepare your development environment for React Native.
Install Node.js: Visit the Node.js downloads page and download the appropriate Node.js v20.11+ installer for your operating system. Alternatively, you can install NVM to manage multiple versions of Node.js on your system.
[Optional] Install Yarn: You can install Yarn v1 (not v2) by following the instructions on the installation page. Yarn v1 provides a better developer experience compared to npm v6 and below. You can skip this step and use npm, which is built into Node.js.
[Optional] Install VS Code: VS Code is a free, open-source IDE that works seamlessly with TypeScript. While you can use any IDE, including Visual Studio or Rider, VS Code typically provides the best developer experience for React Native projects.
[Optional] Install an Emulator/Simulator: If you want to test on Android emulators or iOS simulators (instead of using the Web View method), you'll need to install one of the following:
- Android Studio & Emulator: Install Android Studio and set up an Android Virtual Device (AVD) through the AVD Manager. You can follow the Android Studio Emulator guide on expo.io documentation.
- Xcode & iOS Simulator: On macOS, install Xcode from the App Store, which includes the iOS Simulator. You can follow the iOS Simulator guide on expo.io documentation.
Note: The Web View method (recommended for quick testing) doesn't require an emulator or simulator. If you prefer a CLI-based approach for Android, you can check the setting up android emulator without android studio guide as an alternative.
How to Start a New React Native Project
You have multiple options to initiate a new React Native project that works with ABP:
1. Using ABP Studio
ABP Studio is the most convenient and flexible way to create a React Native application based on the ABP framework. Follow the tool documentation and select the option below:

2. Using ABP CLI
The ABP CLI is another way to create an ABP solution with a React Native application. Install the ABP CLI and run the following command in your terminal:
abp new MyCompanyName.MyProjectName -csf -u <angular or mvc> -m react-native
For more options, visit the CLI manual.
This command creates a solution containing an Angular or MVC project (depending on your choice), a .NET Core project, and a React Native project.
Running the React Native Application
Recommended: For faster development and testing, we recommend using the Web View option first, as it requires fewer backend modifications. The backend configuration described in the next section is only needed if you want to test on Android emulators or iOS simulators.
Before running the React Native application, install the dependencies by running yarn install or npm install in the react-native directory.
Web View (Recommended - Quickest Method)
The quickest way to test the application is by using the web view. While testing on a physical device is also supported, we recommend using local HTTPS development as it requires fewer backend modifications.
Follow these steps to set up the web view:
Navigate to the
react-nativedirectory and start the application by running:yarn webGenerate SSL certificates by running the following command in a separate directory:
mkcert localhostSet up the local proxy by running:
yarn create:local-proxyThe default port is
443. To use a different port, specify theSOURCE_PORTenvironment variable:SOURCE_PORT=8443 yarn create:local-proxyIf you changed the port in the previous step, update the
apiUrlinEnvironment.tsaccordingly.Update the mobile application settings in the database and re-run the migrations. If you specified a custom port, ensure the port is updated in the configuration as well:
"OpenIddict": {
  "Applications": {
    "MyApplication_Mobile": {
      "ClientId": "MyApplication_Mobile",
      "RootUrl": "https://localhost"
    }
  }
}
Running on Emulator/Simulator
If you prefer to test on an Android emulator or iOS simulator, you'll need to configure the backend as described in the section below. Follow these steps:
- Make sure the database migration is complete and the API is up and running.
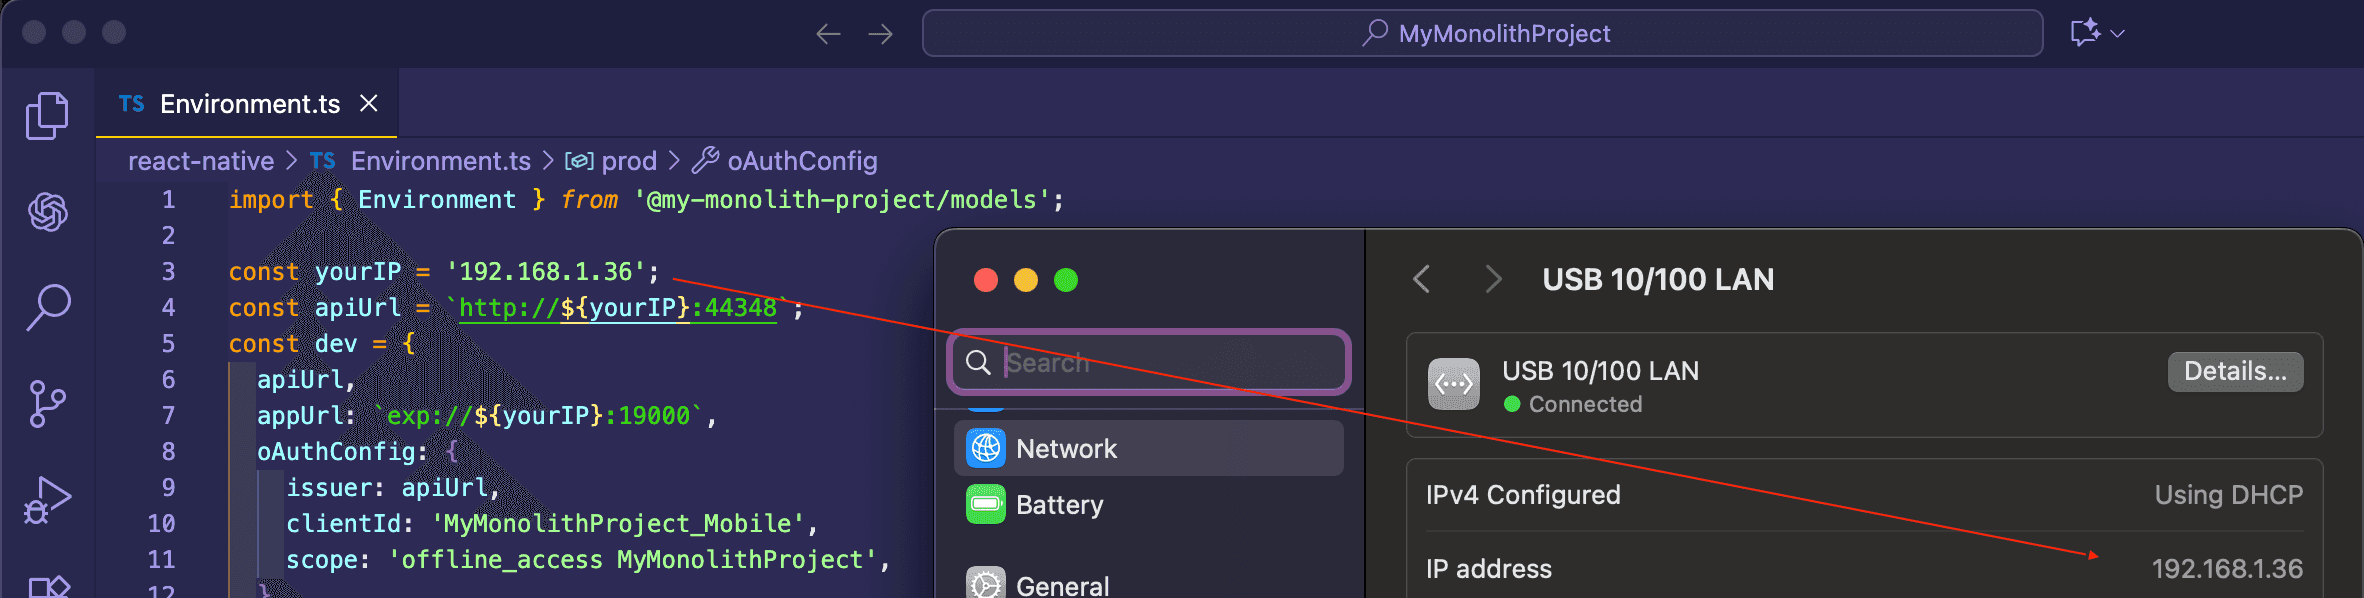
- Open
react-nativefolder and runyarn installornpm installif you have not already. - Open the
Environment.tsfile in thereact-nativefolder and replace thelocalhostaddress in theapiUrlandissuerproperties with your local IP address as shown below:
- Run
yarn startornpm start. Wait for the Expo CLI to print the options.
The React Native application was generated with Expo. Expo is a set of tools built around React Native to help you quickly start an app, and it includes many features.
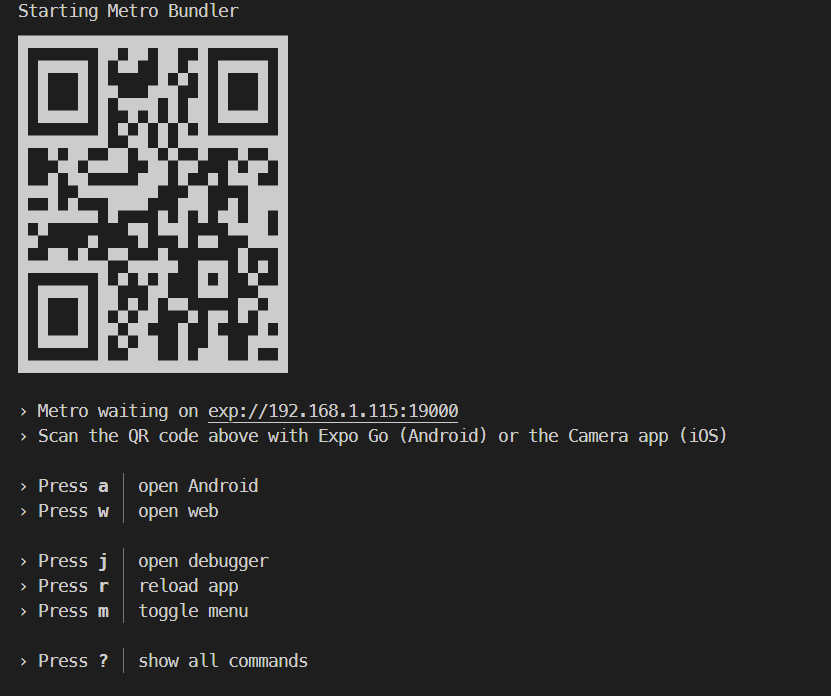
In the image above, you can start the application on an Android emulator, an iOS simulator, or a physical phone by scanning the QR code with the Expo Client or by choosing the corresponding option.
Expo
Android Studio
- Start the emulator in Android Studio before running the
yarn startornpm startcommand. - Press a to open in Android Studio.
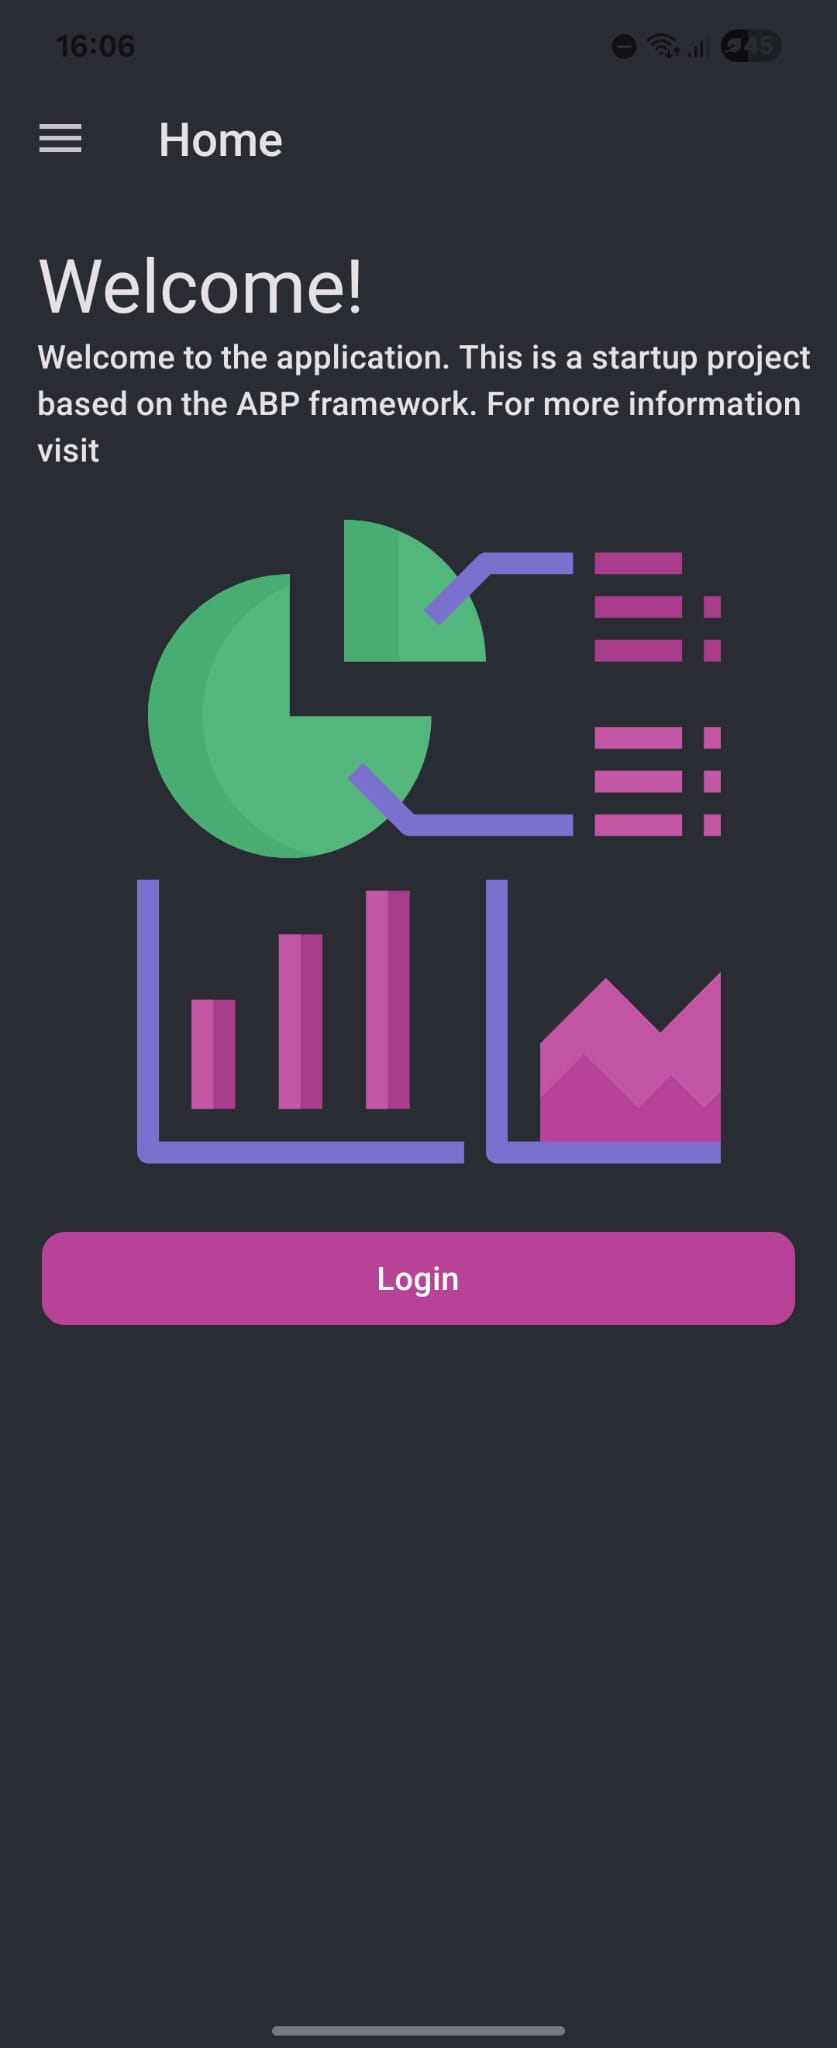
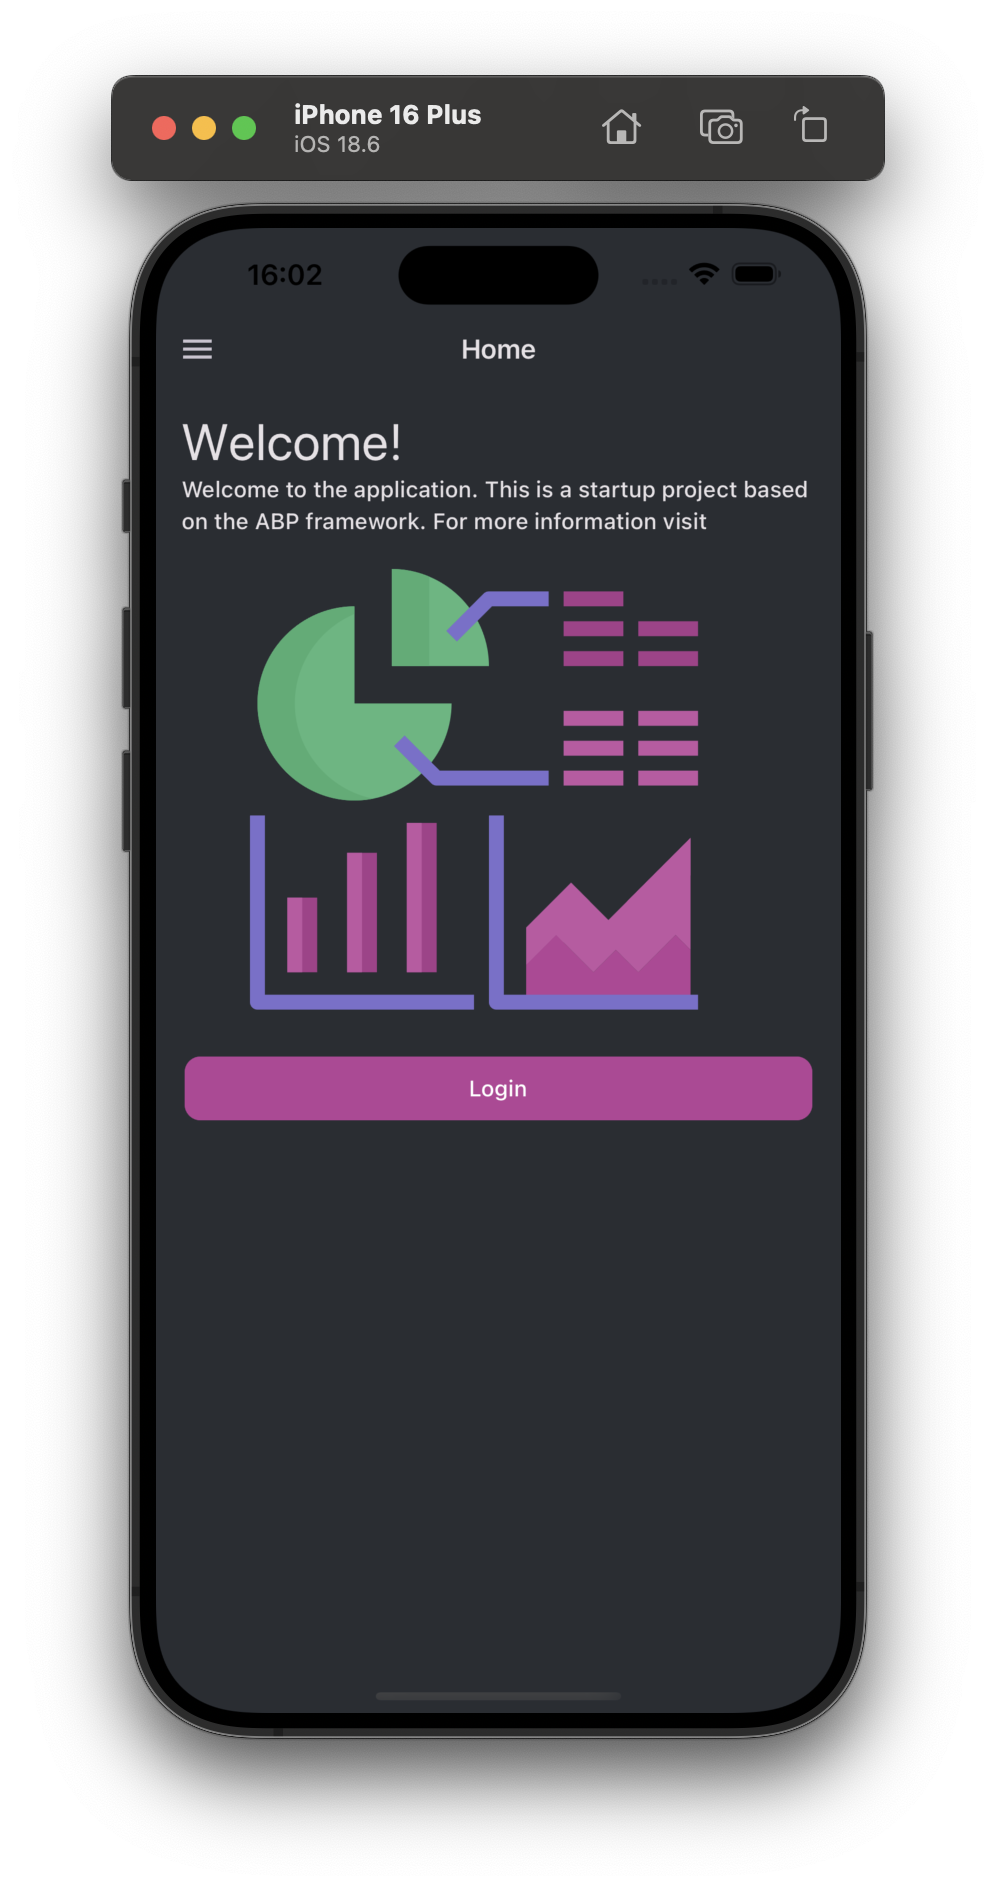
Enter admin as the username and 1q2w3E* as the password to log in to the application.
The application is up and running. You can continue to develop your application based on this startup template.
How to Configure & Run the Backend (Required for Emulator/Simulator Testing)
React Native application does not trust the auto-generated .NET HTTPS certificate. You should use HTTP during the development.
To disable the HTTPS-only settings of OpenIddict, open the MyProjectNameHttpApiHostModule project and add the following code block to the PreConfigureServices method:
#if DEBUG
    PreConfigure<OpenIddictServerBuilder>(options =>
    {
        options.UseAspNetCore()
            .DisableTransportSecurityRequirement();
    });
#endif
Important: Before running the backend application, make sure you have completed the database migration if you are starting with a fresh database. The backend application requires the database to be properly initialized.
A React Native application running on an Android emulator or a physical phone cannot connect to the backend on localhost. To resolve this, you need to run the backend application using the Kestrel configuration.
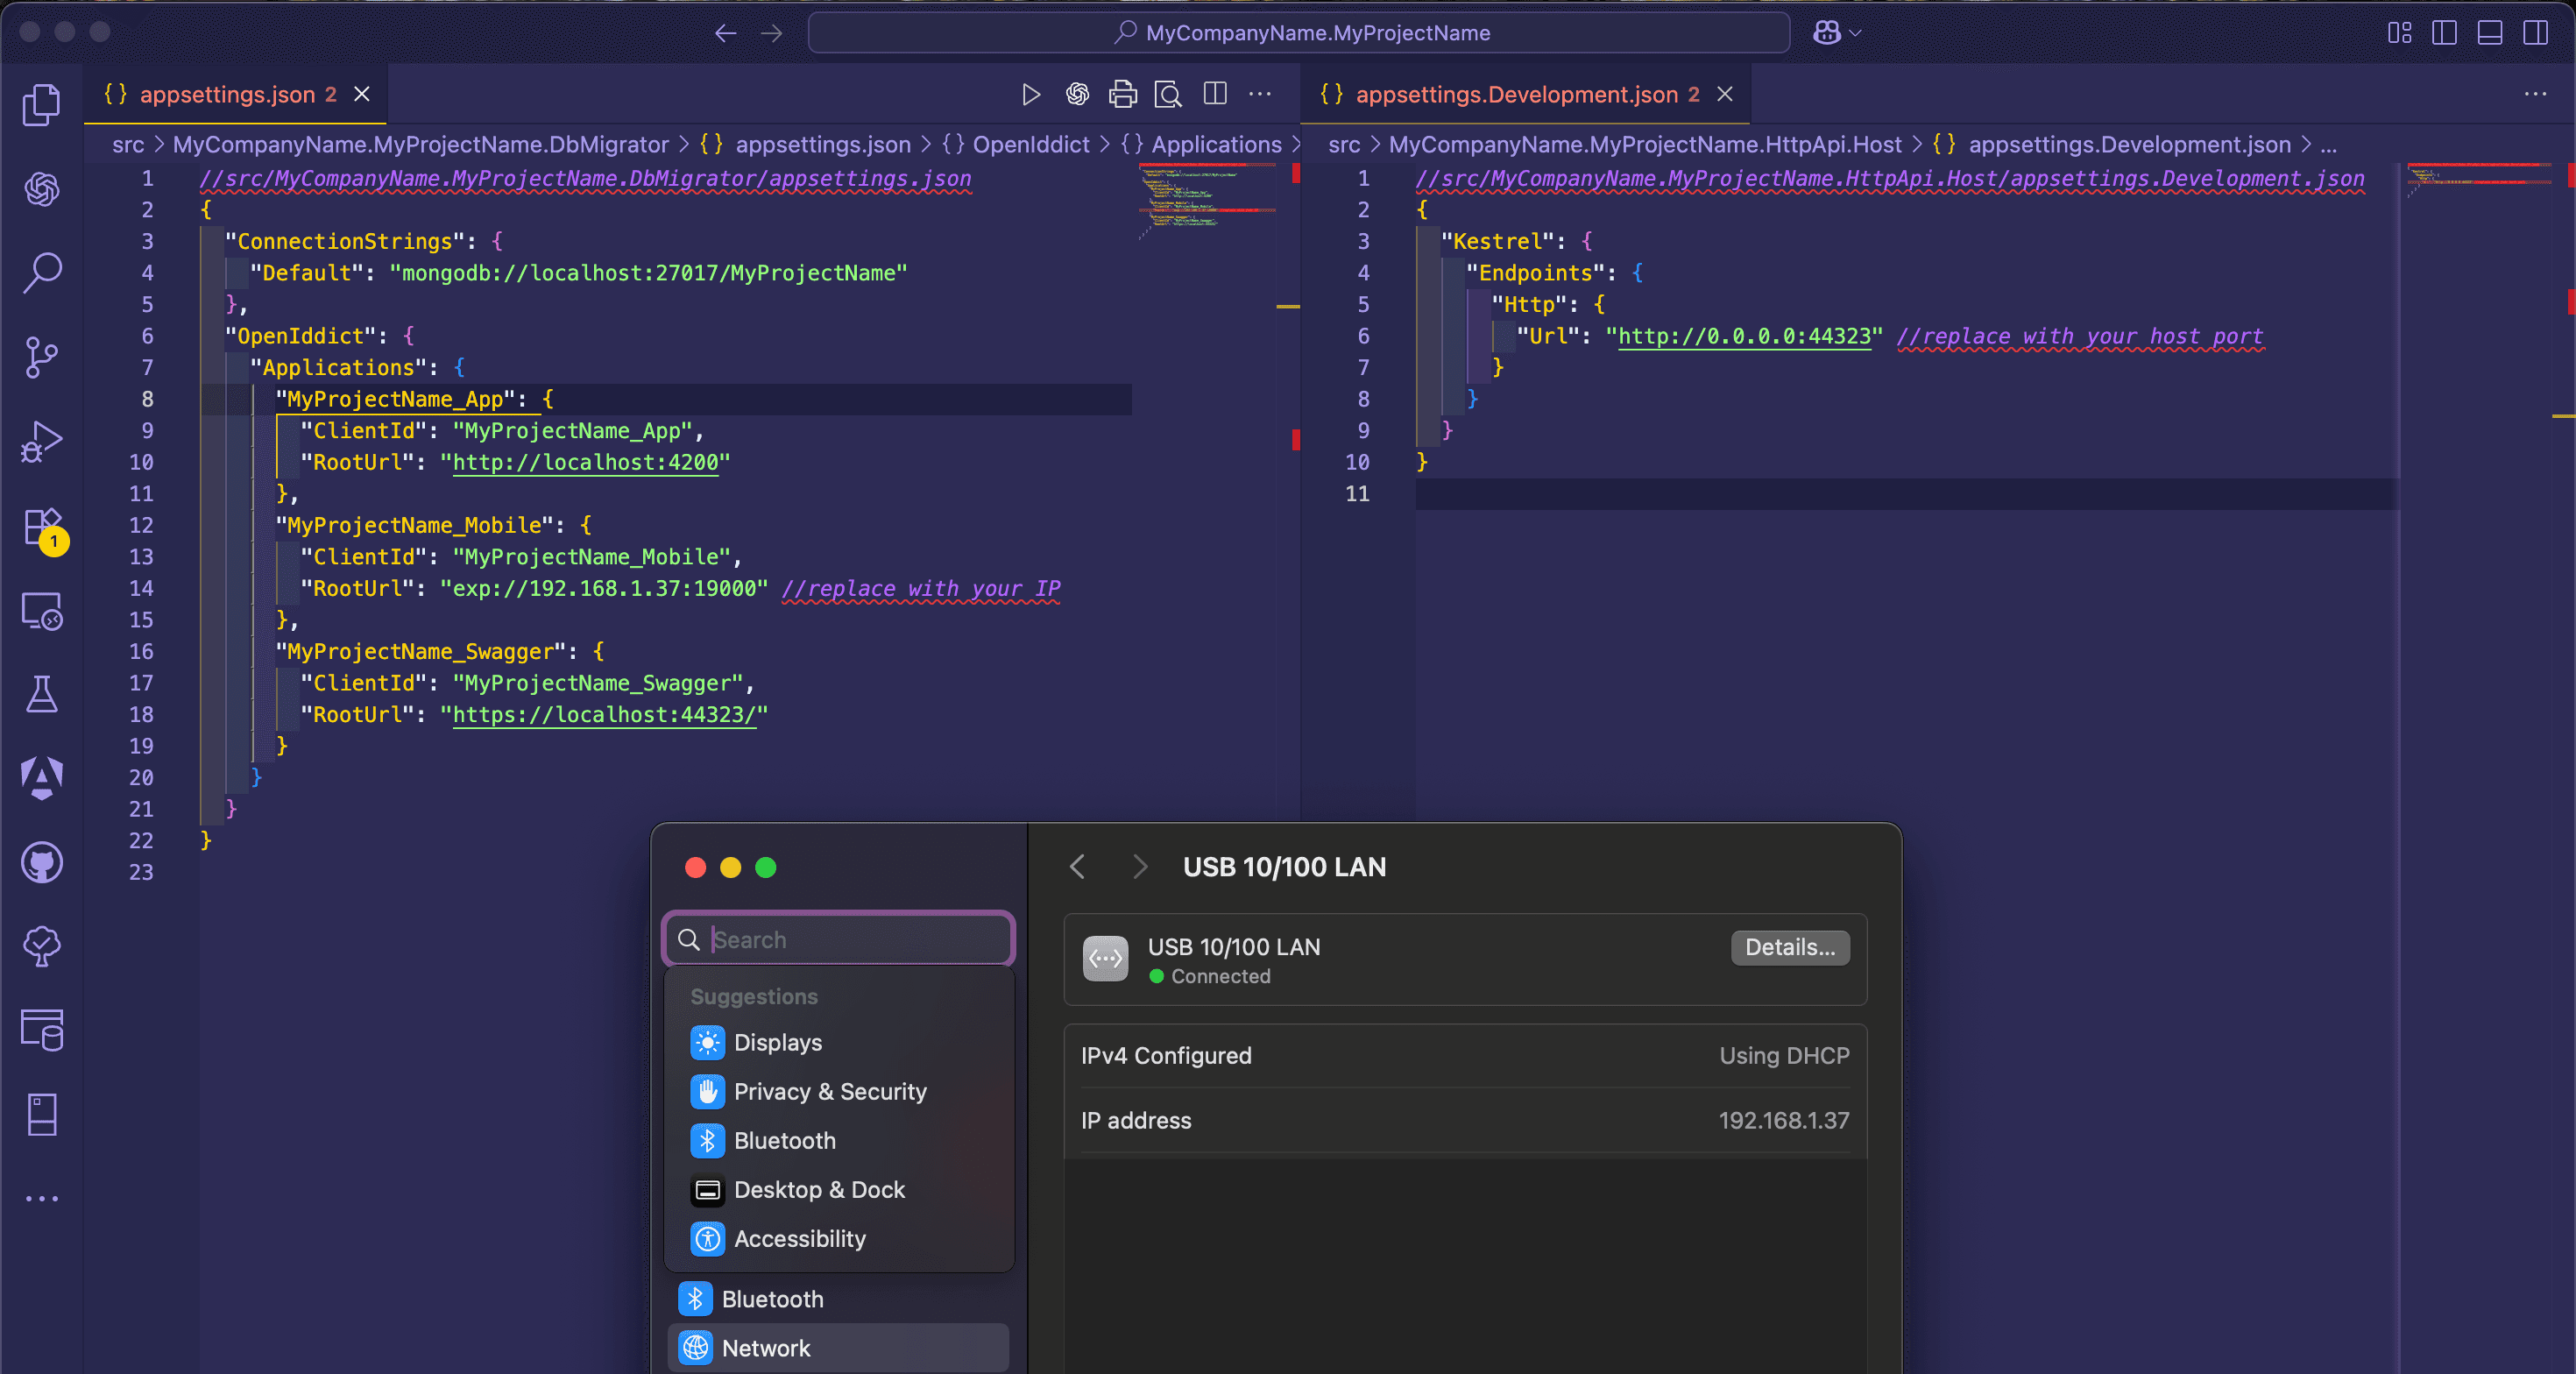
Open the
appsettings.jsonfile in the.DbMigratorfolder. Replace thelocalhostaddress in theRootUrlproperty with your local IP address. Then, run the database migrator.Open the
appsettings.Development.jsonfile in the.HttpApi.Hostfolder. Add this configuration to accept global requests for testing the React Native application in the development environment.{ "Kestrel": { "Endpoints": { "Http": { "Url": "http://0.0.0.0:44323" //replace with your host port } } } }
Run the backend application(s) as described in the getting started document.

