Step 3: Deploying the ABP Application to Azure Web App Service
Deploying the ABP Application to Azure Web App Service using GitHub Actions
Create a new GitHub repository for your project if you don't have one.
Push your project to the new GitHub repository.
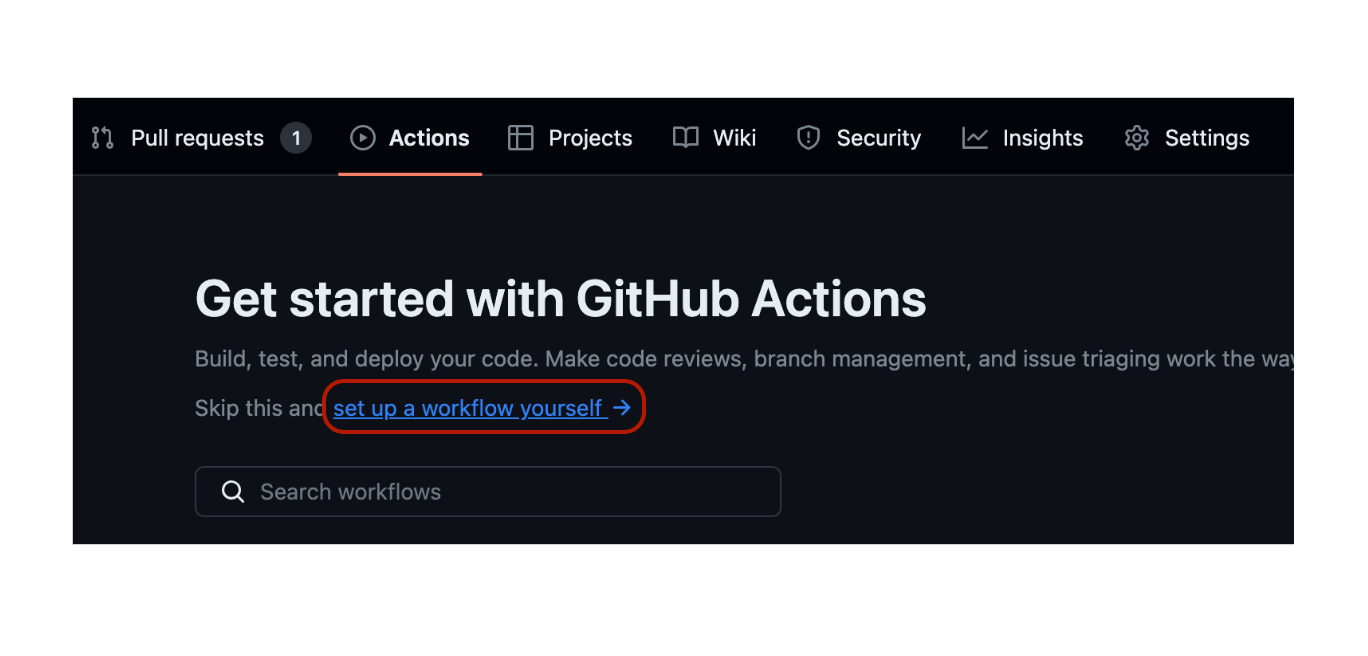
Navigate to the Actions tab of your GitHub repository.
Click the set up a workflow yourself button.

Copy this content to the opened file and commit it.
# Docs for the Azure Web Apps Deploy action: https://github.com/Azure/webapps-deploy
# More GitHub Actions for Azure: https://github.com/Azure/actions

name: Build and deploy ASP.Net Core with MVC to Azure Web App

on:
  push:
    branches:
      - main
  workflow_dispatch:

jobs:
  build:
    runs-on: ubuntu-latest

    steps:
      - uses: actions/checkout@v4

      - name: Set up .NET Core
        uses: actions/setup-dotnet@v4
        with:
          dotnet-version: '9.x'
          include-prerelease: true

      - name: Install ABP CLI
        run: |
          dotnet tool install -g Volo.Abp.Cli
          abp install-libs
        shell: bash

      - name: Build with dotnet
        run: dotnet build --configuration Release

      - name: Run migrations
        run: dotnet run -- "${{ secrets.CONNECTION_STRING }}"   # Set your connection string as a secret in your repository settings
        working-directory: ./src/mvctierdemo.DbMigrator # Replace with your project name

      - name: dotnet publish authserver
        run: dotnet publish -c Release -o ${{env.DOTNET_ROOT}}/authserver
        working-directory: ./src/mvctierdemo.AuthServer # Replace with your project name

      - name: Generate openiddict.pfx
        run: dotnet dev-certs https -v -ep ${{env.DOTNET_ROOT}}/authserver/openiddict.pfx -p 2D7AA457-5D33-48D6-936F-C48E5EF468ED # Replace with your password

      - name: dotnet publish apihost
        run: dotnet publish -c Release -o ${{env.DOTNET_ROOT}}/apihost
        working-directory: ./src/mvctierdemo.HttpApi.Host # Replace with your project name

      - name: dotnet publish webapp
        run: dotnet publish -c Release -o ${{env.DOTNET_ROOT}}/webapp
        working-directory: ./src/mvctierdemo.Web # Replace with your project name

      - name: Upload artifact for authserver
        uses: actions/upload-artifact@v4
        with:
          name: .net-authserver
          path: ${{env.DOTNET_ROOT}}/authserver

      - name: Upload artifact for apihost
        uses: actions/upload-artifact@v4
        with:
          name: .net-apihost
          path: ${{env.DOTNET_ROOT}}/apihost

      - name: Upload artifact for webapp
        uses: actions/upload-artifact@v4
        with:
          name: .net-webapp
          path: ${{env.DOTNET_ROOT}}/webapp

  deploy:
    runs-on: ubuntu-latest
    needs: build
    environment:
      name: 'Production'
      url: ${{ steps.deploy-to-webapp-3.outputs.webapp-url }}

    steps:
      - name: Download artifact from apihost
        uses: actions/download-artifact@v4
        with:
          name: .net-apihost
          path: ./apihost

      - name: Deploy apihost
        id: deploy-to-webapp-2
        uses: azure/webapps-deploy@v3
        with:
          app-name: 'apihost-prodemo'
          slot-name: 'Production'
          publish-profile: ${{ secrets.apihostprodemoPublishSettings }} # Set your Azure Web App publish your profile as a secret in your repository settings
          package: ./apihost

      - name: Download artifact from authserver
        uses: actions/download-artifact@v4
        with:
          name: .net-authserver
          path: ./authserver

      - name: Deploy authserver
        id: deploy-to-webapp
        uses: azure/webapps-deploy@v3
        with:
          app-name: 'authserver-prodemo'
          slot-name: 'Production'
          publish-profile: ${{ secrets.authserverprodemoPublishSettings }} # Set your Azure Web App publish your profile as a secret in your repository settings
          package: ./authserver

      - name: Download artifact from webapp
        uses: actions/download-artifact@v4
        with:
          name: .net-webapp
          path: ./webapp

      - name: Deploy webapp
        id: deploy-to-webapp-3
        uses: azure/webapps-deploy@v3
        with:
          app-name: 'webapp-prodemo'
          slot-name: 'Production'
          publish-profile: ${{ secrets.webappprodemoPublishSettings }} # Set your Azure Web App publish your profile as a secret in your repository settings
          package: ./webapp
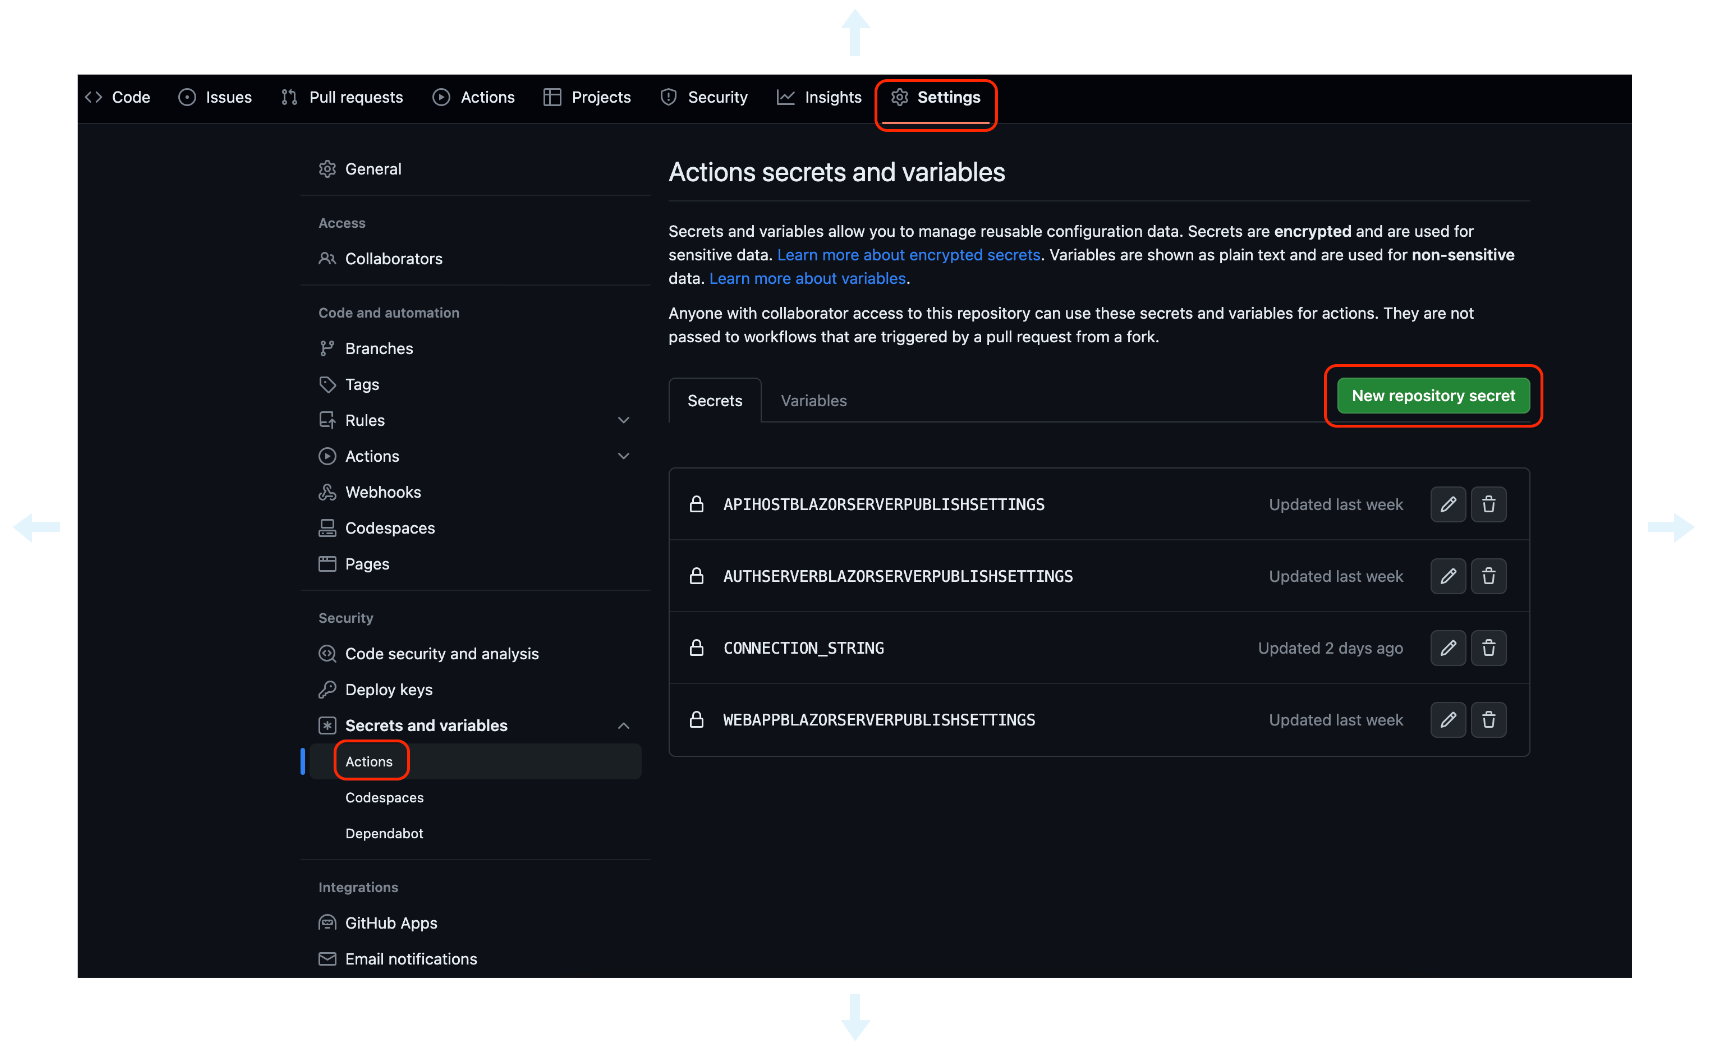
Navigate to the Settings tab of your GitHub repository.
Click the Secrets button.
Click the New repository secret button.

Add the following secrets:
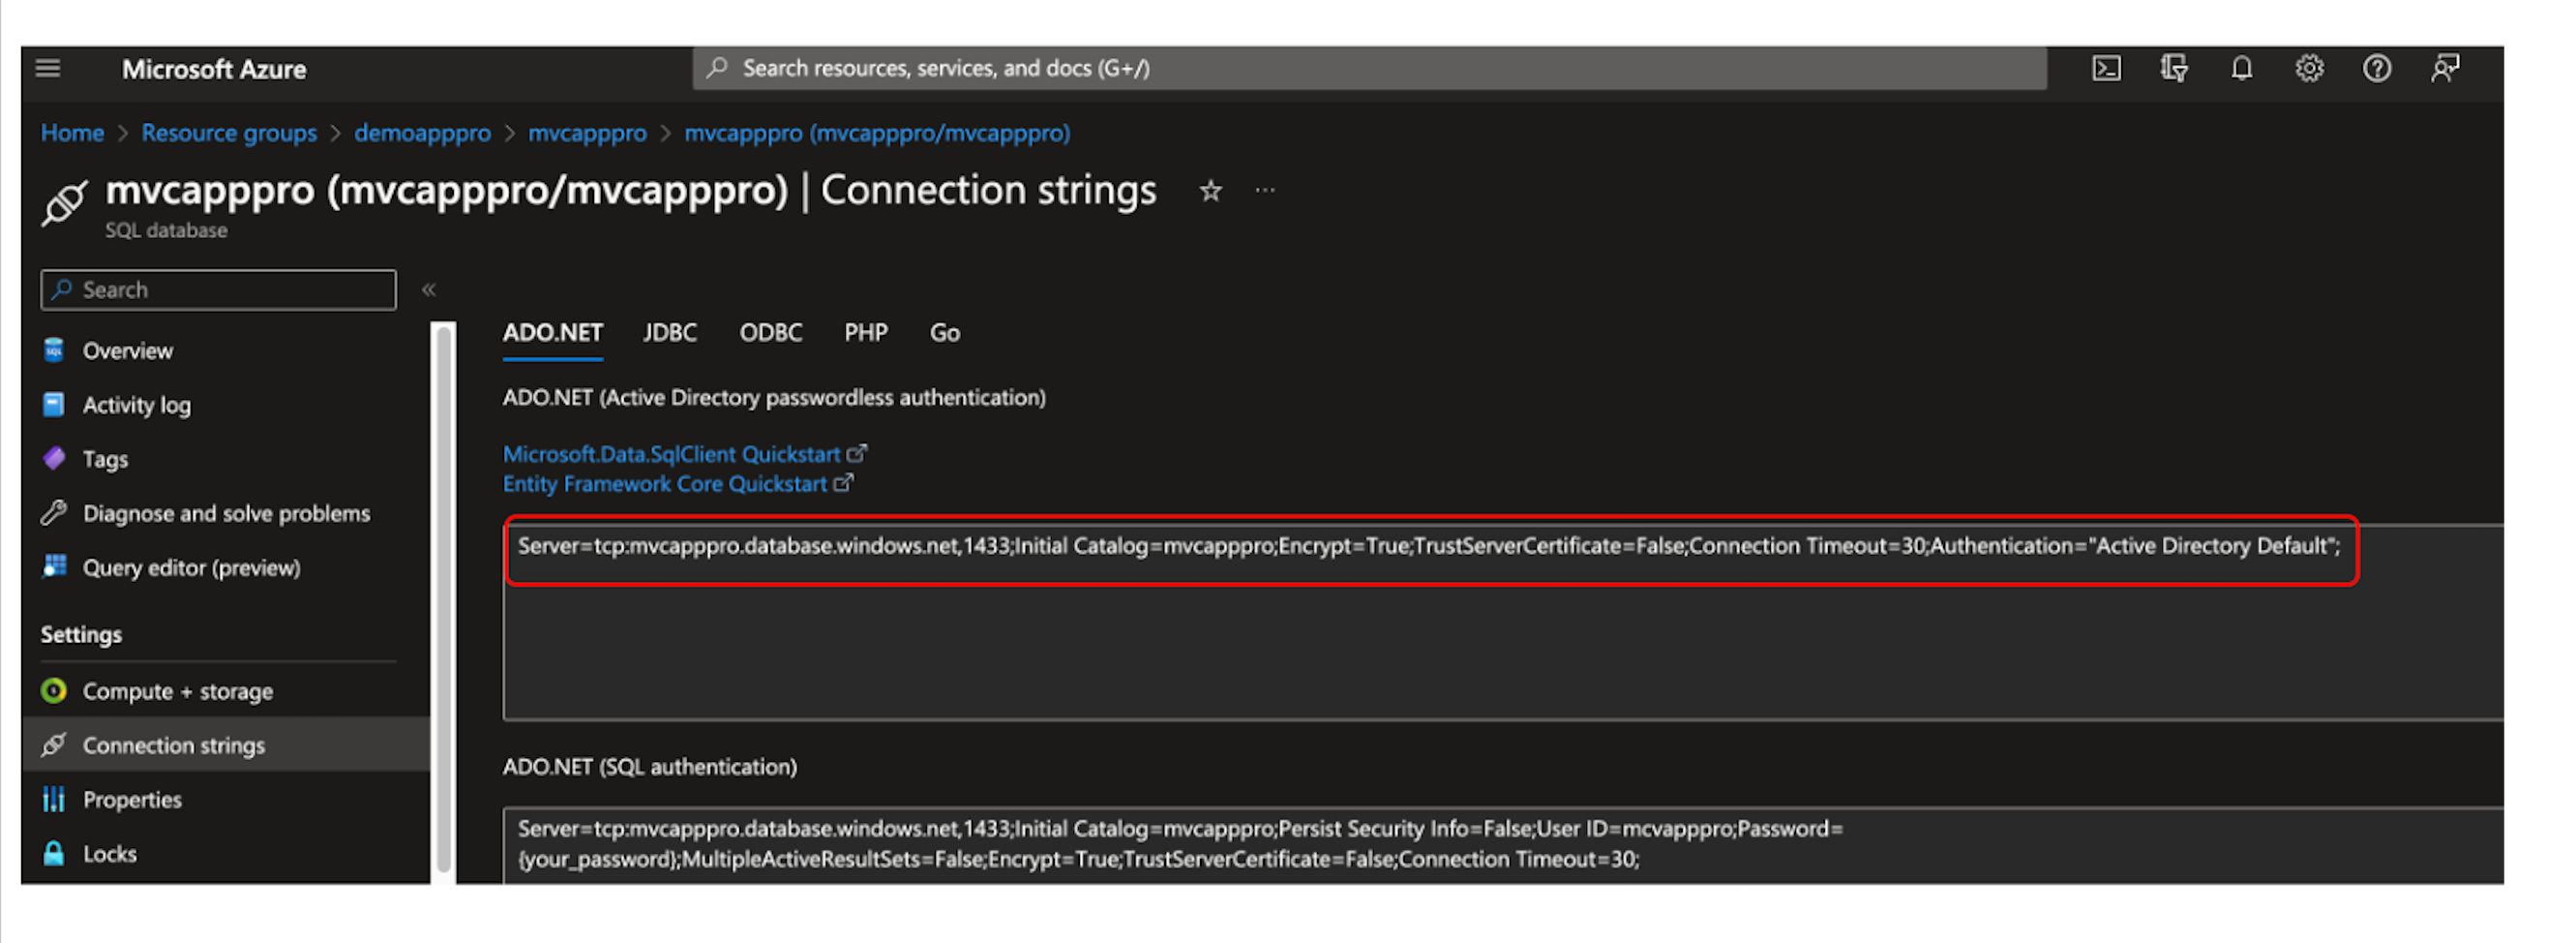
CONNECTION_STRING: The connection string of your database.
Example of Azure SQL connection string:

AZUREAPPSERVICE_PUBLISHPROFILE: The publish the profile of your Azure Web App Service. You can download it from the Overview tab of your Azure Web App Service.

Navigate to the Actions tab of your GitHub repository.
Click the Deploy to Azure Web App workflow.

Click the Run workflow button.

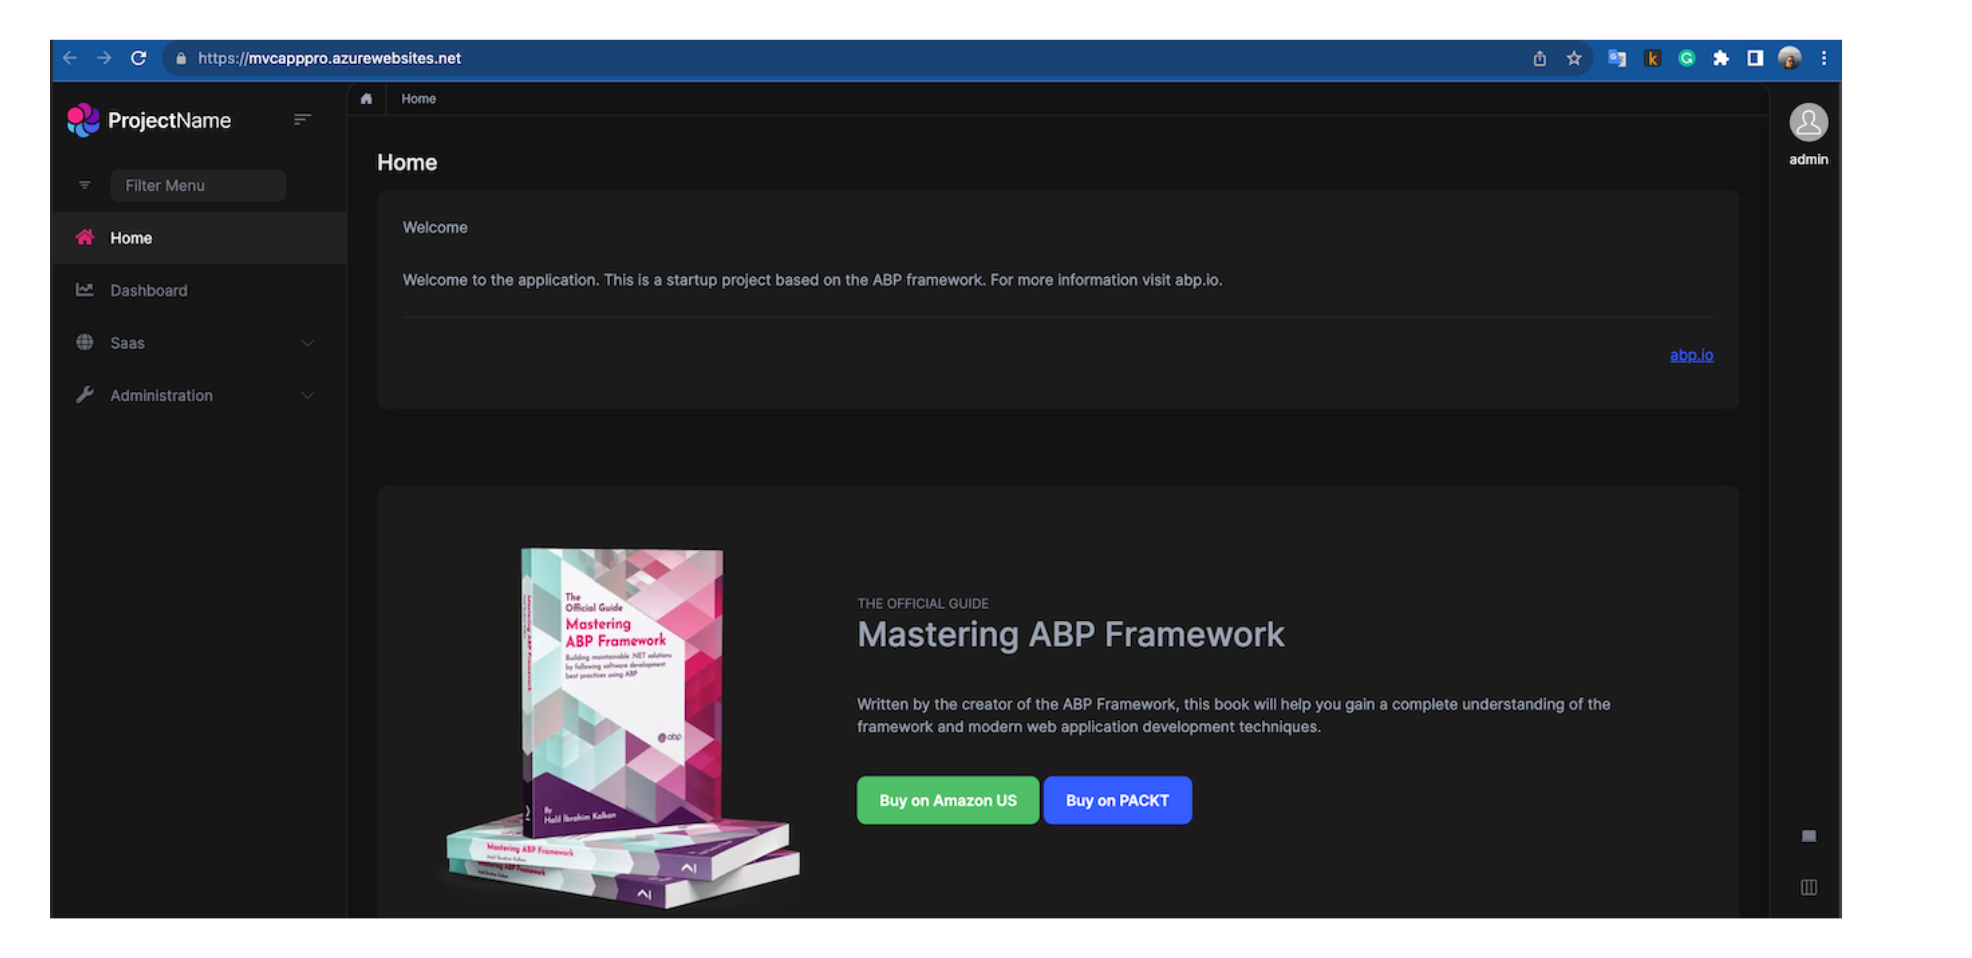
Navigate to the web app URL to see the deployed application.

If deploying your application was unsuccessful, you can check the logs of the deployment by clicking the Deploy to Azure Web App workflow and then clicking the deploy-to-webapp job.
If deployment is successful, but you get an error when you navigate to the web app url, you can check the logs of the web app by clicking the Logs button on the Overview tab of your Azure Web App Service.
Finally, you have the CI/CD pipeline for your application. Every time you push your code to the main branch, your application will be deployed to Azure Web App Service automatically.


