


Setting Up the Catalog Module
In this part, you will install the ModularCrm.Catalog module to the main application, which was created in the previous part.
Installing the Catalog Module to the Main Application
A module does not contain an executable application inside. The ModularCrm.Catalog.UI project is just a class library project, not an executable web application. A module should be installed in an executable application to run it.
Ensure that the web application is not running in Solution Runner or in your IDE. Installing a module to a running application will produce errors.
The product module has yet to be related to the main application. Right-click on the ModularCrm module (inside the main folder) and select the Import Module command:
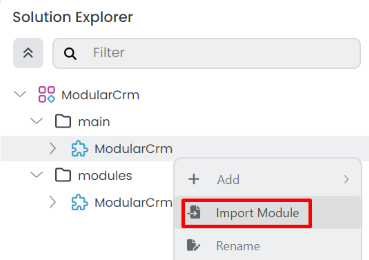
The Import Module command opens a dialog as shown below:
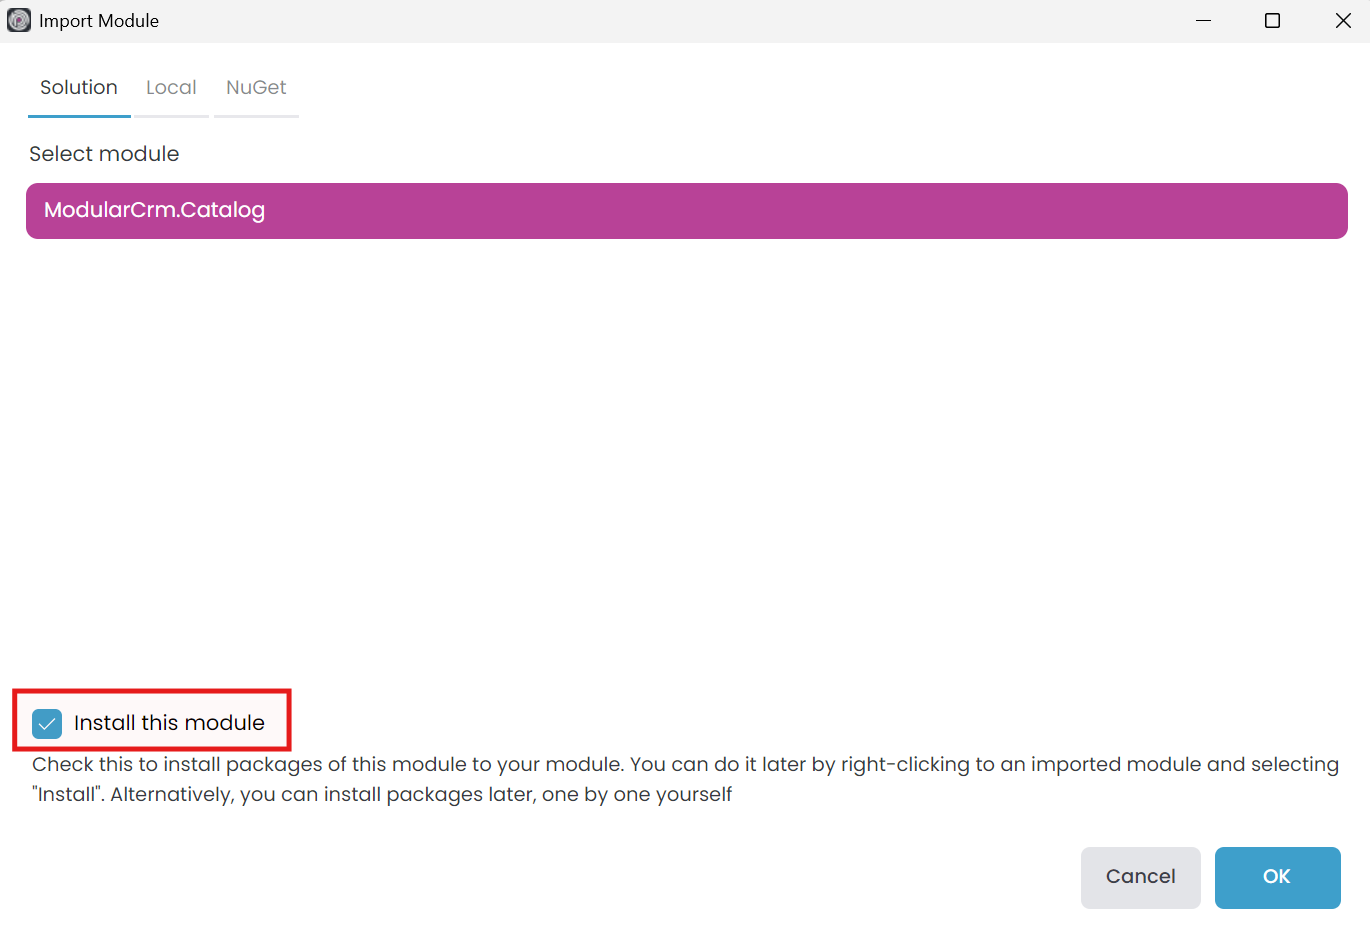
Select the ModularCrm.Catalog module and check the Install this module option. If you don't check that option, it only imports the module but doesn't set project dependencies. Importing a module without installation can be used to set up your project dependencies manually. We want to make it automatically, so check the Install this module option.
When you click the OK button, ABP Studio opens the Install Module dialog:
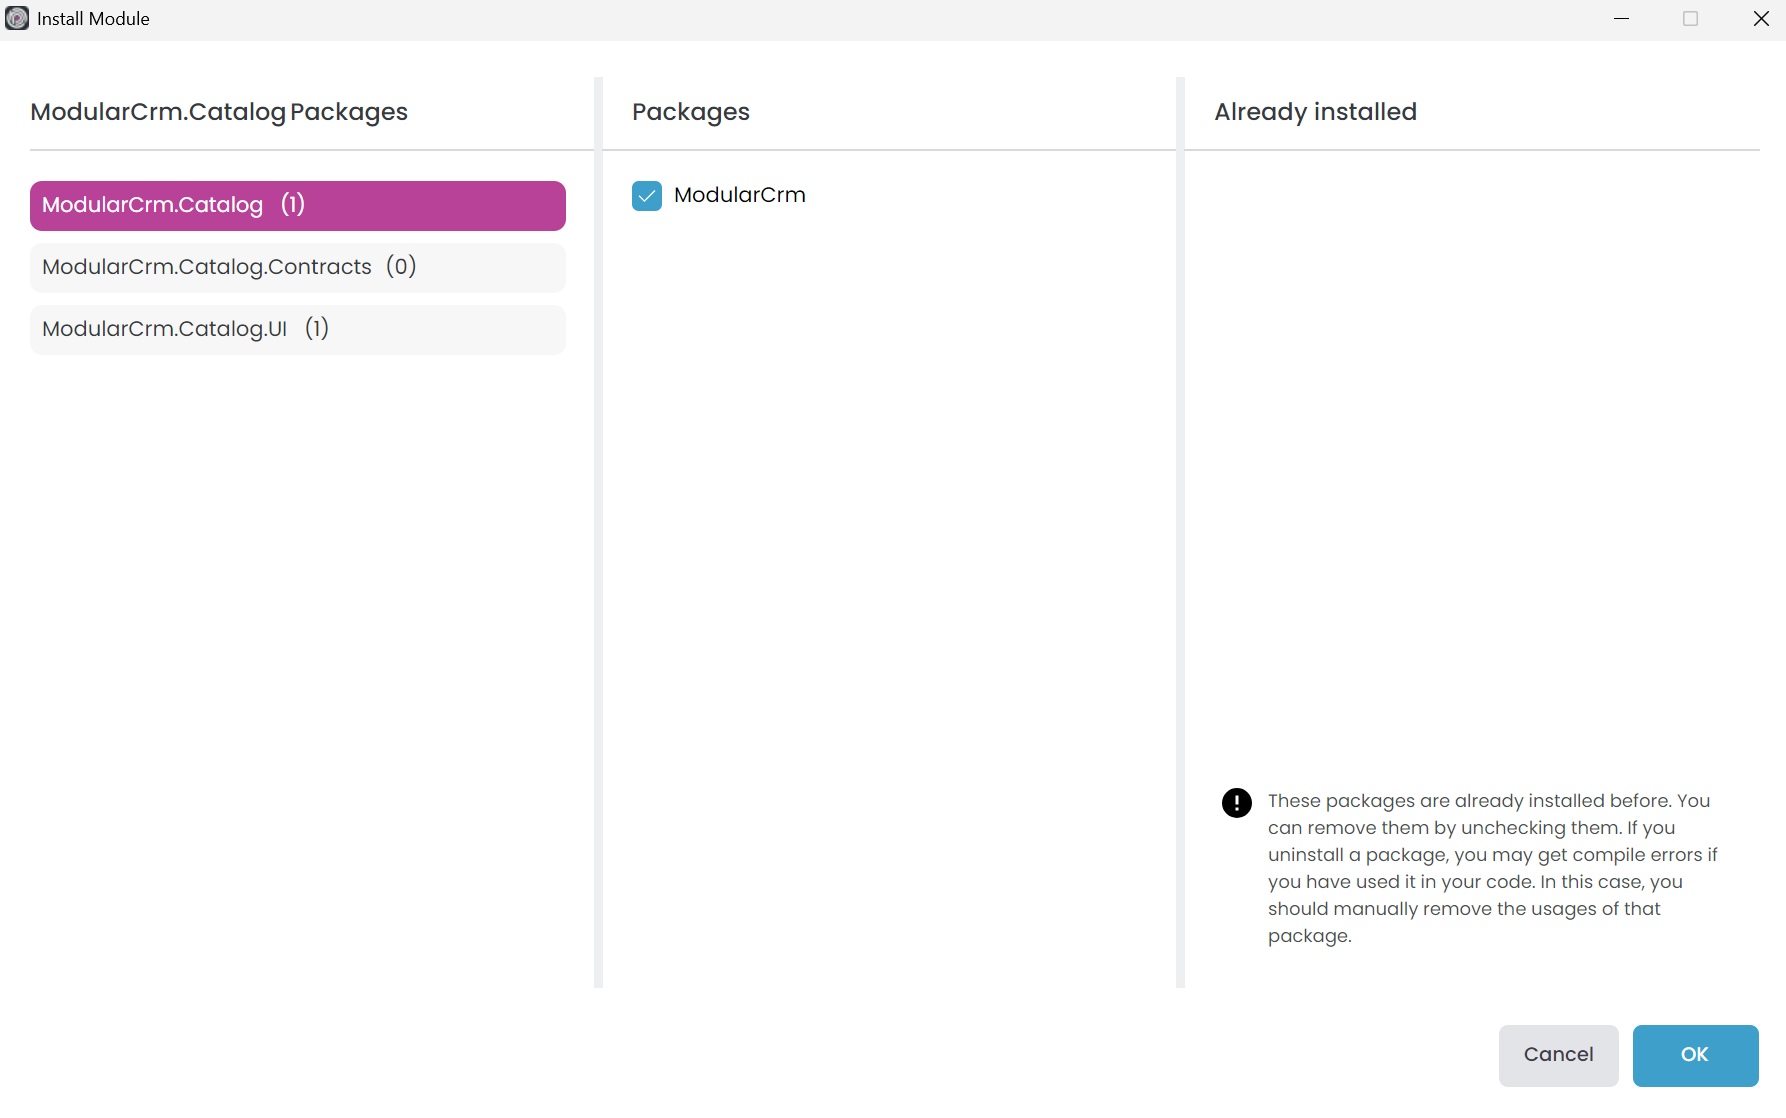
Select the ModularCrm.Catalog and ModularCrm.Catalog.UI packages from the left area and ensure the ModularCrm package from the middle area was checked as shown in the preceding figure. Finally, click OK.
Building the Main Application
After the installation, build the entire solution by right-clicking on the ModularCrm module (under the main folder) and selecting the Dotnet CLI -> Graph Build command:
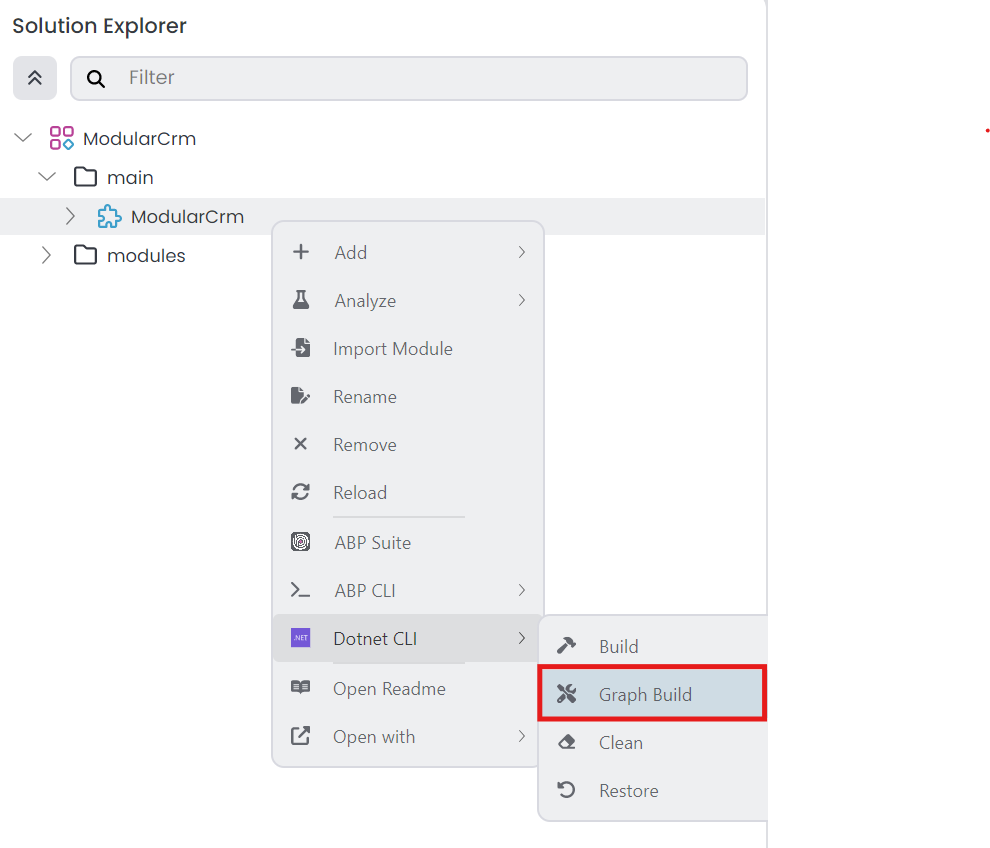
Graph Build is a dotnet CLI command that recursively builds all the referenced dotnet projects, even if they are not part of the root solution.
While developing multi-module solutions with ABP Studio, you may need to perform Graph Build on the root/main module if you change the depending modules.
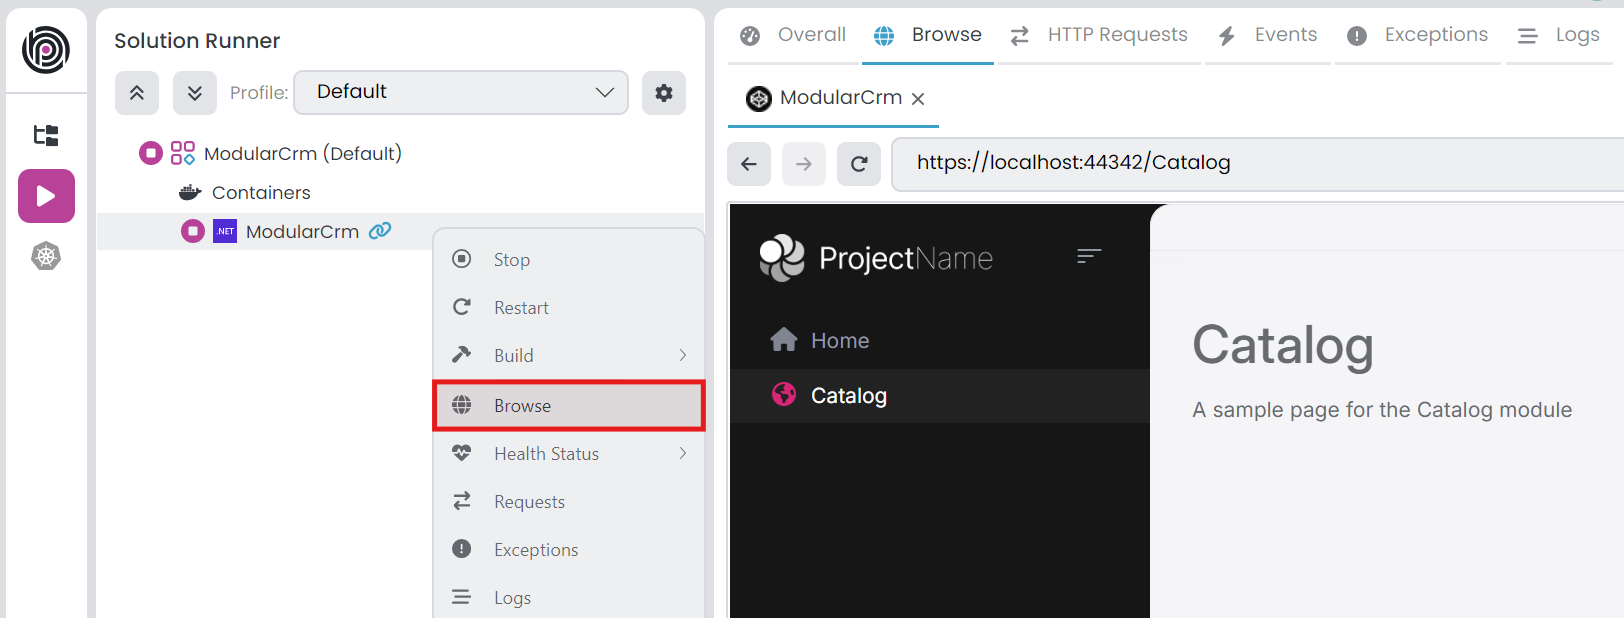
Running the Main Application
Open the Solution Runner panel, click the Play button (near to the solution root), right-click the ModularCrm application and select the Browse command. It will open the web application in the built-in browser. Then you can navigate to the Catalog page on the main menu of the application to see the Catalog page that is coming from the ModularCrm.Catalog module:
Summary
In this part, you installed the ModularCrm.Catalog module to the main application and run the solution to test if it has successfully installed. In the next part, you will learn how to create entities, services and a basic user interface for the catalog module.


