Web Application Development Tutorial (with ABP Suite) - Part 2: Creating the Books
In this part, you will create a new entity named Book and generate CRUD pages for the related entities with everything that you would normally implement manually (including application services, tests, CRUD pages, database relations and more...) via ABP Suite with few clicks.
Opening the ABP Suite
Please stop the application in ABP Studio's Solution Runner panel, if it's currently running, because ABP Suite will make changes in the solution and it might need to build the solution in some steps and running the solution prevents to build it.
After creating the solution in the previous part, now you can open the ABP Suite and start generating CRUD pages. You can select the ABP Suite -> Open command on the main menu to open ABP Suite:

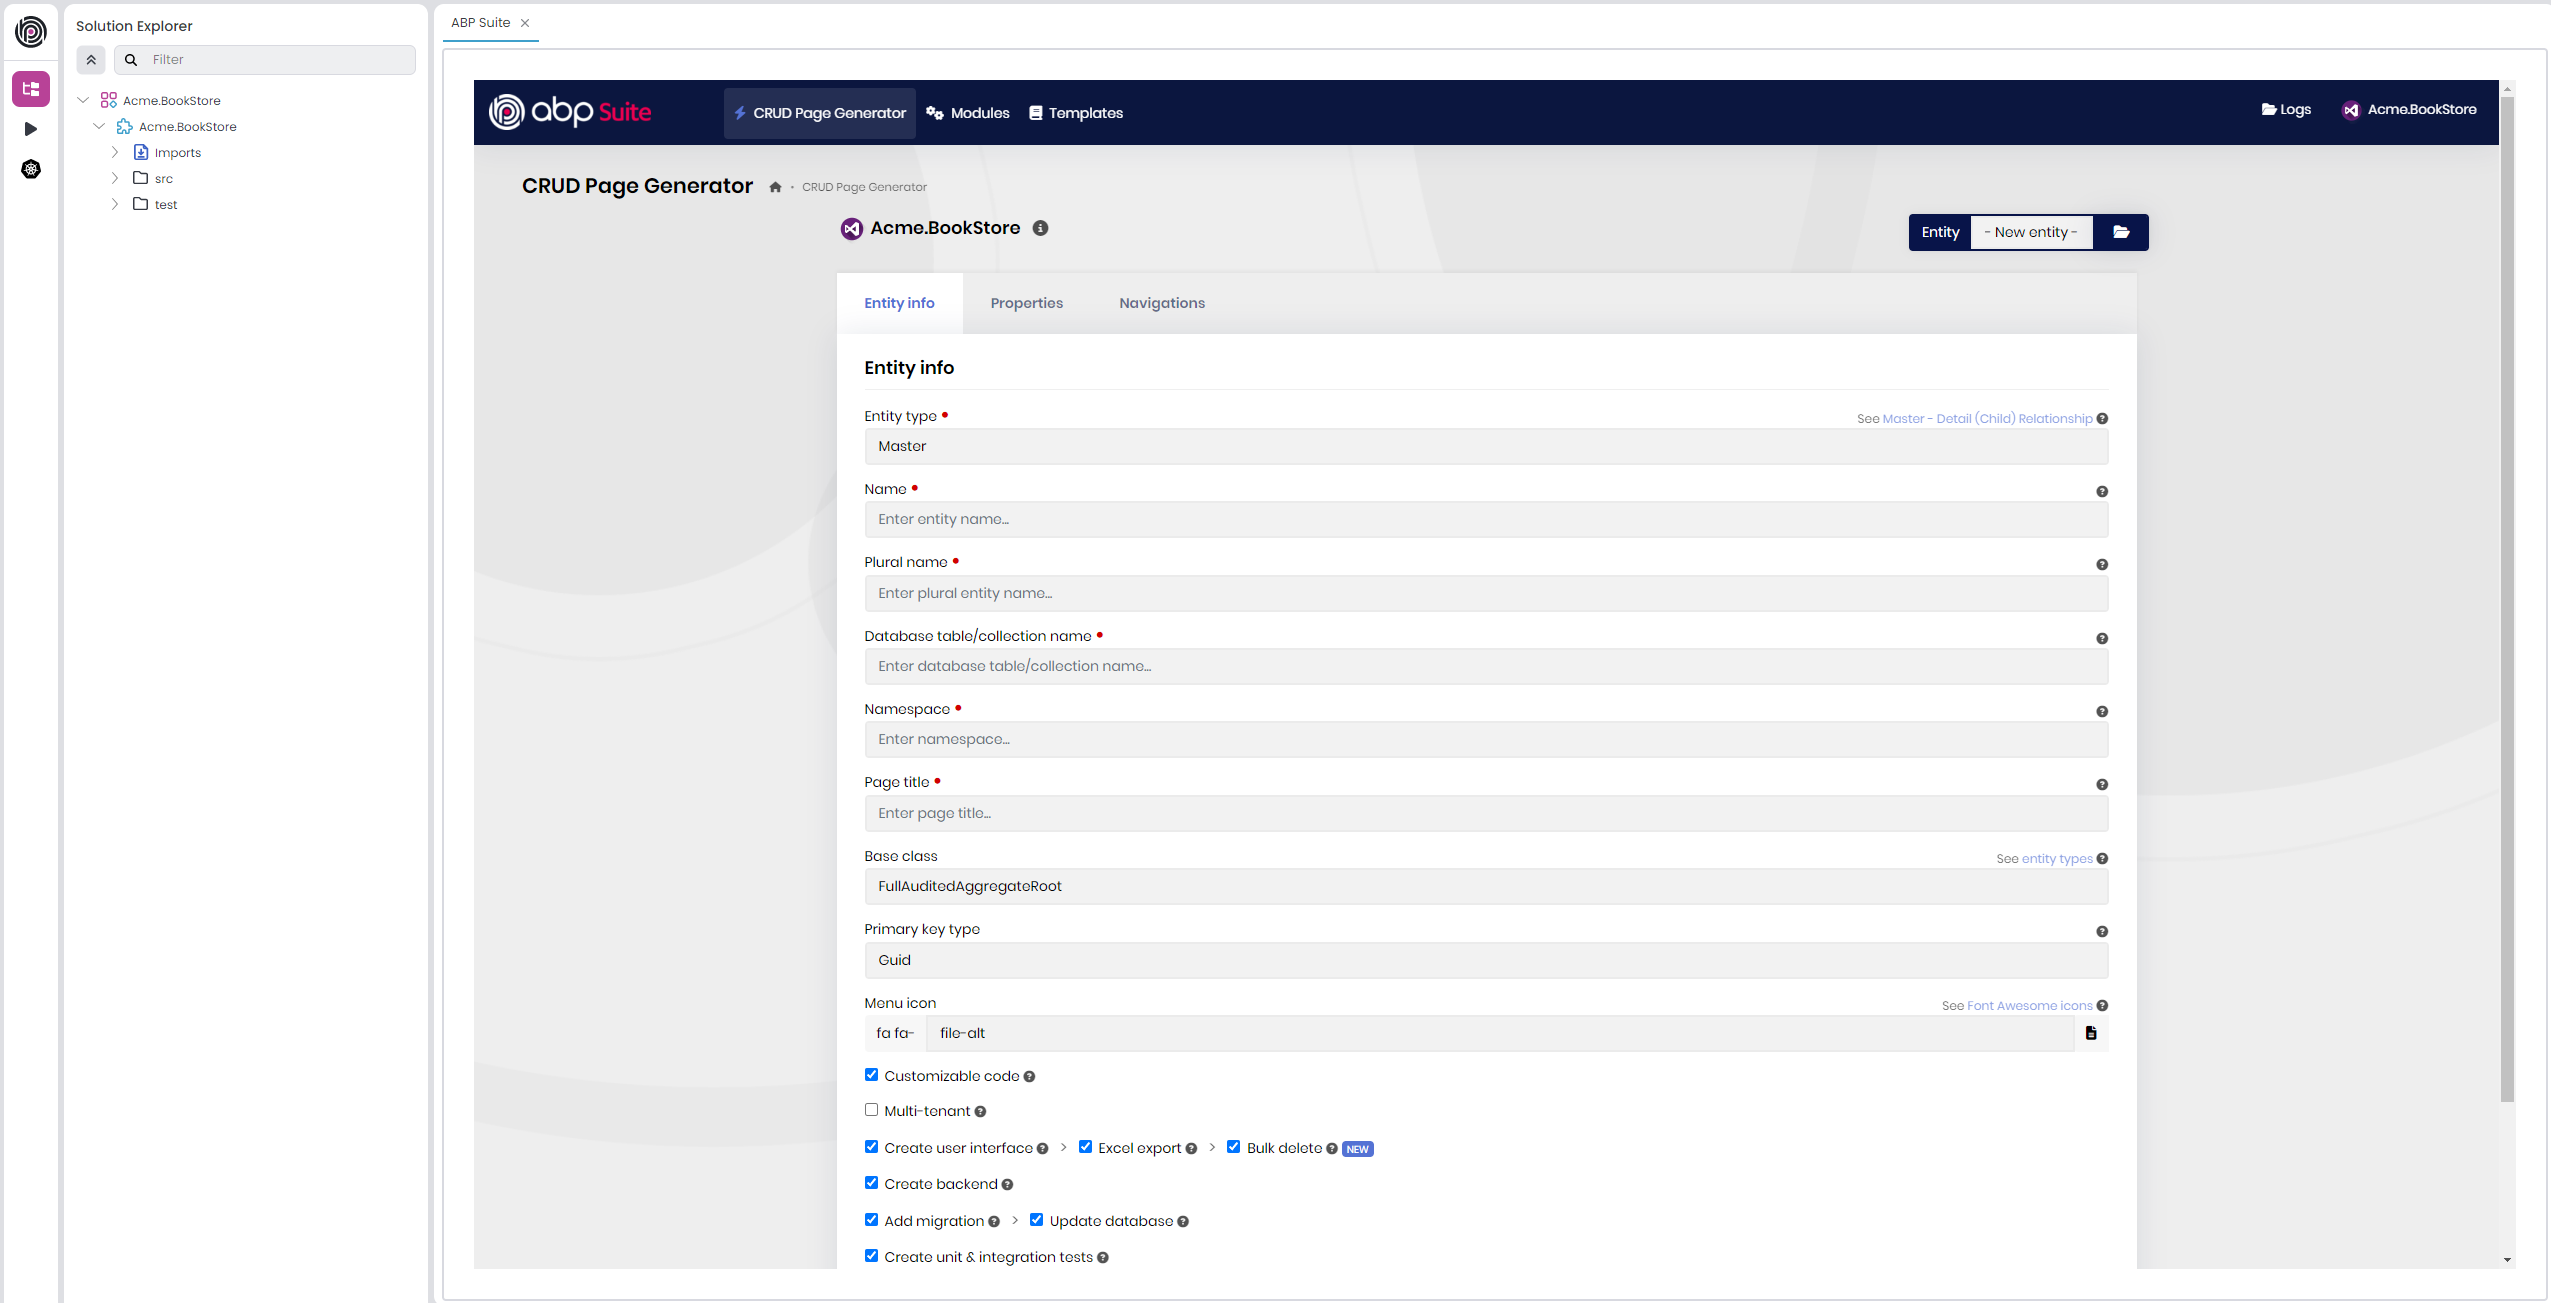
After clicking the related command, pre-integrated browser of ABP Studio should open, then you can start generating entities and all related codes with a few configurations:
Creating the Book Entity
Before creating the Book entity, we need to create a BookType enum. This enum will be used as a property type in ABP Suite while defining the entity. So, open your code editor, create a new file named BookType.cs in the Acme.BookStore.Domain.Shared\Books folder and add the following content:
namespace Acme.BookStore.Books;

public enum BookType
{
    Undefined,
    Adventure,
    Biography,
    Dystopia,
    Fantastic,
    Horror,
    Science,
    ScienceFiction,
    Poetry
}
After creating the enum file in your project, you can use it as a property type when creating entities in ABP Suite. When you specify an enum property, ABP Suite will prompt you to provide the path to the enum file. It then reads the file and automatically sets the namespace and enum name in the generated code. Now, let's create the Book entity with its properties.
Type Book for the Name field and leave the other options as is. ABP Suite automatically calculates proper values for the rest of the inputs for you:
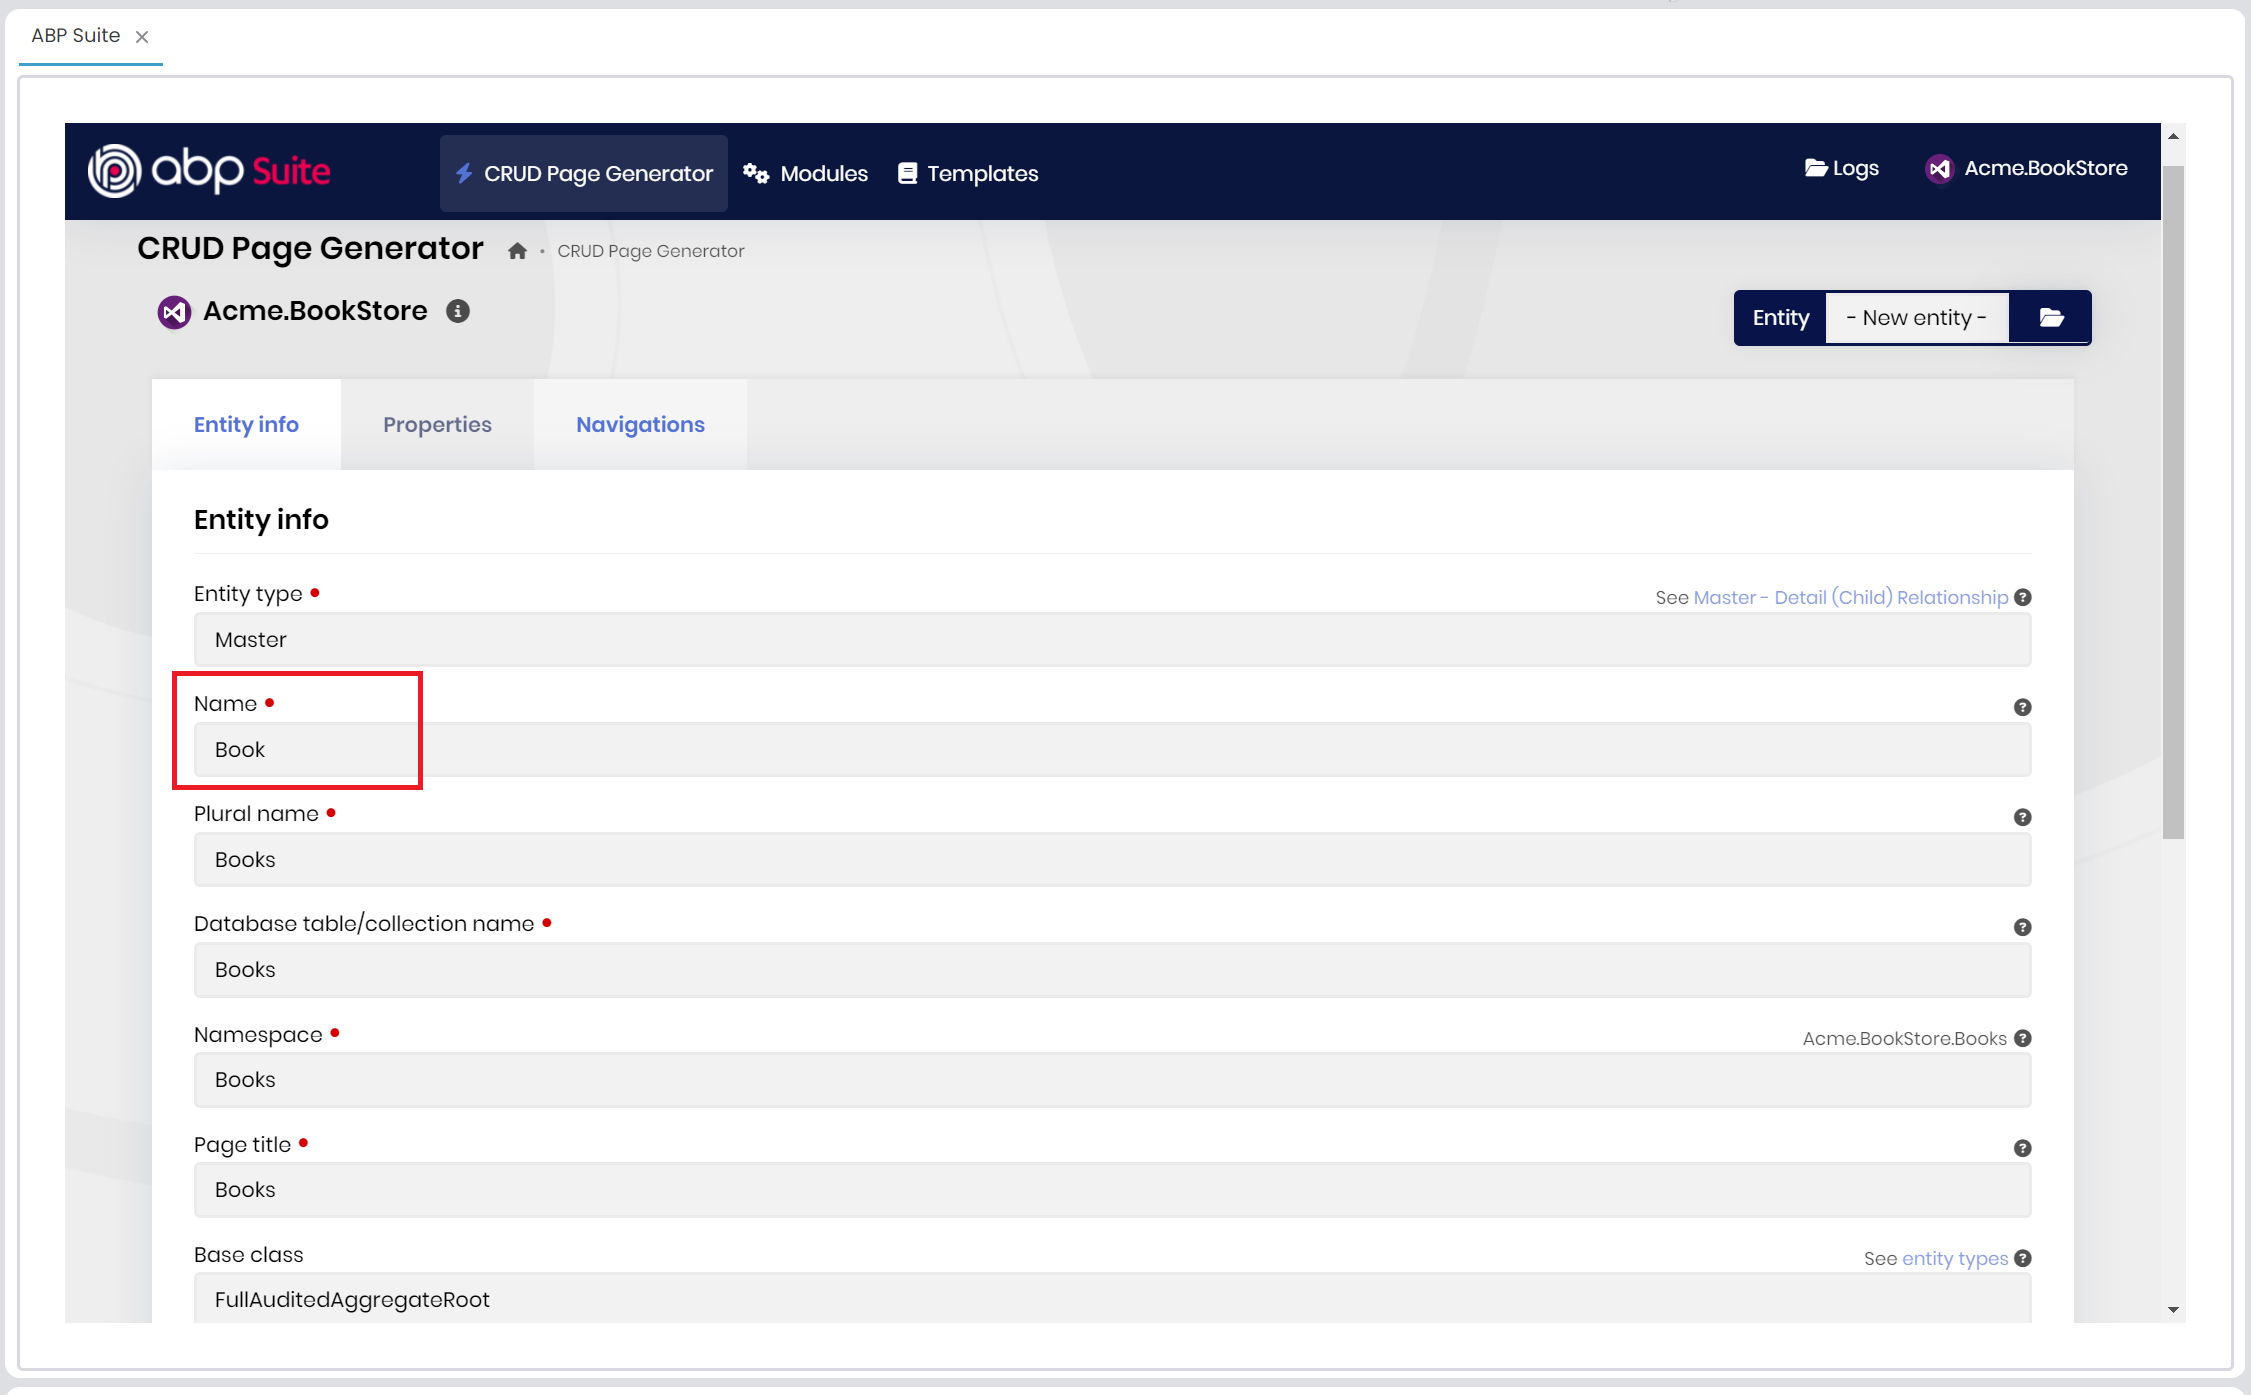
ABP Suite sets:
- Entity type as master (ABP Suite allows you to establish master-child relationship),
- Base class as FullAuditedAggregateRoot (see other possible values),
- Primary key type as Guid,
- Plural name, database name, namespace, page title, menu item and more...
You can change the menu-item value as book to show a proper icon in the generated UI, and also enable code customization, creating unit & integration tests, and other options as you wish:

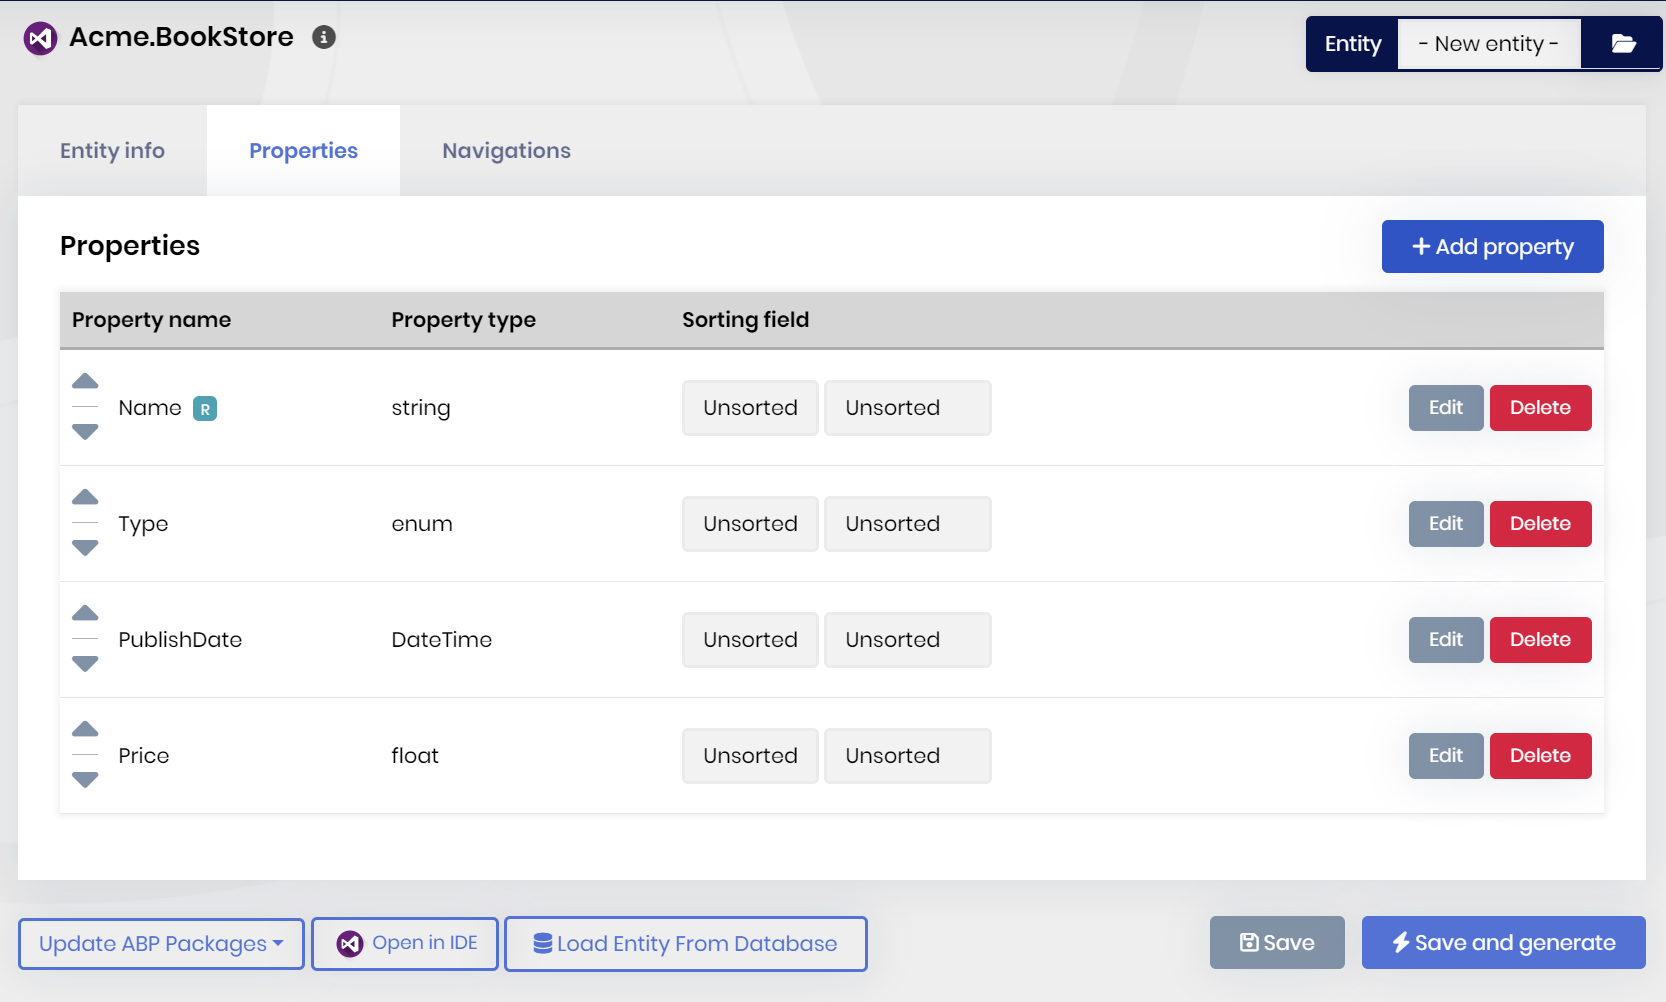
After, specifying the entity metadata, open the Properties tab and create the properties shown in the following figure:
While defining the properties, you define a Type property with the type of enum. ABP Suite asks for an enum path and fill the all other inputs by reading the specified enum file. Therefore, you can specify the enum path for the Type property like in the following figure:
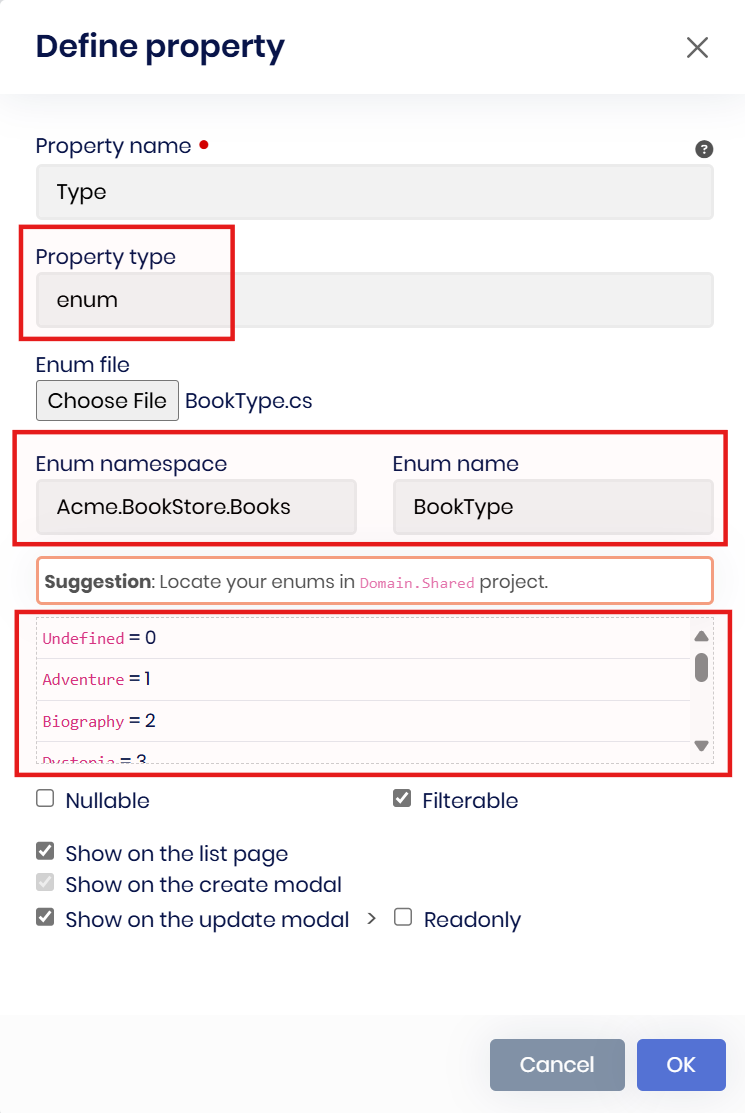
After you select the enum file, ABP Suite automatically sets the namespace and enum name, and lists your enum values in the next section. You can change these values, but for now, you can leave as is.
Here is the all details for the Book entity:
Nameis required, it's a string property and maximum length is 128.Typeis an enum and the enum file path is \Acme.BookStore.Domain.Shared\Books\BookType.cs.PublishDateis a DateTime property and not nullable.Priceis a float property.
You can leave the other configurations as default.
ABP Suite allows you to define properties with a great range of options, for example, you can specify the property type as string, int, float, Guid, DateTime, and even File (for file upload) and also you can set any options while defining your properties, such as specifying it as required, or nullable, setting max-min length, default value and more...
After that, you can click the Save and Generate button to start the code generation process.
ABP Suite will generate the necessary code for you. It generates:
Bookentity (alsoBookBaseclass, which is allow you customizing the generated entity),- Repository implementation (
EfCoreBookRepositoryclass), BookManagerdomain service,- Input & Output DTOs and application service implementations (
IBookAppService&BookAppService), - Unit & integration tests,
- A new migration (and also applies to the database),
- All related permission, object mapping and navigation menu item configurations,
- and all required UI components and pages...
It will take some time to complete the process. After the process is completed, you will see a success message, you can click the Ok button, and then run the application by clicking the Start button (or alternatively, directly clicking the run icon) in the Solution Runner panel:
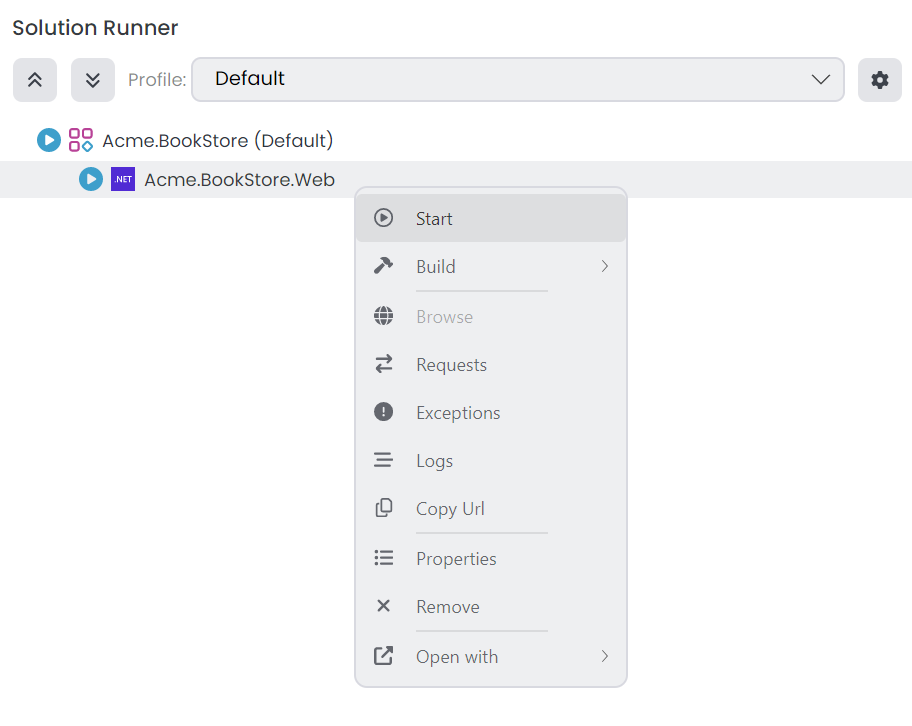
After the application is started, you can right-click and Browse on the application to open it in the ABP Studio's pre-integrated browser. After logging in using the default credentials (admin / 1q2w3E*), you can see the Books page like in the following figure:
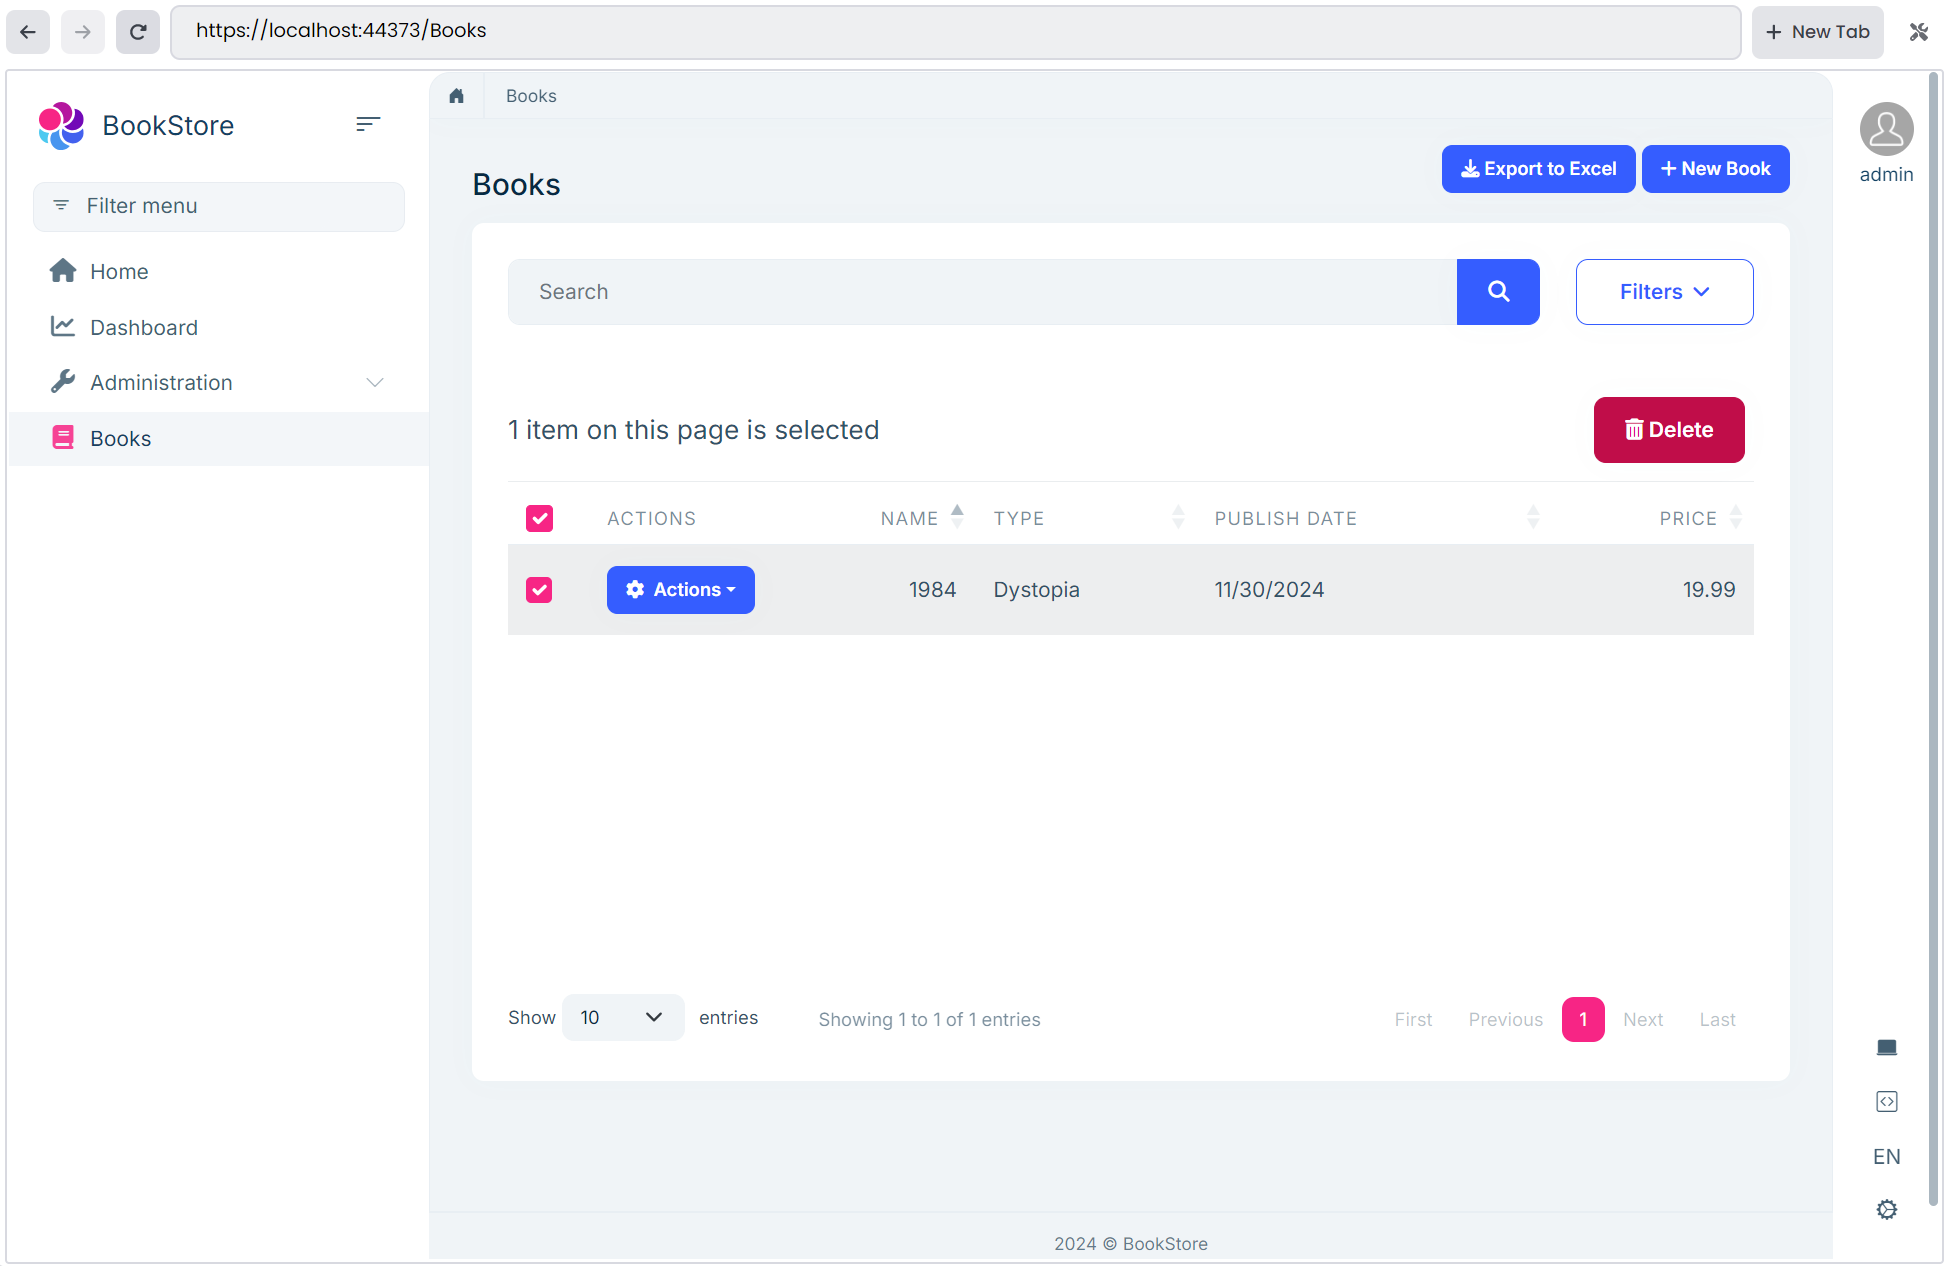
By default, ABP Suite doesn't generate data seed contributors for entities, as you'll need to create them manually. This is intentional since having dummy data in development or production environments may not be suitable for your specific needs. However, if you selected the Create unit & integration tests option while creating the entity, you can see the sample data-seed contributors under the Acme.BookStore.Domain.Tests project to simplify the testing process by having initial data for the entities, which we will see in the part 4 of this tutorial.
On this page, you can create a new book, update an existing book, delete a book, export all records (or the filtered records) to excel, filter the records by using the advanced filter section, bulk delete multiple records and so on.
Summary
In this part, you've created a new entity named Book and generated the necessary code for it with ABP Suite with a few clicks. ABP Suite generated the all code for you, including the entity, application service, database relations, unit & integration tests, UI and defined the custom hooks for code customization.


